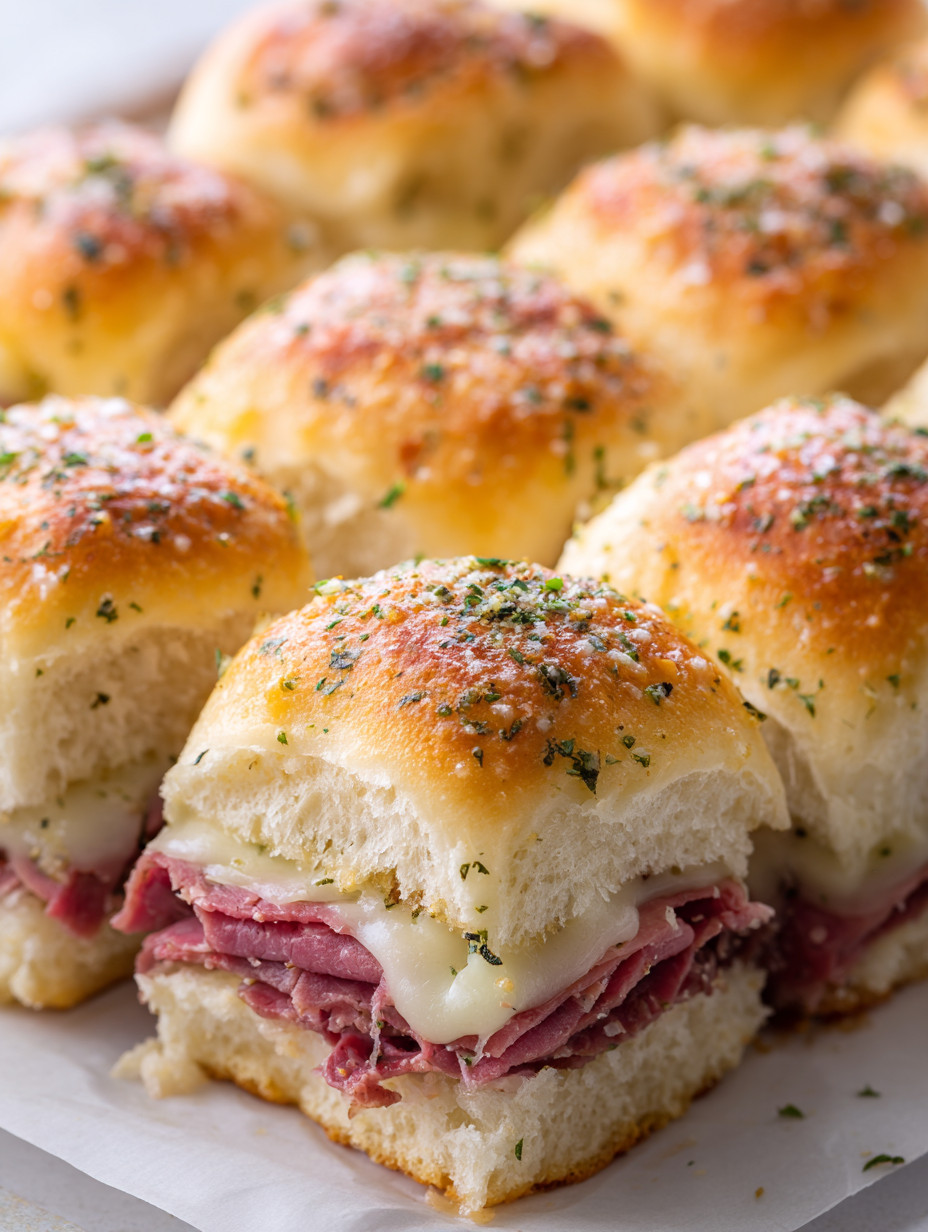
Roast Beef Sliders are the little sandwiches you make when you want big deli-shop flavor with minimal effort.
Stack tender roast beef between connected dinner rolls, tuck in provolone, and brush on a buttery, savory glaze.
They bake golden in minutes, slice cleanly, and disappear fastest at parties, game days, and easy weeknight dinners.
These crowd-pleasers lean on smart assembly.
Keep the rolls intact, layer cheese–meat–cheese for even melt, and let a quick Worcestershire–garlic butter tie everything together.
A short rest after baking sets the cheese so each slider cuts neatly.
Customize the fillings, swap the rolls, or scale the batch; this format is flexible and forgiving.
What You Need for Roast Beef Sliders
- Connected dinner rolls form the pillowy pull-apart base; Hawaiian adds subtle sweetness, while regular rolls keep it neutral.
- Deli roast beef should be thinly sliced for tender stacks and quick heat-through.
- Provolone cheese melts smoothly and brings mild creaminess that flatters the beef.
- Butter carries flavor and helps the tops brown beautifully.
- Garlic powder adds savory depth without the bite of fresh garlic.
- Dried parsley supplies gentle herby aroma and color on the crust.
- Worcestershire sauce delivers an umami pop that wakes up every layer.
Roll choice sets the tone and structure
The rolls do more than hold everything together; they shape flavor and bite.
Hawaiian rolls bring a soft, slightly sweet chew that contrasts salty beef and tangy Worcestershire.
Classic dinner rolls read more neutral and let the meat lead.
Whichever you choose, keep the sheet intact for tidy assembly and even browning.
Slice cleanly so the bottoms remain flat, then press the layered slab lightly before baking.
This contact encourages cheese to bond to the bread, so each slider slices without slippage.
If your rolls feel very soft, bake on a rimmed sheet to contain butter and maintain structure.
Fast Track to Flavor: Roast Beef Sliders
- Split the connected rolls horizontally into top and bottom slabs.
- Layer provolone, roast beef, then more provolone for even melt and edible “glue.”
- Stir melted butter with garlic powder, dried parsley, and Worcestershire, then brush it evenly over the tops.
- Bake until the crowns are golden and the cheese puddles at the edges.
- Rest the slab for five minutes to set, then transfer and slice with a serrated knife.
- See the full recipe card for details and exact amounts.
Savory butter glaze dictates flavor balance
That butter brush is not just shine; it seasons every bite.
Melted butter carries garlic powder and parsley evenly, while Worcestershire adds deep steakhouse-style umami.
Aim for a thin, thorough coat rather than saturation so the tops crisp instead of turning greasy.
If you use salted butter, skip extra salt because Worcestershire is already savory.
For a bolder profile, whisk in a teaspoon of Dijon or a pinch of onion powder, but avoid fresh garlic.
If you want extra gloss, reserve a tablespoon of butter.
Swipe it on right after baking for a soft sheen without over-browning.
Smart Swaps & Tiny Tweaks (Recipe Tips)
Baking on foil makes cleanup painless and lets you lift the whole slab to a board for easy slicing.
A brief rest after the oven keeps cheese in place for neat squares instead of slide-y stacks.
- Swap provolone with pepper jack for heat.
- Choose Swiss for nuttiness and gentle tang.
- Use mozzarella if you want ultra stretch.
- Tuck in caramelized onions, banana peppers, or a swipe of horseradish mayo without overpowering the core flavors.
Layering controls melt and prevents slide-outs
Treat cheese like edible glue, with one layer under the beef and one on top to secure both slabs.
Fold the roast beef into loose ribbons instead of balling it up.
Those folds trap heat for faster, more even warming.
Keep ingredients edge to edge but not overhanging, and avoid overfilling so the top meets the bottom evenly.
After assembly, press the slab gently so the layers settle, then bake.
The five-minute rest lets the cheese set slightly for clean cuts and tidy handheld sliders.
A light foil tent can protect tops if your oven runs hot.
Remove it in the last minutes for color.
If you use very lean beef, swipe a thin layer of mayo on the bottom slab.
It adds moisture insurance without turning soggy.
For a party, assemble ahead unbaked, refrigerate covered, then brush and bake just before serving.
Save, Freeze, Reheat—Without Soggy Buns (How to Store Leftovers)
Cool sliders to room temperature before storing so trapped steam does not soften the crust.
Refrigerate in a covered container for up to three days, or wrap individually in foil for grab-and-reheat lunches.
For freezing, wrap each slider in foil, place them in a zip bag, and freeze for up to a month.
Thaw overnight for best texture, or reheat from frozen a little longer.
Gentle heat revives softness and keeps edges crisp
- Oven: Reheat at 300–325°F with each slider wrapped in foil for 8–10 minutes. Open the foil for 2–3 minutes to re-crisp the tops.
- Air fryer: Warm at 300°F, starting wrapped and then unwrapping briefly to finish.
- Microwave: Use 50% power with a loose paper-towel wrap to reduce chewiness. Finish for 1–2 minutes in a hot toaster oven for snap.
Frequently Asked Questions (FAQ)
Can I serve these cold without baking?
Yes. Assemble as directed, skip the butter glaze, and layer the cheese thinly so the bite is not stiff.
Add a swipe of creamy horseradish or Dijon for brightness, and press the slab before slicing for cleaner edges.
What roast beef works best—deli slices or leftovers?
Thin deli slices warm quickly and stay tender. Leftover roast works well too; slice it thin across the grain.
If it is lean, add a touch of mayo or a drizzle of pan juices to keep the interior moist.
Can I double the recipe on one sheet pan?
Absolutely. Use two 12-roll slabs side by side on a rimmed sheet.
Brush evenly, rotate the pan halfway for uniform browning, and add 1–2 minutes if needed. Watch the color and melted edges.
Do I separate the rolls before or after baking?
Keep the rolls connected for assembly and baking to ensure even heat and easy handling.
After the five-minute rest, move the slab to a board and use a serrated knife to cut clean, individual sliders.
Roast Beef Sliders
Ingredients
- ¾ pound deli roast beef adjust quantity as preferred
- 3 tablespoons butter melted
- 12 dinner rolls connected (Hawaiian or regular style)
- 1 teaspoon Worcestershire sauce
- 8 ounces sliced provolone cheese about 12 thin slices, more or less as desired
- ½ teaspoon garlic powder
- ½ teaspoon dried parsley
Instructions
- Preheat your oven to 375°F and prepare a baking sheet by lining it with foil.
- Slice the connected dinner rolls horizontally into two even slabs. Position the bottom half on the prepared baking sheet.
- Place half of the provolone cheese slices evenly across the bottom layer of rolls. Follow with a generous layer of roast beef, then top with the remaining cheese. Carefully replace the top slab of rolls.
- In a small mixing bowl, whisk together the melted butter, garlic powder, dried parsley, and Worcestershire sauce until fully combined. Generously brush this mixture over the tops of the rolls.
- Bake the assembled sliders in the preheated oven for 10 to 12 minutes, or until the tops are golden brown and the cheese has fully melted.
- Remove from the oven and allow to rest for 5 minutes before slicing. Transfer to a cutting board and use a serrated knife to cut the sliders apart.