
Fried Chicken Fillet delivers a deeply crisp, seasoned crust with tender, juicy chicken inside. A long buttermilk marinade, thin chicken pieces, and controlled frying temperature make every batch crunchy, flavorful, and dependable.
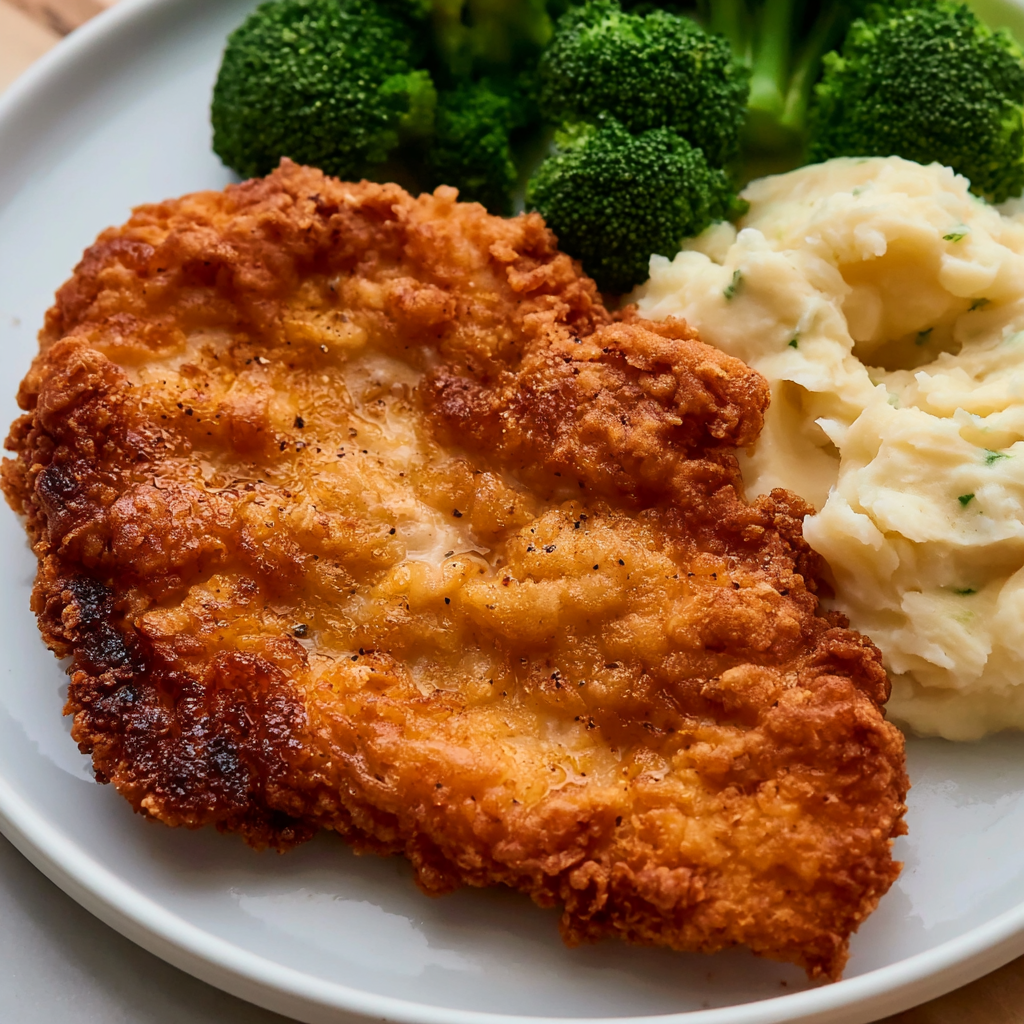
This is the kind of chicken you can serve for a relaxed family dinner, tuck into sandwiches, or prepare when you want something more satisfying than ordinary pan-fried chicken. The thin fillets cook evenly and develop plenty of crunchy coating in every bite.
The flavor begins with a cayenne-spiked buttermilk soak. It adds a subtle tang, gently seasons the chicken, and helps the meat stay moist during frying. A little hot sauce in the egg mixture builds another layer of flavor without making the finished chicken overwhelmingly spicy.
The method is straightforward, but the small details matter. Allowing the breaded fillets to rest, maintaining the correct oil temperature, and draining the chicken on a wire rack all help create a sturdy crust that stays crisp through serving.
Fried Chicken Fillet Ingredients
Boneless chicken breasts: Slice three breast halves horizontally to create six thin fillets that cook quickly and evenly.
Buttermilk: Forms the base of the marinade, adding mild tang while helping tenderize the chicken during the long soaking period.
Cayenne pepper: Brings gentle background heat to the marinade without overpowering the seasoned crust.
Self-rising flour: Creates the main coating and gives the exterior a slightly lighter, puffier texture than plain flour.
Coarsely ground black pepper: Adds visible specks of pepper and a bold, savory flavor throughout the crust.
Paprika: Contributes warm flavor and encourages an appetizing golden color.
Garlic salt: Adds garlic flavor while helping season the flour coating.
Seasoned salt: Provides a balanced blend of savory spices that complements the chicken.
Fine salt and ground black pepper: Season the chicken directly before it is coated.
Eggs: Help the flour mixture cling firmly to the marinated fillets.
Vinegar-based hot sauce: Blends into the egg wash for tangy heat and an additional layer of seasoning.
Neutral frying oil: Corn, canola, or vegetable oil works well because each has a mild flavor and can handle the necessary frying temperature.
Helpful Tips
- Slice the chicken into fillets of similar thickness so every piece reaches the correct internal temperature at roughly the same time.
- Use a thermometer to monitor the oil. Keeping it close to 350°F prevents the coating from becoming greasy or browning before the chicken cooks through.
- Rest the coated fillets for several minutes before frying. This hydrates the flour slightly and helps the crust remain attached when the chicken enters the oil.

Cooking Steps
STEP 1: Place each chicken breast flat on a cutting board and carefully slice it horizontally through the center. You should finish with six relatively thin, evenly sized fillets. Trim away any loose pieces that could burn during frying.
STEP 2: Transfer the chicken to a nonreactive bowl and pour the buttermilk over it. Sprinkle in the cayenne pepper and stir gently until it is evenly distributed. Cover the bowl and refrigerate for 24 hours, keeping every fillet as submerged as possible.
STEP 3: When you are ready to cook, prepare three coating stations. In one small bowl, combine the fine salt, regular ground pepper, paprika, garlic salt, and seasoned salt. In a second bowl, whisk the eggs with the hot sauce. In a third shallow dish, combine the self-rising flour and coarsely ground pepper.
STEP 4: Lift one chicken fillet from the marinade and let the excess buttermilk drip back into the bowl. Season both sides with the prepared spice mixture. Dip the fillet completely into the egg wash, then transfer it directly to the flour.
STEP 5: Turn the chicken several times in the flour and press the coating firmly onto every surface. Pay attention to the edges, which are often missed during dredging. Place the coated fillet on a clean plate and repeat with the remaining chicken. Let all the breaded pieces rest for 5 to 10 minutes.
STEP 6: Pour the frying oil into a heavy, deep-sided skillet, leaving plenty of space above the oil level. Heat it gradually to 350°F. Carefully lower a few fillets into the oil without crowding the pan. Frying in small batches helps the oil recover quickly and keeps the coating crisp.
STEP 7: Cook the fillets for approximately 7 to 10 minutes on the first side, depending on their thickness. Turn each piece once and fry the second side until deeply golden. The center of the thickest fillet should register 165°F. Transfer the cooked chicken to a wire rack and rest for 2 to 3 minutes before serving.
Why does the coating fall off fried chicken?
The coating often separates when too much marinade remains on the meat, the flour is not pressed firmly into place, or the breaded chicken is fried immediately. Let the excess buttermilk drain, press on the flour, and rest the coated fillets before frying.
Avoid moving the chicken repeatedly once it enters the oil. Give the first side time to form a solid crust before turning it with tongs.
Serving Ideas for Fried Chicken Fillet
- Serve the chicken with mashed potatoes, gravy, and a crisp cabbage slaw for a comforting dinner.
- Place a fillet inside a toasted bun with lettuce, pickles, and a creamy sauce for a crunchy chicken sandwich.
- Pair it with macaroni and cheese, corn, green beans, or a simple garden salad when serving a larger family meal.
Can I shorten the marinating time?
The full 24-hour soak produces the most tender and evenly seasoned chicken, but a shorter marinade can still work when needed. Allow at least 4 to 6 hours so the buttermilk has enough time to flavor the surface and soften the meat.
Avoid marinating the chicken for several days. An excessively long soak may eventually affect the texture and make the surface unusually soft.
How can I tell when the frying oil is ready?
A cooking thermometer gives the most reliable reading. Heat the oil to approximately 350°F before adding the first batch. After the chicken enters the pan, the temperature will decrease, so adjust the heat as necessary to keep it in a steady frying range.
Oil that is too cool is absorbed by the coating and can make the chicken heavy or greasy. Oil that is too hot may darken the crust while the center remains undercooked.
Can I make the chicken less spicy?
Yes. Reduce or omit the cayenne pepper in the buttermilk and replace the hot sauce in the egg mixture with a tablespoon of buttermilk. The paprika, garlic salt, black pepper, and seasoned salt will still give the coating plenty of savory flavor.
For mild heat, keep the hot sauce but leave out the cayenne. Most of the sharpness becomes subtle once it is combined with the eggs, flour, and frying oil.

How do I keep each batch warm and crisp?
Place finished fillets on a wire rack set over a baking sheet, then keep them in a 200°F oven while the remaining batches cook. Do not cover the chicken with foil because trapped steam can soften the crust.
A rack is preferable to a flat plate or paper towels. Air can circulate beneath the chicken, preventing the bottom from becoming damp while the juices settle.
How to Store and Reheat
Let leftover chicken cool before transferring it to a shallow airtight container. Refrigerate it within two hours of frying and use it within 3 to 4 days. Place parchment paper between stacked fillets so the coating does not stick together.
For longer storage, arrange the cooled fillets in a single layer and freeze until firm. Transfer them to a freezer-safe container or bag and keep them frozen for up to 2 months. Thaw the chicken overnight in the refrigerator before reheating for the most even result.
Reheat refrigerated chicken on a wire rack over a baking sheet in a 375°F oven for approximately 10 to 15 minutes. An air fryer set to 350°F also works well and usually restores the crust in 5 to 8 minutes. Heat the chicken until the center is fully hot.
Avoid reheating the fillets in the microwave when crispness is important. The microwave warms the meat quickly, but the steam it produces tends to soften the seasoned flour coating.
Fried Chicken Fillet
Ingredients
For the Buttermilk Marinade
- 2 cups buttermilk any preferred brand
- ½ teaspoon cayenne pepper
- 3 boneless chicken breast halves approximately 6–8 ounces each
For the Seasoned Coating
- 2 cups self-rising flour
- ½ teaspoon paprika
- 1½ teaspoons coarsely ground black pepper preferably freshly ground
- ½ teaspoon garlic salt
- ¼ teaspoon fine salt
- ½ teaspoon seasoned salt
- ½ teaspoon ground black pepper
For the Egg Mixture
- 1 tablespoon Frank’s RedHot sauce
- 3 large eggs brought to room temperature
For Frying
- 2 cups corn oil or another neutral frying oil such as canola or vegetable oil
Instructions
- Slice each chicken breast horizontally through the center to create two thin, evenly sized fillets. This produces six pieces and encourages uniform cooking.
- Transfer the chicken to a bowl and pour in the buttermilk. Add the cayenne pepper and stir gently until the seasoning is evenly dispersed and every fillet is fully submerged.
- Cover the bowl and refrigerate the chicken for at least 24 hours. The buttermilk gradually tenderizes the meat while contributing a mild, pleasant tang.
- When ready to prepare the coating, combine the fine salt, ground black pepper, paprika, garlic salt, and seasoned salt in a small bowl. Stir until evenly blended, then set aside.
- Crack the eggs into a separate bowl. Add the Frank’s RedHot sauce and whisk thoroughly until the mixture is smooth and uniformly colored.
- In a third bowl or shallow dish, mix the self-rising flour with the coarsely ground black pepper.
- Remove the marinated chicken from the refrigerator. Lift out each fillet and allow the excess buttermilk to drain away.
- Season both sides of every chicken piece with the prepared spice blend, pressing the seasonings lightly against the surface so they remain in place.
- Working with one fillet at a time, immerse the seasoned chicken in the egg and hot sauce mixture until completely coated.
- Immediately transfer the fillet to the seasoned flour. Turn it several times and gently press the flour onto the chicken to create a thorough, well-adhered coating.
- Arrange the breaded chicken on a clean plate and leave it undisturbed for 5–10 minutes. This brief resting period helps the coating set before frying.
- Pour the corn oil into a large, heavy skillet or deep-sided pan. Heat the oil to 350°F, checking the temperature with a cooking thermometer for accuracy.
- Carefully lower the coated chicken into the hot oil. Fry in batches when necessary to prevent overcrowding, which can reduce the oil temperature and soften the crust.
- Cook each fillet for 7–10 minutes on the first side. Turn it once, then continue frying for another 7–10 minutes, or until the exterior is deeply golden and the thickest portion of the chicken registers 165°F.
- Using tongs or a slotted spoon, transfer the finished chicken to a wire rack positioned over a baking sheet. Paper towels may also be used, although a rack provides better airflow and helps preserve the crisp underside.
- Allow the fried chicken fillets to rest for 2–3 minutes before serving so the internal juices can redistribute.