
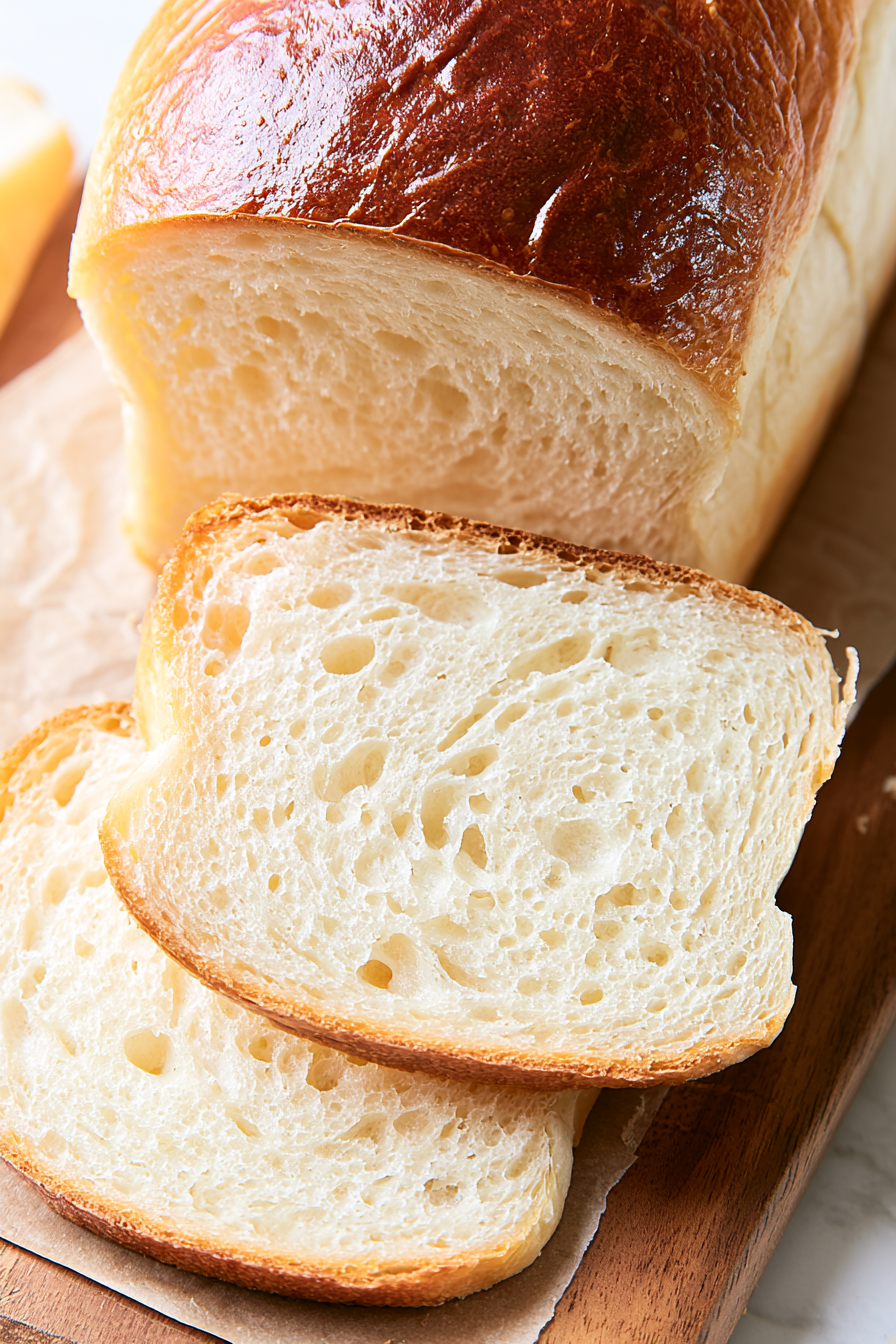
Cottage Cheese Yeast Bread is a soft, tender homemade loaf with a moist crumb, gentle richness, and dependable yeast-bread structure. Cottage cheese keeps the dough supple, while thorough kneading and two rises help create loaves that slice beautifully without feeling heavy.

If you enjoy homemade bread but want something a little softer than a standard white loaf, this is a great option for everyday baking. The cottage cheese blends into the dough as it kneads, contributing moisture without leaving the finished bread tasting strongly of cheese.
The method relies on a long kneading time followed by two patient rises. That combination develops enough strength for the dough to hold its shape while still keeping the interior tender. Once baked, the lightly golden loaves work just as well for toast as they do alongside dinner.
Cottage Cheese Yeast Bread Ingredients
Bread flour: Four cups provide the structure the dough needs to rise and hold its shape. All-purpose flour can also work, although the finished texture may be slightly softer and less chewy.
Low-fat cottage cheese: Sixteen ounces supply moisture and richness while helping create the bread’s tender interior. Small-curd cottage cheese incorporates especially well during kneading.
Instant yeast: Two teaspoons provide the leavening needed for both the initial bulk rise and the final rise after shaping.
Granulated sugar: Three tablespoons give the yeast a little sweetness to work with and add mild flavor to the finished loaf.
Fine salt: One teaspoon balances the flavor while also helping control yeast activity and strengthen the dough.
Lukewarm water: Start with ¼ cup at about 105–115°F. Keep another 1–2 tablespoons available in case the dough seems unusually dry during kneading.
Optional milk and maple syrup: A small amount of each can be combined and brushed over the risen dough to encourage a glossy, lightly golden crust. Regular milk or egg wash can also be used.
Cooking Steps
STEP 1: Add the flour, instant yeast, sugar, and salt to the bowl of a stand mixer. Mix briefly so the yeast and salt are evenly distributed, then add the cottage cheese and the initial ¼ cup of lukewarm water.
STEP 2: Knead on low speed for about a minute, just until the ingredients begin forming a cohesive dough. Check the consistency before adding more liquid. If dry flour remains and the dough feels stiff or crumbly, drizzle in additional water a tablespoon at a time.
STEP 3: Continue kneading on low speed for another 8–10 minutes. The dough should gradually become smoother, more elastic, and easier to handle. It is ready for its first rise when it begins pulling away from the sides of the bowl and forms a soft, pliable ball.
STEP 4: Place the kneaded dough in a lightly greased bowl and cover it. Leave it somewhere warm and free from drafts for 90–120 minutes. Rather than watching the clock alone, look for the dough to roughly double in volume.
STEP 5: Gently deflate the risen dough and transfer it to a generously floured work surface. Divide it into four equal portions. Roll each portion into a rectangle measuring roughly 6 × 9 inches, then fold each rectangle into thirds like a letter.
STEP 6: Starting from a long side, roll each folded piece into a compact cylinder. Pinch the ends closed so the dough maintains its shape, then transfer the formed loaves into well-oiled bread pans.
STEP 7: Cover the shaped dough loosely and let it rise for about 60 minutes. The loaves should look noticeably puffier and should expand within the pans. Near the end of this rise, preheat the oven to 350°F and place a rack in the center.
STEP 8: For a shinier crust, lightly brush the tops with the optional milk and maple syrup mixture or your preferred milk or egg wash. Bake for about 15 minutes, loosely tent the tops with foil, and bake for roughly 15 minutes longer. The bread is done when the center reaches about 190°F.
How to Store & Reheat
Once the bread has cooled completely, wrap it well or place it in an airtight container. At normal room temperature, it should stay at its best for about 3–4 days. Keeping the bread tightly covered helps prevent its soft crumb from drying out.
For longer storage, freeze the cooled loaves or individual portions for up to 3 months. Wrapping individual slices can be especially convenient if you normally use the bread for breakfast or sandwiches and do not need a full loaf at once.
Thaw frozen bread at room temperature while still wrapped so condensation remains outside the crumb rather than drying the surface. Individual portions can also be warmed briefly in the microwave. For toast, frozen slices can usually go straight into the toaster without being thawed first.
Why is cottage cheese used in bread?
Cottage cheese brings moisture, mild richness, and additional tenderness to yeast dough. As the bread is kneaded and baked, the curds become incorporated into the dough rather than remaining as obvious cheese pieces.
Its moisture also helps keep the interior softer than many basic flour-and-water loaves. The finished bread still depends on proper kneading and rising for structure, so cottage cheese enhances the crumb without replacing the role of gluten development.
How do I know when the dough has risen enough?
Use volume as your main guide. During the first rise, the dough should become approximately twice its original size. Depending on the warmth of your kitchen, that can take anywhere from about 90 minutes to 2 hours.
For the second rise, look for clearly puffed dough that has expanded within the pans. A cool kitchen may require a little more time than the suggested hour.
Can I add all the extra water at once?
It is better not to. Cottage cheese naturally contains moisture, and its exact consistency can vary. Begin with the measured ¼ cup of water, allow the mixer to combine everything, and then decide whether the dough actually needs more.
If additional water is necessary, add only a small amount at a time. This gives you much better control over the final dough consistency.
Why should I cover the bread with foil while baking?
The tops can develop color before the centers have finished baking. Loosely covering the loaves with foil after the first 15 minutes protects the crust from becoming overly dark while still allowing the centers to continue cooking.
An instant-read thermometer is particularly useful here. A center temperature of approximately 190°F provides a more reliable indication of doneness than crust color alone.

Should cottage cheese bread cool before slicing?
Yes. Fresh bread continues to set internally after it leaves the oven. Cutting into it immediately can compress the warm crumb and release moisture too quickly.
Transfer the loaves to a wire rack and let them cool until the interior has had time to firm. Waiting gives you cleaner slices and helps preserve the soft texture.
Helpful Tips
- Judge the dough by feel rather than automatically using all of the extra water. It should be soft and pliable, not dry, but it should still form a manageable ball after kneading.
- Give the dough enough kneading time. The full 8–10 minutes helps build the elasticity needed for well-shaped loaves and a more even crumb.
- Let the bread cool on a wire rack rather than inside the pans. Air circulation around the loaves prevents trapped steam from making the crust damp.
Serving Ideas for Cottage Cheese Yeast Bread
This soft bread is especially good toasted and spread with butter, fruit preserves, or a little maple syrup. Its mild flavor makes it flexible enough for both sweet and savory toppings.
For lunch, use the slices for simple sandwiches with sliced turkey, chicken, cheese, or vegetables. Because the crumb is soft but structured, it can hold fillings without becoming excessively dense.
You can also serve the bread alongside soups, stews, baked casseroles, or other comfort-food dinners. Warm slices are useful for soaking up broth and sauces, while day-old pieces can be toasted to restore a slightly crisp exterior.
The combination of cottage cheese, patient rising, and thorough kneading gives this bread its distinctive balance: soft enough for breakfast toast, sturdy enough for sandwiches, and mild enough to serve with almost any meal. Once you are comfortable judging the dough’s moisture and rise by appearance, it becomes a straightforward yeast bread you can return to whenever you want a tender homemade loaf.
Cottage Cheese Yeast Bread
Ingredients
- 3 tablespoons granulated sugar
- 16 ounces low-fat cottage cheese with small curds
- 1 teaspoon fine salt preferably fine sea salt
- 4 cups bread flour sifted (King Arthur all-purpose flour may be used as noted in the original recipe)
- 2 teaspoons instant yeast
- ¼ cup lukewarm water approximately 105–115°F, plus an additional 1–2 tablespoons if the dough requires more moisture
Optional crust finish:
- 1 tablespoon non-dairy milk
- 1 tablespoon maple syrup
- Regular milk or an egg wash may be substituted if preferred
Instructions
- Place the sifted flour, instant yeast, granulated sugar, and salt in the bowl of a stand mixer and blend the dry ingredients together. Add the cottage cheese along with ¼ cup of the lukewarm water.
- Using the stand mixer on low speed, approximately speed 2, knead the mixture for about 1 minute, or until the ingredients have come together. If the dough appears excessively dry, gradually incorporate another 1–2 tablespoons of water as necessary while continuing to knead at the same speed
- Keep kneading for an additional 8–10 minutes. The dough is ready when it releases from the sides of the mixing bowl and develops into a smooth, pliable ball. This extended kneading period is important for building the dough's elasticity and proper texture.
- Transfer the dough from the mixer bowl to a lightly greased bowl. Cover with clean plastic wrap or a kitchen towel and leave it in a warm location protected from drafts for approximately 90–120 minutes, or until it has doubled in volume.
- Once the first rise is complete, gently punch down the dough and remove it from the bowl. Set it on a generously floured work surface and divide it evenly into four portions. With a small rolling pin, shape each portion into a rectangle measuring approximately 6 × 9 inches. Fold every rectangle into thirds in the manner of folding a letter.
- Step 6: Beginning at the long edge of each folded piece, roll the dough firmly into a cylindrical shape. Pinch the ends closed so that each loaf remains securely formed during baking
- Arrange each shaped cylinder in a thoroughly oiled bread pan. Loosely cover the pans with plastic wrap or a clean kitchen towel, then allow the dough to rise in a warm, draft-free location for about 60 minutes. The loaves should become visibly puffy and expand to fill the pans.
- Near the end of the second rising period, heat the oven to 350°F (180°C). Position the oven rack in the center to promote uniform baking.
- If a glossy, golden finish is desired, combine 1 tablespoon of non-dairy milk with 1 tablespoon of maple syrup and lightly brush the mixture over the tops of the risen loaves. Regular milk or an egg wash may be used instead.
- Transfer the bread pans to the preheated oven and bake for 15 minutes. After this initial baking period, loosely cover the loaves with aluminum foil to keep the crust from becoming overly brown. Continue baking for approximately 15 minutes more, or until the center of the bread registers 190°F (88°C).
- Remove the pans from the oven and carefully release the loaves onto a wire cooling rack. Let the bread cool slightly before cutting it so that the crumb retains its moisture and structural integrity.
- Once cooled, wrap the bread securely and keep it at room temperature for up to 3–4 days. For extended storage, place the loaves in an airtight container or freezer-safe plastic bag and freeze them for as long as 3 months. Thaw at room temperature, or warm portions in the microwave before serving.