
Pumpkin Banana Bread Mini Loaves are moist, warmly spiced, and simple enough for everyday baking. Ripe bananas, pumpkin purée, brown sugar, and fragrant fall spices create tender gluten-free loaves that are ideal for breakfast, snacks, sharing, or freezing for later.
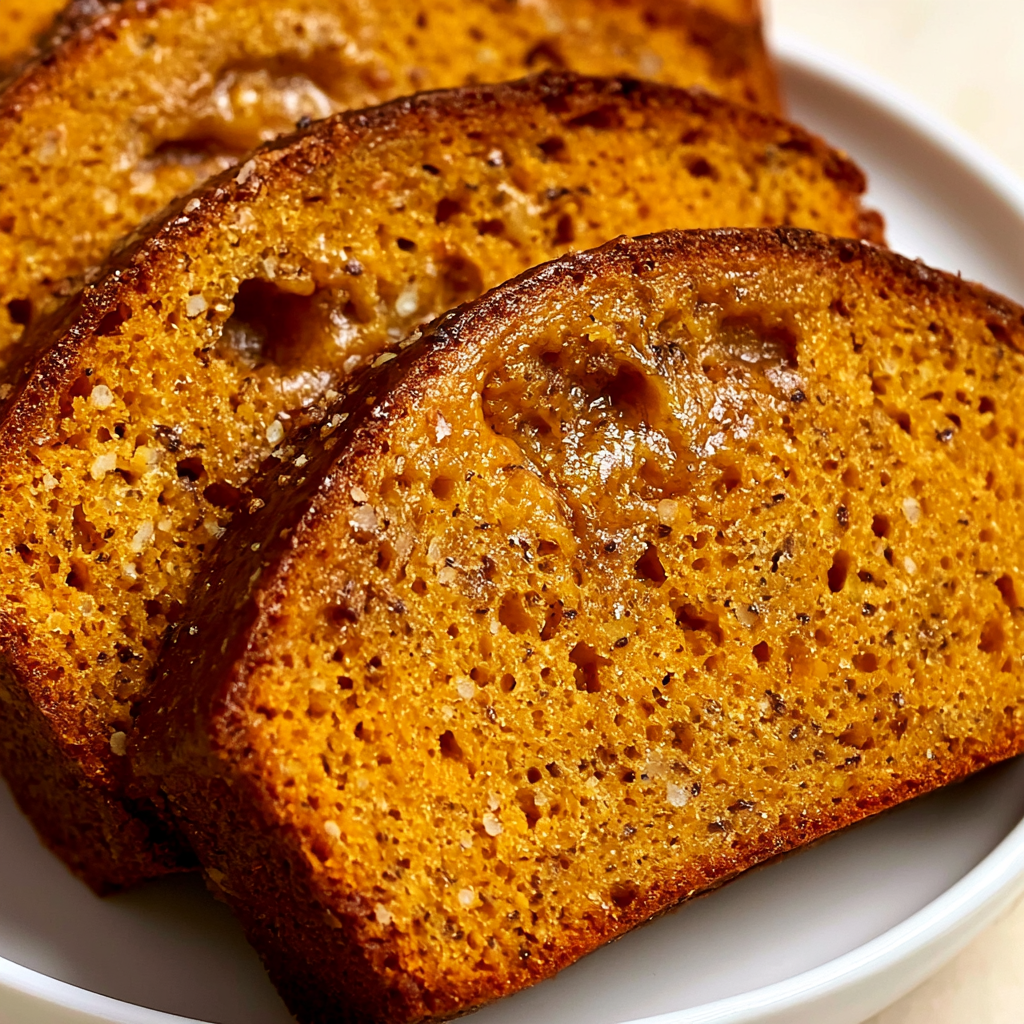
These little loaves are especially useful when you want the comforting flavor of pumpkin bread without committing to one large loaf. They bake faster, cool sooner, and are already portioned for gifting or packing into lunches.
The combination of banana and pumpkin works beautifully because both ingredients add moisture while contributing different flavors. Banana brings natural sweetness and a familiar fruity richness, while pumpkin gives the crumb a soft texture and a mellow seasonal taste.
A blend of cinnamon, ginger, nutmeg, and pumpkin pie spice rounds everything out without overwhelming the banana. Light brown sugar adds a gentle caramel note, while neutral oil helps the loaves stay tender even after they have cooled.
Pumpkin Banana Bread Mini Loaves Ingredients
The ingredients are divided into wet and dry components so the batter comes together evenly without requiring excessive mixing.
Wet Ingredients
- Very ripe bananas: Use bananas covered with dark spots for the strongest flavor, natural sweetness, and easiest mashing.
- Pumpkin purée: Adds moisture, color, and a mild earthy sweetness. Be sure to use plain pumpkin purée rather than sweetened pumpkin pie filling.
- Large eggs: Provide structure and help the mini loaves rise. Room-temperature eggs blend more smoothly into the batter.
- Granulated sugar: Sweetens the bread and helps create a soft, lightly browned crumb.
- Light brown sugar: Adds moisture and a subtle caramel-like flavor that complements both the pumpkin and banana.
- Neutral oil: Vegetable or canola oil keeps the loaves tender without adding a strong flavor.
- Vanilla extract: Gives the batter a gentle aromatic sweetness.
- Pumpkin pie spice: Adds a balanced mixture of familiar autumn spices to the wet ingredients.
Dry Ingredients
- Gluten-free 1-to-1 baking flour: Creates the main structure of the bread while keeping the recipe gluten-free. Choose a blend intended as a direct substitute for regular flour.
- Ground cinnamon: Supplies the most noticeable warm spice flavor.
- Ground ginger: Adds a mild peppery warmth that keeps the bread from tasting overly sweet.
- Ground nutmeg: Brings a fragrant, slightly nutty note to the spice mixture.
- Baking soda: Provides most of the lift and helps the loaves develop a tender interior.
- Baking powder: Supports the baking soda and encourages a lighter crumb.

Cooking Steps
STEP 1: Preheat your oven to 350°F. Coat four mini loaf pans or two standard loaf pans with nonstick cooking spray, paying attention to the corners where quick bread can sometimes stick.
STEP 2: Peel the very ripe bananas and place them in a large mixing bowl. Mash them with a fork or potato masher until mostly creamy. A few small banana pieces are fine and will add texture to the finished bread.
STEP 3: Add the granulated sugar, firmly packed brown sugar, neutral oil, room-temperature eggs, pumpkin purée, vanilla, and pumpkin pie spice. Stir until the eggs are fully incorporated and the mixture looks evenly combined. It may remain slightly lumpy because of the mashed banana.
STEP 4: In a separate bowl, whisk together the gluten-free flour blend, cinnamon, ginger, nutmeg, baking soda, and baking powder. Mixing these ingredients separately helps distribute the leavening and spices throughout every loaf.
STEP 5: Add about half of the dry mixture to the pumpkin-banana mixture. Fold gently with a large spoon or mix on the lowest speed until most of the flour has disappeared.
STEP 6: Add the remaining dry ingredients and continue mixing only until you no longer see dry flour. Do not try to make the batter completely smooth. Overmixing can make gluten-free quick bread heavy rather than tender.
STEP 7: Divide the batter evenly among the prepared pans, filling each one approximately three-quarters full. Smooth the tops lightly, but do not press down or compact the batter.
STEP 8: Bake for 40 to 45 minutes, checking mini loaves beginning around the 30-minute mark. The bread is ready when the tops feel set and a toothpick inserted into the center comes out clean or with a few moist crumbs. Let the loaves cool in their pans for 10 minutes before transferring them to a wire rack.
What to Serve with Pumpkin Banana Bread Mini Loaves
A warm slice is delicious on its own, but a few simple additions can make it feel more like a complete breakfast or afternoon treat.
- Softened butter or cream cheese: A thin spread adds richness without covering the pumpkin, banana, and spice flavors.
- Fresh fruit and yogurt: Serve a slice with berries, sliced apples, or plain yogurt for a simple breakfast plate.
- Coffee or tea: The cinnamon and ginger are especially good with hot coffee, chai, black tea, or a lightly sweetened latte.
Can I use fresh pumpkin instead of canned?
You can use homemade pumpkin purée, but it should be thick and smooth rather than watery. Freshly prepared purée often contains more moisture than canned pumpkin, so drain it through a fine-mesh sieve or cheesecloth before measuring one cup for the batter.
How do I know when the mini loaves are finished?
Insert a toothpick into the thickest part of a loaf. It should come out clean or with a few soft crumbs, but not wet batter. The top should also spring back gently when touched. Begin checking early because mini loaf pans can vary considerably in size.
Helpful Tips
- Measure the gluten-free flour by lightly spooning it into the measuring cup and leveling the top. Scooping directly from the bag can pack in too much flour and make the bread dry.
- Keep the bananas slightly textured instead of blending them into a completely smooth liquid. Small pieces create pockets of banana flavor throughout the loaves.
- Allow the bread to cool before slicing. Gluten-free quick bread continues setting as it cools, and cutting it while very hot can make the center appear gummy.
Can I bake this batter as standard loaves?
Yes. Divide the batter between two greased standard loaf pans rather than four mini pans. Begin testing them around the stated 40-minute mark and continue baking until a toothpick comes out clean. Larger or deeper pans may require a little more time than mini loaf pans.
Why did my pumpkin banana bread turn out dense?
Dense quick bread is commonly caused by overmixing, too much flour, expired leavening, or removing the loaves before the centers are fully baked. Mix only until the flour disappears and confirm that your baking powder and baking soda are still active before beginning.

How to Store and Reheat
Let the mini loaves cool completely before storing them. Wrapping warm bread traps steam, which can leave the exterior damp and encourage the crumb to become sticky.
Store the loaves in an airtight container at room temperature for up to 2 days. Place a piece of parchment paper between stacked slices to prevent them from sticking together.
For longer storage, refrigerate the bread in a tightly sealed container for up to 5 days. Chilling can firm the crumb slightly, so bring a slice to room temperature before serving or warm it briefly.
To freeze the mini loaves, wrap each cooled loaf tightly in plastic wrap and place it in a freezer-safe container or bag. Freeze for up to 3 months. Individual slices can also be wrapped separately, making it convenient to thaw only what you need.
Defrost a whole loaf overnight in the refrigerator or leave it wrapped at room temperature until softened. Reheat individual slices in the microwave for approximately 10 to 15 seconds. For a freshly baked texture, warm the loaf in a low oven until heated through.
Can I make these mini loaves ahead of time?
These loaves are a practical make-ahead option because their flavor remains rich after resting. Bake them one day before serving, let them cool completely, and store them tightly covered. For gifts, wrap the cooled loaves individually only after you are certain no residual warmth remains.
Pumpkin banana bread mini loaves bring together the mellow sweetness of pumpkin, the fruitiness of overripe bananas, and a cozy mixture of spices in a convenient size. With their moist crumb and reliable gluten-free batter, they are well suited to seasonal gatherings, breakfast meal prep, homemade gifts, or a quiet afternoon snack.
Pumpkin Banana Bread Mini Loaves
Ingredients
Wet Mixture
- 1 cup pure canned pumpkin purée
- 3 large eggs brought to room temperature
- ½ cup firmly packed light brown sugar
- ¼ teaspoon pure vanilla extract
- 3 heavily spotted very ripe bananas, mashed
- ⅔ cup vegetable oil or another neutral-flavored oil such as canola
- ½ teaspoon pumpkin pie spice
- 1 cup granulated white sugar
Dry Mixture
- 2 teaspoons baking soda
- ½ teaspoon ground ginger
- 3 cups gluten-free 1-to-1 baking flour blend
- ¼ teaspoon ground nutmeg
- 1 teaspoon ground cinnamon
- ½ teaspoon baking powder
Instructions
- Preheat the oven to 350°F (175°C). Coat four mini loaf pans or two standard loaf pans with nonstick cooking spray, then set them aside.
- Place the ripe bananas in a large mixing bowl. Mash them until mostly creamy while retaining a small amount of texture.
- Add the granulated sugar, packed brown sugar, vegetable oil, eggs, pumpkin purée, vanilla extract, and pumpkin pie spice to the mashed bananas. Stir thoroughly until the ingredients are evenly combined. A slightly lumpy consistency is expected because of the bananas.
- In a separate bowl, combine the gluten-free flour blend, cinnamon, baking powder, baking soda, ginger, and nutmeg. Stir well to distribute the leavening agents and spices uniformly.
- Add approximately half of the dry mixture to the wet ingredients. Blend gently with a large spoon or a mixer set to low speed until just incorporated.
- Add the remaining dry ingredients and continue mixing only until no visible pockets of flour remain. Avoid excessive mixing to preserve the bread’s tender texture.
- Distribute the batter evenly among the prepared loaf pans, filling each pan approximately three-quarters full. Keep the portions as equal as possible to encourage consistent baking.
- Transfer the pans to the preheated oven. Bake for 40–45 minutes, or until a toothpick inserted into the center of a loaf emerges clean. Begin checking mini loaves at the 30-minute mark to prevent overbaking.
- Remove the finished loaves from the oven and allow them to rest in their pans for approximately 10 minutes.
- Carefully release the loaves from the pans and transfer them to a wire cooling rack. Let them cool completely before slicing and serving.