
Portuguese Christmas Cookies are tender, lightly crisp holiday cookies with a delicate vanilla flavor, simple pantry ingredients, and a snowy powdered sugar coating. They’re straightforward to shape, quick to bake, and especially useful when you want a festive cookie that doesn’t require complicated decorating.
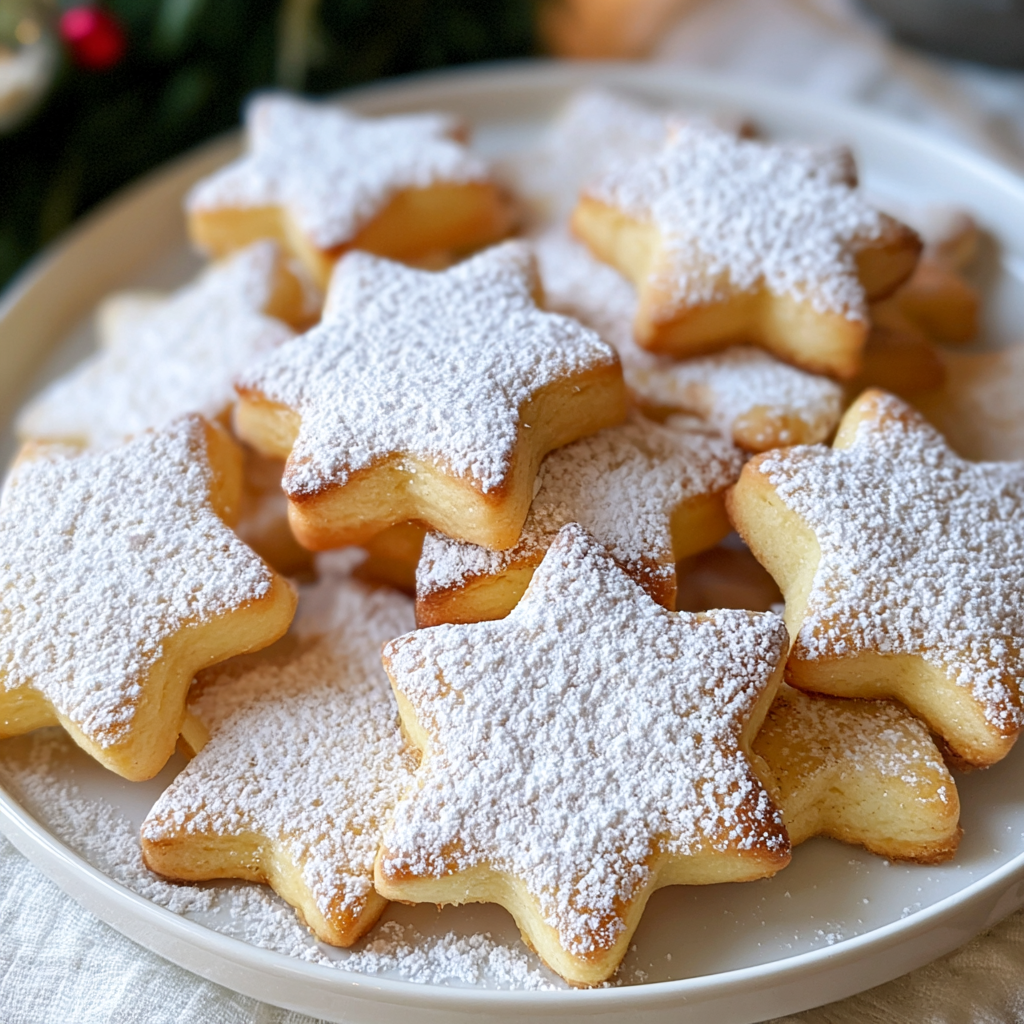
These cookies are a lovely choice for Christmas baking days when you want something traditional-looking without spending hours on elaborate icing. The dough rolls out easily once it has been lightly kneaded with flour, so you can use stars, trees, bells, or any other holiday cookie cutters you already have in your kitchen.
The combination of melted margarine, sugar, egg, and vanilla creates a simple, tender base, while a relatively short 10 to 12 minute bake keeps the cookies from becoming too dark or dry. Once they’re completely cool, a generous layer of powdered sugar gives each cookie its classic snowy finish.
They’re also practical for holiday cookie trays because the shapes can be prepared in batches and the finished cookies are easy to arrange alongside richer Christmas desserts. The key is watching the oven closely near the end of baking and waiting until the cookies are fully cool before adding the powdered sugar.
Portuguese Christmas Cookies Ingredients
You only need a short list of familiar baking ingredients for these cookies. Because the recipe is simple, each ingredient plays an important role in creating the final texture and flavor.
- All-purpose flour: Provides the structure for the dough and makes it firm enough to roll and cut into shapes.
- Margarine: Melted and slightly cooled margarine adds richness and helps create the cookies’ tender texture.
- Granulated sugar: Sweetens the dough while contributing to the lightly crisp edges after baking.
- Egg: Helps bind the dough together and gives the cookies enough structure to hold their cut shapes.
- Vanilla extract: Adds the delicate vanilla flavor that complements the simple buttery-style dough.
- Powdered sugar: Added only after cooling, this creates the festive white coating that gives the cookies their Christmas appearance.
Helpful Tips
- Roll the dough to an even thickness so cookies of different shapes bake at roughly the same speed. Thin sections can brown before thicker cookies are ready.
- Add only enough flour to the work surface to prevent sticking. Too much additional flour during kneading and rolling can make the finished cookies firmer and drier.
- Watch the first tray carefully after about 9 to 10 minutes. The cookies should only begin developing a light golden color rather than becoming deeply browned.

Cooking Steps
STEP 1: Start by combining the granulated sugar with the melted margarine after the margarine has cooled slightly. Stir them together thoroughly until the mixture looks cohesive. Add the egg and vanilla, then continue mixing until everything is smooth and creamy.
STEP 2: Add the all-purpose flour gradually rather than dumping it in all at once. Fold it into the wet mixture with a spatula, continuing until you have a compact dough with no obvious streaks or pockets of dry flour remaining.
STEP 3: Heat your oven to 180°C or 350°F. While it heats, lightly flour a clean work surface and place the dough on top. Dust the dough very lightly with more flour and knead just until it becomes manageable and stops sticking excessively to your hands or the surface.
STEP 4: Use a rolling pin to roll the dough into an even sheet. Choose your favorite Christmas cookie cutters and cut out individual shapes. Gather the remaining scraps carefully, reroll them, and continue cutting until you have used the dough.
STEP 5: Arrange the shaped cookies on a parchment-lined baking tray, leaving a small amount of space between them. They do not need enormous gaps, but a little airflow around each cookie helps them bake more evenly.
STEP 6: Bake for approximately 10 to 12 minutes. Begin checking the cookies toward the lower end of that range, especially if you have rolled them thinly. Remove them when they are set and just starting to develop a pale golden color around the edges.
STEP 7: Transfer the baked cookies to a wire rack and allow them to cool completely. Once no warmth remains, coat them generously with powdered sugar. Waiting until the cookies are cool helps the sugar stay white and powdery instead of dissolving into the surface.
What to Serve with Portuguese Christmas Cookies
These simple vanilla cookies work especially well as part of a larger Christmas dessert spread. Serve them with hot chocolate for an especially festive combination, or pair them with coffee or tea when you want something light and sweet after a holiday meal.
They also make a good contrast to richer desserts such as chocolate truffles, cheesecake, or nut-filled Christmas pastries. Their mild vanilla flavor and powdered sugar finish keep them from competing with stronger flavors on a mixed cookie platter.
Can I prepare the cookie dough ahead of time?
Yes. You can prepare the dough in advance and keep it tightly covered in the refrigerator until you are ready to roll and shape it. If the chilled dough becomes quite firm, allow it to sit briefly at room temperature so it is easier to roll without cracking.
How do I know when the cookies are finished baking?
Look for cookies that appear set and are only beginning to turn lightly golden, particularly around the edges. You do not need to wait for deep browning. Removing them at this stage helps preserve the tender, lightly crisp texture rather than producing a hard cookie.
Why should the powdered sugar be added after cooling?
Warm cookies can partially melt or absorb powdered sugar, causing the bright white coating to disappear. Cooling them completely first allows the sugar to remain visible on the surface and creates the snowy Christmas-cookie appearance intended for this recipe.

Can I use different Christmas cookie cutter shapes?
Absolutely. Stars, trees, bells, hearts, snowflakes, and other cutters can all work with this dough. Try to keep the cookies similar in thickness even when the shapes differ. Very small or narrow cookies may finish baking slightly sooner than larger ones, so check the tray carefully.
Can these cookies be frozen?
Yes. For the cleanest finish, freeze the cookies before adding their final powdered sugar coating. Place the fully cooled cookies in a freezer-safe container with parchment between layers. After thawing them completely, dust them generously with fresh powdered sugar before serving.
Keeping Leftovers Fresh
Once the powdered sugar has been added, store the completely cooled cookies in an airtight container. At room temperature, they are best enjoyed within about 4 to 5 days. Keep the container somewhere cool and dry so moisture does not make the sugar coating sticky.
If you prefer to refrigerate them, place the cookies in a tightly sealed container and keep them for up to one week. Refrigeration is not usually necessary for this type of cookie, and the cooler environment may slightly change the texture, so room-temperature storage is preferable for short-term use.
For longer storage, freeze the baked cookies for up to 2 months. Separate layers with parchment paper to protect the shapes. Thaw them at room temperature while still protected from excess moisture, then refresh the powdered sugar coating before arranging them on your Christmas cookie platter.
There is no need to reheat these cookies before serving. In fact, they are at their best once fully cooled, when the texture has settled and the powdered sugar can remain dry and visible. If frozen, simply allow them to return completely to room temperature before finishing with fresh powdered sugar.
Portuguese Christmas Cookies
Ingredients
- 1/2 cup margarine melted and allowed to cool slightly
- 1 large egg
- 1 3/4 cups plain all-purpose flour
- Powdered sugar in a generous amount for coating
- 1 teaspoon vanilla extract
- 2/3 cup white granulated sugar
Instructions
- Combine the granulated sugar with the melted, slightly cooled margarine in a mixing bowl. Stir thoroughly until the ingredients form a uniform, cohesive mixture.
- Add the egg and vanilla extract, then continue mixing until the consistency becomes smooth, creamy, and evenly blended.
- Introduce the all-purpose flour gradually into the wet ingredients.
- Using a spatula, gently fold in the flour until a firm, compact dough develops. Continue folding until no visible pockets of dry flour remain.
- Preheat the oven to 180°C (350°F).
- Lightly flour a clean work surface and transfer the dough onto it. Dust the top of the dough with a small additional amount of flour.
- Knead the dough by hand until it stops adhering to the work surface. Using a rolling pin, roll the dough out evenly on the floured surface.
- Cut the rolled dough into desired shapes with cookie cutters.
- Arrange the shaped pieces carefully on a baking tray lined with parchment paper, leaving a little room between each cookie to promote even baking.
- Place the tray in the preheated oven and bake for approximately 10–12 minutes, or until the cookies are just beginning to develop a golden color.
- Monitor them closely toward the end of the baking period to prevent excessive browning.
- Remove the baked cookies from the oven and transfer them to a wire rack. Allow them to cool completely.
- Once fully cooled, coat or generously dust the cookies with powdered sugar before serving.