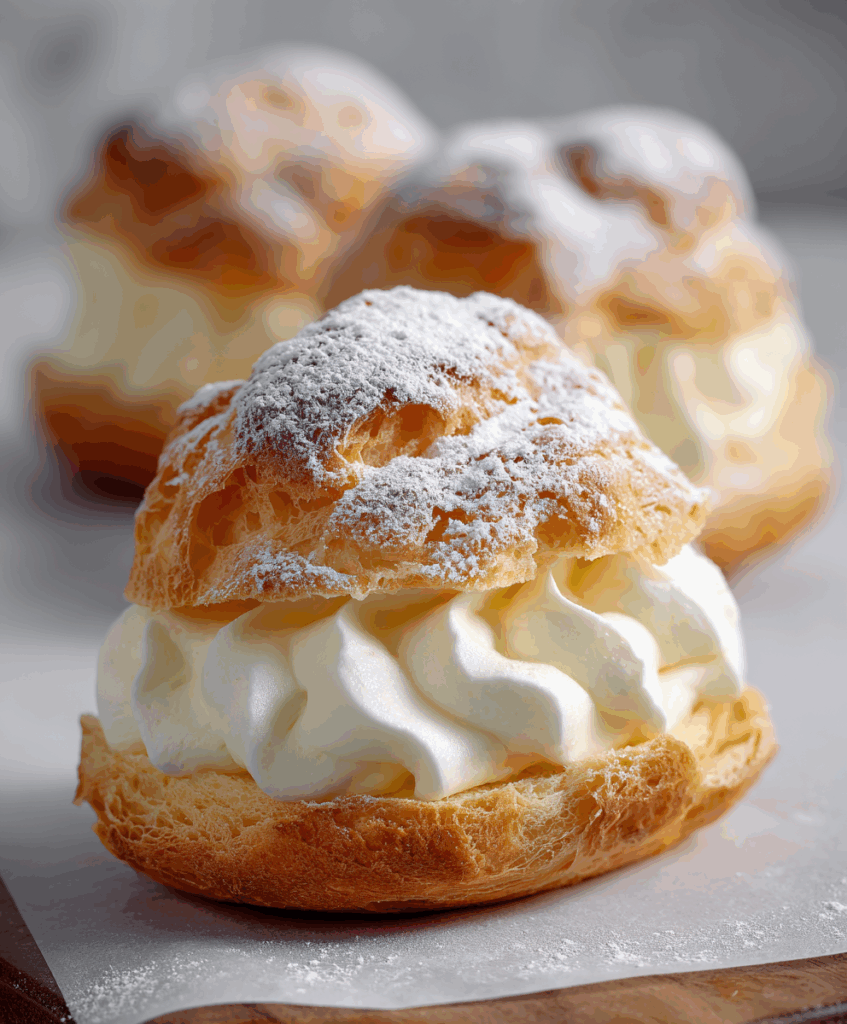
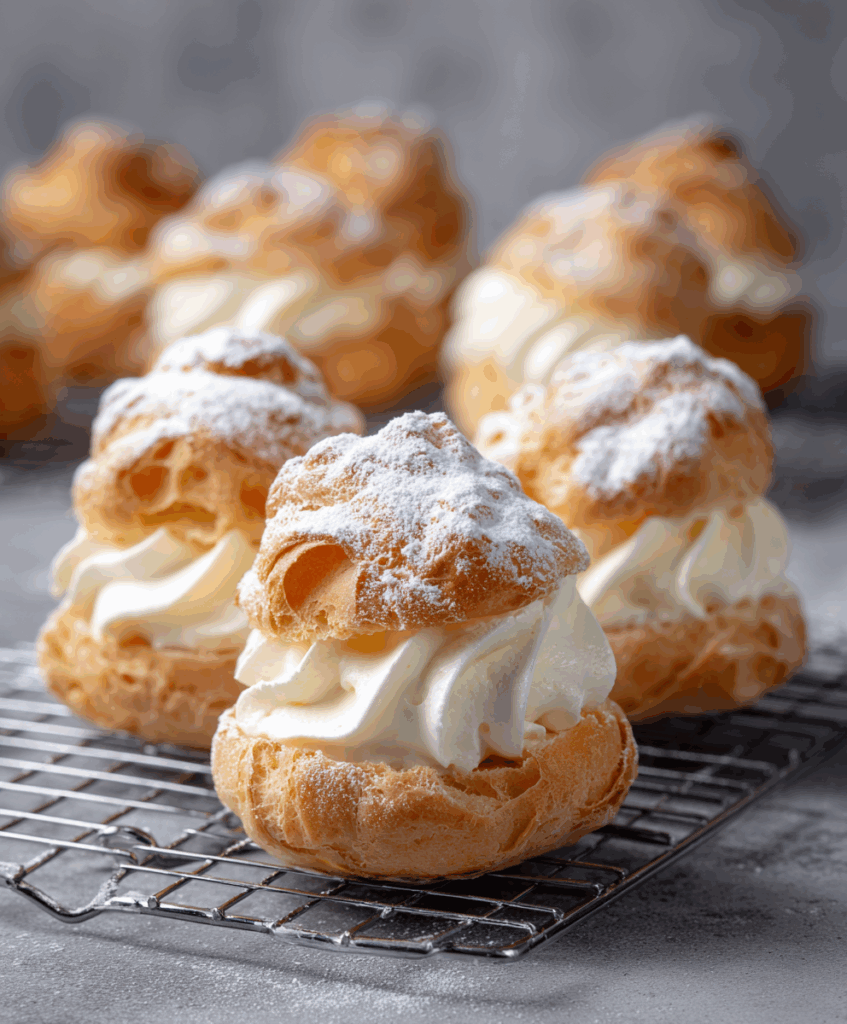
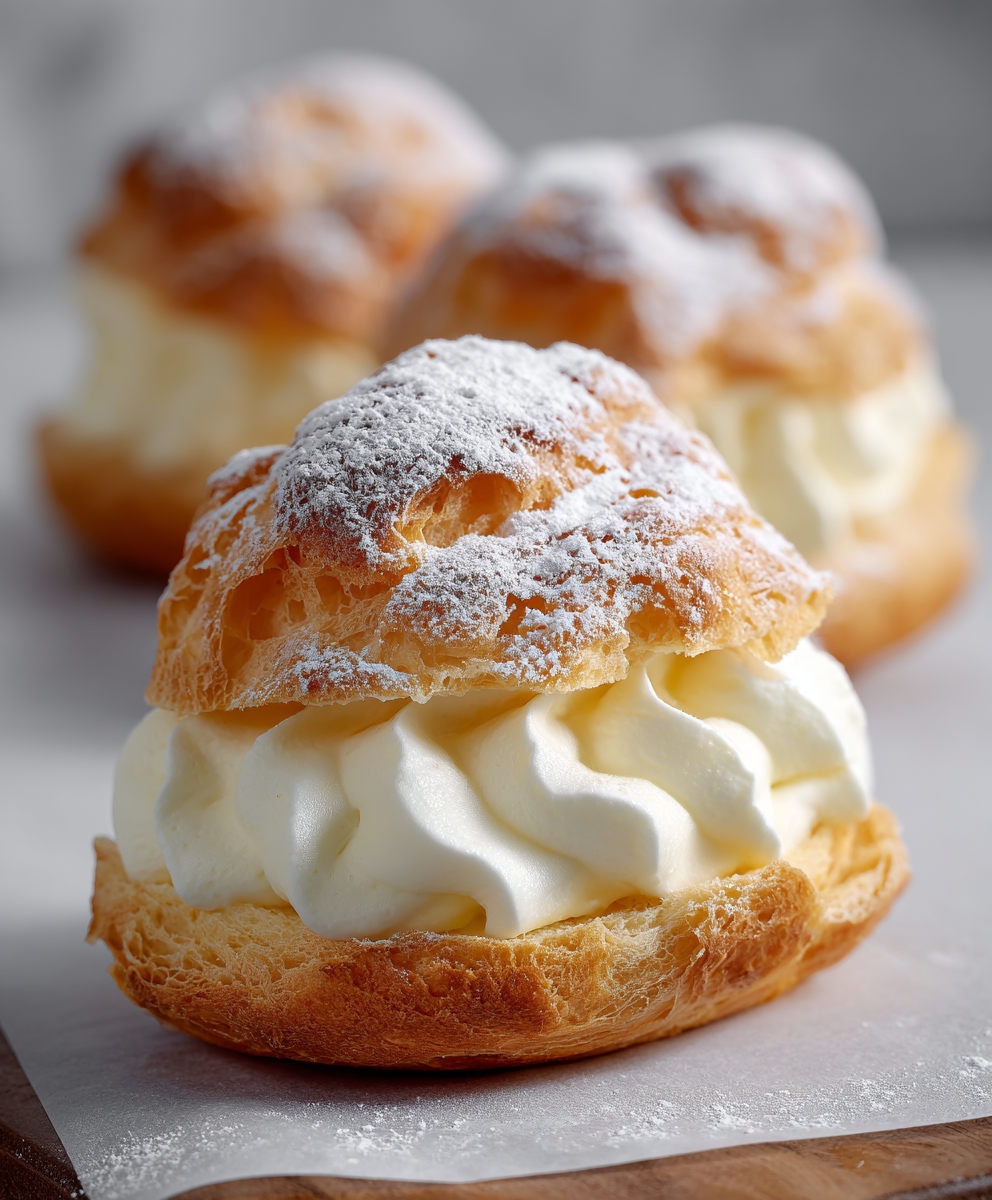
These vanilla cream puffs feature crisp golden shells filled with fluffy vanilla cream, perfect for holidays, celebrations, or any time you crave a nostalgic dessert.
There’s something magical about watching simple pantry staples transform into bakery-worthy cream puffs in your own oven. The shells rise high, hollow and golden, just waiting to be filled with the dreamiest vanilla cream. It feels impressive, but the process is surprisingly approachable.
This version leans into classic comfort: a traditional choux pastry shell paired with a light, pudding-based vanilla filling that’s folded with whipped cream for extra softness. Dust them with powdered sugar, drizzle a little chocolate, and you’ve got a dessert that looks straight out of a pastry shop window.
Whether you’re baking for a holiday table, a celebration, or just a cozy weekend treat, these Mom-style cream puffs have that nostalgic charm that makes everyone pause for a moment and savor every bite.

Vanilla Cream Puffs Ingredients
A handful of basic ingredients is all you need to build both the airy shells and the creamy vanilla filling. Here’s how each part of the recipe works together to give you those picture-perfect puffs.
- Water – Creates steam in the oven, which is what makes the choux pastry puff up and form hollow centers for the filling.
- Unsalted butter – Adds richness and flavor to the shells while helping the dough come together smoothly on the stovetop.
- Salt – Just a pinch sharpens the overall flavor so the pastry doesn’t taste flat or bland.
- All-purpose flour – Provides structure for the choux dough, helping the puffs hold their shape and rise tall.
- Large eggs – The secret to glossy dough and impressive loft; eggs give both moisture and stability to the pastry shells.
- Cold whole milk – Forms the base of the vanilla cream, keeping the filling smooth, creamy, and not too heavy.
- Instant vanilla pudding mix – Thickens the milk quickly and adds classic vanilla flavor with a silky, custard-like texture.
- Heavy whipping cream – Whipped to stiff peaks, it lightens the pudding and turns the filling into a fluffy, cloud-like cream.
- Powdered sugar – Sweetens the whipped cream gently and also makes a pretty finishing dusting on top of the puffs.
- Vanilla extract – Deepens the vanilla notes in the cream so it tastes bakery-quality rather than one-dimensional.
- Powdered sugar or melted chocolate (for topping) – A simple way to finish the cream puffs beautifully, whether you prefer a snowy dusting or a glossy drizzle.
Step-by-Step Vanilla Cream Puffs
STEP 1: Preheat your oven to 400°F (200°C) and line a baking sheet with parchment paper. In a medium saucepan, bring the water, butter, and salt to a gentle boil over medium heat so the butter is fully melted.
STEP 2: Add the flour all at once and stir vigorously with a wooden spoon. Keep cooking and stirring until the mixture pulls away from the sides and forms a smooth ball, with a thin film on the bottom of the pan. Remove from the heat and let it cool for about 5 minutes.
STEP 3: Beat in the eggs one at a time, mixing well after each addition. The dough may look separated at first, but keep going until it becomes thick, smooth, and glossy. It should be soft enough to pipe but firm enough to hold a mound.
STEP 4: Using a spoon or piping bag, portion 8–10 mounds of dough (about 2–3 inches wide) onto the prepared baking sheet, spacing them apart. Bake for 25–30 minutes, until puffed, deeply golden, and light when lifted. Avoid opening the oven during baking.
STEP 5: Remove the tray from the oven and immediately pierce each puff with a toothpick or small knife to release steam from the center. Transfer them to a wire rack and let them cool completely so the shells stay crisp rather than soggy.
STEP 6: To make the filling, whisk the cold milk and instant vanilla pudding mix in a bowl until thickened. In a separate bowl, whip the heavy cream with powdered sugar and vanilla extract until stiff peaks form. Gently fold the whipped cream into the pudding for a light, fluffy vanilla cream, then chill until slightly firm.
STEP 7: Once the shells are cool, slice each cream puff in half horizontally. Spoon or pipe a generous amount of vanilla cream into the bottom half, then place the top back on. Dust with powdered sugar or drizzle with melted chocolate just before serving.

Serving Ideas for Vanilla Cream Puffs
These cream puffs are elegant enough for a dessert table, but still cozy enough for a relaxed family gathering. They pair wonderfully with simple sides that let their vanilla flavor shine.
- Serve them with a bowl of fresh berries or sliced fruit to add a bright, juicy contrast to the rich cream.
- Pair with hot coffee, cappuccino, or tea for a café-style dessert experience at home.
- For celebrations, plate them with a glass of sparkling juice or a chilled dessert wine for a festive touch.
Can I make these cream puffs ahead of time?
Yes. You can bake the shells a day in advance and store them, unfilled, in an airtight container at room temperature. Fill them shortly before serving to keep the shells crisp.
Why did my cream puffs deflate after baking?
Usually they deflate because the centers were still too moist. Bake until deeply golden, then pierce each puff right away to release steam and let them cool completely on a rack.
Can I use a different filling instead of vanilla cream?
Absolutely. You can fill the shells with whipped cream, chocolate pudding, pastry cream, or even a flavored mousse. Just choose a filling thick enough to hold its shape.
Do cream puffs need to be refrigerated?
Once filled, cream puffs should be refrigerated because of the dairy-rich filling. Store them in a covered container and bring them out shortly before serving for the best texture.
Pro Tips for Vanilla Cream Puffs
- For the best rise, make sure your oven is fully preheated before the tray goes in, and resist opening the door while they bake so the steam stays trapped.
- If the dough feels too runny after adding the eggs, chill it briefly or pipe slightly smaller mounds; this helps the puffs hold their shape instead of spreading.
- For extra-pretty puffs, pipe the dough using a large round or star tip and smooth any peaks with a damp fingertip so they bake up evenly rounded.
Keeping Leftovers Fresh
Once filled, store cream puffs in the refrigerator in a loosely covered container so the shells don’t soften too quickly. They’re best enjoyed within about 24 hours, while the pastry still has a light, delicate bite.
If you’d like to plan further ahead, bake the shells and freeze them unfilled. Cool completely, then place them in an airtight container or freezer bag for up to one month. Thaw at room temperature and re-crisp on a low oven setting for a few minutes if needed.
Avoid reheating filled cream puffs, since the cold, creamy center is part of their charm. Instead, keep the shells and filling separate when possible, then assemble just before serving for that perfect contrast of crisp pastry and cool vanilla cream.
Mom’s Classic Vanilla Cream Puffs
Ingredients
For the Pastry Shells
- 4 whole eggs large
- 1 cup plain flour all-purpose
- 1/4 teaspoon fine salt
- 1 cup water
- 1 stick 1/2 cup unsalted butter
For the Vanilla Cream Filling
- 1 cup chilled heavy cream
- 1 box 3.4 oz instant vanilla pudding
- 1 teaspoon pure vanilla extract
- 1/4 cup icing sugar powdered sugar
- 2 cups cold whole milk
For Garnish (Optional)
- Melted chocolate for drizzling
- Sifted powdered sugar for topping
Instructions
Prepare the Pastry Shells:
- Set the oven to 400°F (200°C) and prepare a baking tray with a sheet of parchment paper.
- In a medium saucepan, combine the water, butter, and salt, and bring to a rolling boil over medium heat.
- Immediately add the flour in one motion and stir rapidly until the mixture clings together and detaches cleanly from the sides of the pot.
- Remove from the burner and allow the dough to cool for 5 minutes.
Incorporate the Eggs:
- Beat in the eggs individually, thoroughly blending each into the dough before adding the next. Continue until the mixture is smooth and has a glossy sheen.
- Use a spoon or a piping bag to form 8–10 mounds of dough, each about 2–3 inches in diameter, spaced evenly on the baking tray.
Bake the Shells:
- Place in the preheated oven and bake for 25–30 minutes, or until the shells are puffed and golden. Avoid opening the oven during this time.
- Once baked, remove from the oven and use a toothpick to poke a small hole in each shell to release steam. Set them on a wire rack and allow to cool completely.
Create the Filling:
- In one bowl, whisk the cold milk with the instant pudding mix until the mixture thickens.
- In a separate bowl, whip the heavy cream together with the powdered sugar and vanilla extract until stiff peaks form.
- Fold the whipped cream into the pudding to create a smooth and airy vanilla cream. Keep chilled until ready for use.
Assemble the Puffs:
- Slice each cooled pastry in half horizontally. Spoon or pipe the vanilla cream filling onto the bottom halves. Replace the tops gently.
- For a final touch, dust with powdered sugar or drizzle with melted chocolate before serving.