
Hatch Chile Sourdough brings smoky cheese, savory green chile, and naturally fermented bread together in a deeply flavorful loaf with a crisp crust, tender crumb, and an overnight cold proof that fits neatly into a home baking schedule.
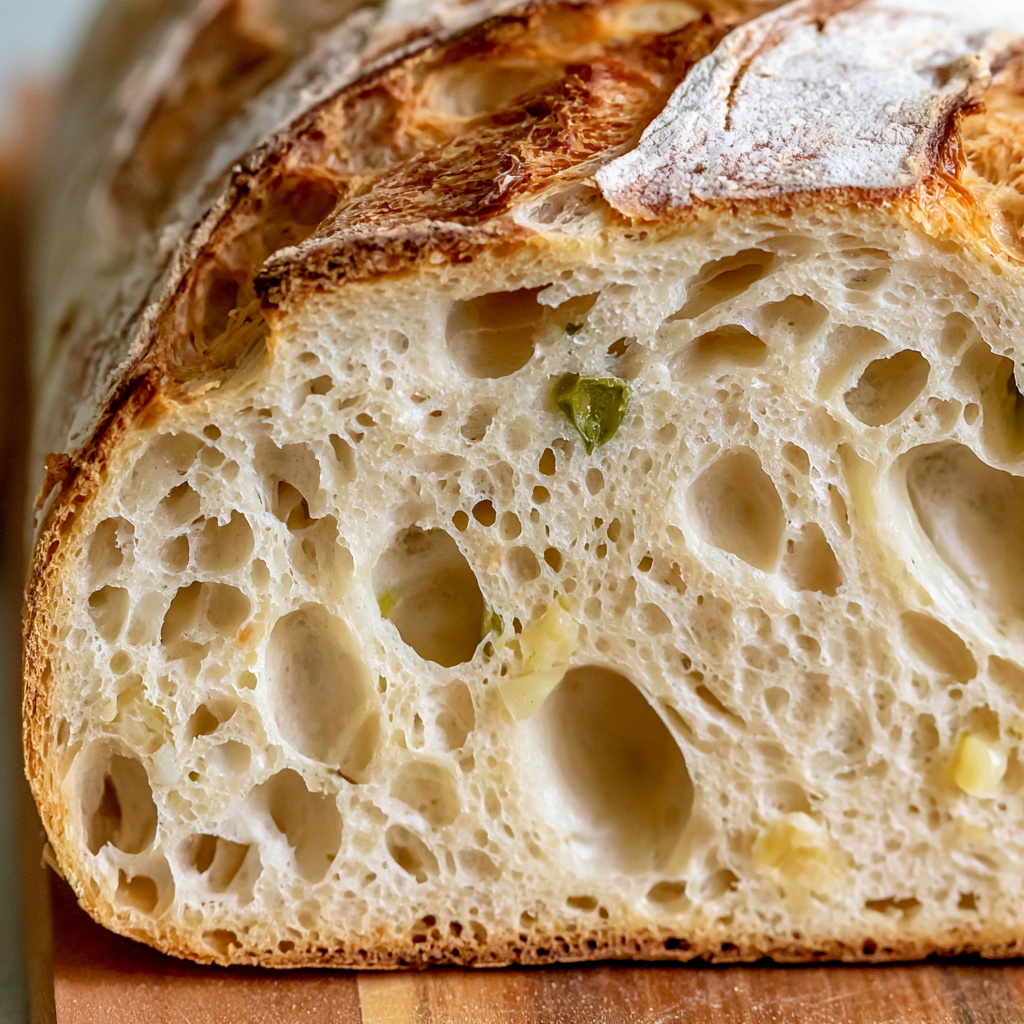
This is the kind of sourdough loaf worth making when you want something a little more exciting than a classic country bread. Roasted green chile adds gentle heat and earthy flavor, while small cubes of smoked Gouda melt into savory pockets throughout the crumb.
The process is also pleasantly manageable. Instead of aggressively kneading the dough, you build strength with four stretch-and-fold sessions, adding the cheese and chile during the first round so they become evenly distributed as the dough develops.
Most of the remaining work is hands-off fermentation. After bulk rising and shaping, the dough rests overnight in the refrigerator, giving you deeper sourdough flavor and making it convenient to bake the following day.
Ingredients
- Bread flour, 4 cups (500 g): Provides the structure needed to support the moist chile and cheese additions while producing a pleasantly chewy crumb.
- Filtered water, 1 1/2 cups (375 g): Warm it to roughly 88°F so the starter becomes active without exposing the dough to excessive heat.
- Active sourdough starter, 1/3 cup (93 g): A bubbly starter at 100% hydration supplies the natural yeast responsible for the loaf’s fermentation and rise.
- Sea salt, 2 1/4 teaspoons (14 g): Strengthens the dough while balancing the richness of the smoked cheese.
- Hatch green chile, 1/2 cup (85 g): Roasted or canned chile gives the loaf its signature savory flavor. Drain it extremely well before adding it.
- Smoked Gouda, 1/2 cup (85 g): Cut into roughly 1/4-inch cubes so small pockets of smoky, melted cheese are distributed through the bread.
Cooking Steps
STEP 1: Combine the flour, warm filtered water, sea salt, and active starter in a large bowl. Mix until the flour is completely hydrated and you have a rough but cohesive dough. It does not need to look perfectly smooth at this stage.
STEP 2: Begin a two-hour stretch-and-fold period. Complete one set approximately every 30 minutes, for a total of four sets. To perform a fold, gently pull one edge of the dough upward and fold it toward the center, rotating the bowl as you work around the dough.
STEP 3: Incorporate the well-drained green chile and smoked Gouda during the first stretch-and-fold session. Work gently so you do not tear the dough unnecessarily. It can feel slippery and somewhat loose at first, especially from the chile, but later folds will improve its strength.
STEP 4: After the final fold, cover the bowl and allow the dough to continue bulk fermenting at room temperature. Depending on the warmth of your kitchen and strength of your starter, this stage may take several hours and up to about 8 hours. Look for a dough that appears expanded, aerated, and noticeably puffier rather than relying entirely on the clock.
STEP 5: Turn the fermented dough out and gently form it into a round loaf. Avoid pressing out more gas than necessary. Place the shaped dough seam-side up in a rice-floured banneton or a suitable lined bowl, cover it, and refrigerate overnight.
STEP 6: The next day, place a Dutch oven in your oven and heat it to 450°F for at least 30 minutes. You can bake the loaf while it is still cold, which also makes scoring easier, or let it stand at room temperature for roughly an hour before baking.
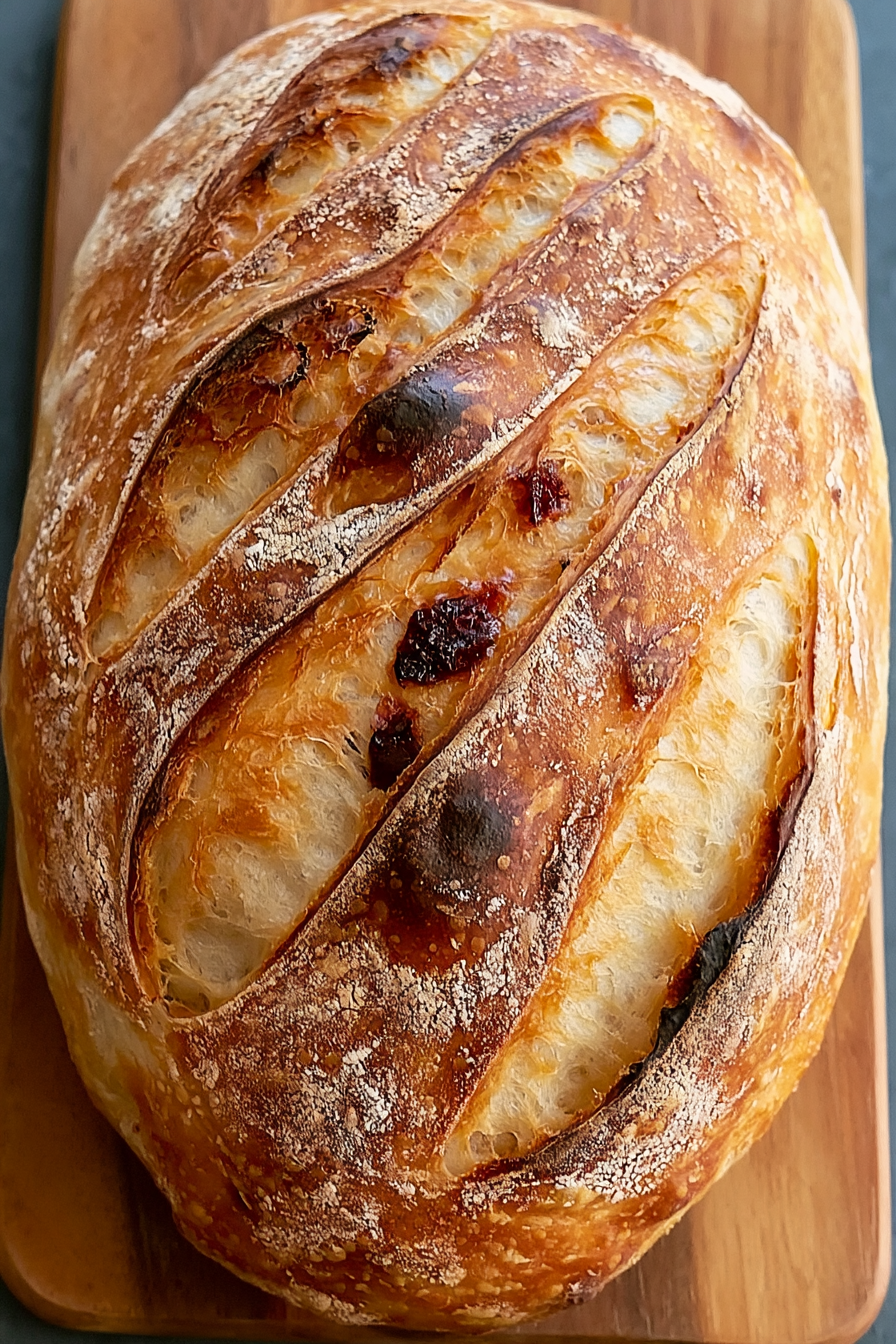
STEP 7: Turn the loaf onto parchment and score the top with a sharp bread lame or blade. Carefully lower it into the preheated Dutch oven. If desired, add a few tablespoons of water around the outside of the parchment to produce additional steam, taking care because the hot pot will cause the water to boil immediately.
STEP 8: Cover and bake for 20 minutes at 450°F. Remove the lid and continue baking for about 30 minutes, until the crust is deeply browned. Transfer the loaf to a cooling rack and wait at least one hour before cutting so the interior has time to finish setting.

Why is my dough sticky after adding the green chile?
Some stickiness is completely normal because green chile introduces additional moisture to the dough. Thorough draining makes a noticeable difference. Once the chile and cheese are incorporated, continue with the scheduled folds rather than adding large amounts of extra flour. The dough should gain strength as the folding period continues.
Can I use canned Hatch green chile?
Yes. Canned chile works well as long as you drain it very thoroughly. Let it sit in a fine-mesh strainer and gently remove excess liquid before adding it to the dough. Too much chile liquid can loosen the dough and make shaping more difficult.
Should I bake the loaf straight from the refrigerator?
You can. Cold dough is often firmer and easier to score, so baking directly from the refrigerator is a convenient option. The original method also allows the shaped loaf to sit out for approximately one hour if you prefer to let it warm slightly before baking.
How do I know when bulk fermentation is finished?
Watch the dough rather than depending only on an eight-hour maximum. It should look noticeably expanded, airy, and puffy, with signs of fermentation visible around the surface and edges. Fermentation can move considerably faster in a warm kitchen or with a particularly vigorous starter.
Why should sourdough cool before slicing?
The crumb continues setting after the bread leaves the oven. Slicing while the loaf is steaming hot can compress the interior and leave it feeling gummy. Give it at least an hour on a wire rack, and for the cleanest slices, wait until it is only barely warm.
Pro Tips for Chile Cheese Sourdough
- Drain the chile exceptionally well. Excess moisture is one of the biggest factors that can make this enriched sourdough harder to handle.
- Keep the cheese pieces small. Roughly 1/4-inch Gouda cubes spread more evenly through the dough and create smaller melted pockets instead of large gaps in the crumb.
- Judge fermentation visually. Starter activity and kitchen temperature can change the timing considerably, so use the dough’s expansion and aeration as your main guide.
Perfect Pairings
This savory loaf is flavorful enough to eat on its own, especially while slightly warm, but it also works beautifully alongside simple meals.
- Tomato or roasted vegetable soup: The smoky Gouda and green chile make an especially satisfying partner for a smooth, savory soup.
- Eggs for breakfast or brunch: Toast thick slices and serve them beside scrambled, fried, or poached eggs.
- A simple dinner salad: The rich cheese and chile bread pairs nicely with crisp greens and a bright, acidic dressing.

Keeping Leftovers Fresh
Allow the loaf to cool completely before storing it. For short-term storage, keep it at room temperature in a bread bag, bread box, or loosely wrapped container for about 2 to 3 days. Avoid refrigerating the whole loaf when possible because refrigeration tends to make bread stale more quickly.
For longer storage, slice the cooled bread and freeze the pieces in a freezer-safe container or bag for up to about 2 months. Separating slices before freezing makes it much easier to take out only what you need.
To reheat individual slices, toast them directly from frozen or warm them briefly in the oven until the crumb is soft and the edges are lightly crisp again. For a larger portion of the loaf, wrap it loosely and warm it in a moderate oven until heated through.
Because this bread contains pockets of smoky Gouda and green chile, reheating does more than refresh the crumb. It also softens the cheese again and brings the savory aroma back to life, making leftover slices especially good for toast, sandwiches, or serving alongside a bowl of soup.
Hatch Chile Sourdough
Ingredients
- 1/2 cup 85 g smoked Gouda cheese, sliced into approximately 1/4-inch cubes
- 1 1/2 cups 375 g filtered water, warmed to roughly 88°F
- 1/3 cup 93 g active sourdough starter, maintained at 100% hydration
- 1/2 cup 85 g Hatch green chile, roasted or canned and thoroughly drained
- 2 1/4 teaspoons 14 g sea salt
- 4 cups 500 g bread flour (King Arthur all-purpose flour may be used as noted in the original recipe)
Instructions
- Add the flour, 88°F filtered water, sea salt, and active sourdough starter to a large mixing bowl. Combine thoroughly until the ingredients come together into a unified, cohesive dough with no significant dry patches remaining.
- Begin the stretch-and-fold sequence. Over the following 2 hours, complete four sets of stretch-and-folds, allowing approximately 30 minutes between each set.
- During the first set of folds, gently work the thoroughly drained Hatch green chile and 1/4-inch smoked Gouda cubes into the dough. The mixture may initially seem slick or difficult to handle because of the additions, but it should become progressively smoother and stronger with subsequent folds.
- After the folding period, leave the dough to ferment at room temperature for up to 8 hours. Allow it to continue until it appears noticeably expanded, puffy, and aerated.
- Once bulk fermentation is complete, form the dough into a round loaf. Transfer it upside down, with the seam facing upward, into a banneton or suitable bowl dusted with rice flour.
- Cover the shaped dough and place it in the refrigerator overnight. The extended chilled fermentation allows the loaf to proof gradually while further developing its flavor and texture.
- When ready to bake, place a Dutch oven inside the oven and preheat to 450°F for a minimum of 30 minutes.
- The loaf may be baked directly from refrigeration, or it can rest outside the refrigerator for approximately 1 hour to move closer to room temperature before baking.
- Carefully invert the proofed dough onto a sheet of parchment paper. Score the surface as desired so the loaf can expand in a controlled manner during baking.
- Wearing suitable oven mitts, carefully remove the fully heated Dutch oven. Lower the scored loaf, together with its parchment paper, into the hot pot.
- Carefully pour a few tablespoons of water between the parchment paper and the sides of the Dutch oven. The water will boil immediately upon contacting the heated surface, so use appropriate caution.
- Place the lid on the Dutch oven and bake the loaf at 450°F for 20 minutes.
- Remove the lid and continue baking for an additional 30 minutes, or until the crust develops a deep golden-brown color and the loaf produces a hollow sound when tapped.
- Remove the baked sourdough from the Dutch oven and place it on a wire cooling rack. Allow it to rest for at least 1 hour before slicing so the interior crumb can set properly.