
Cottage Cheese Truffles are a creamy, no-bake chocolate treat with a smooth cocoa center, crisp semi-sweet chocolate shell, and flaky sea salt finish. They’re simple to prepare ahead and need only a handful of everyday ingredients.
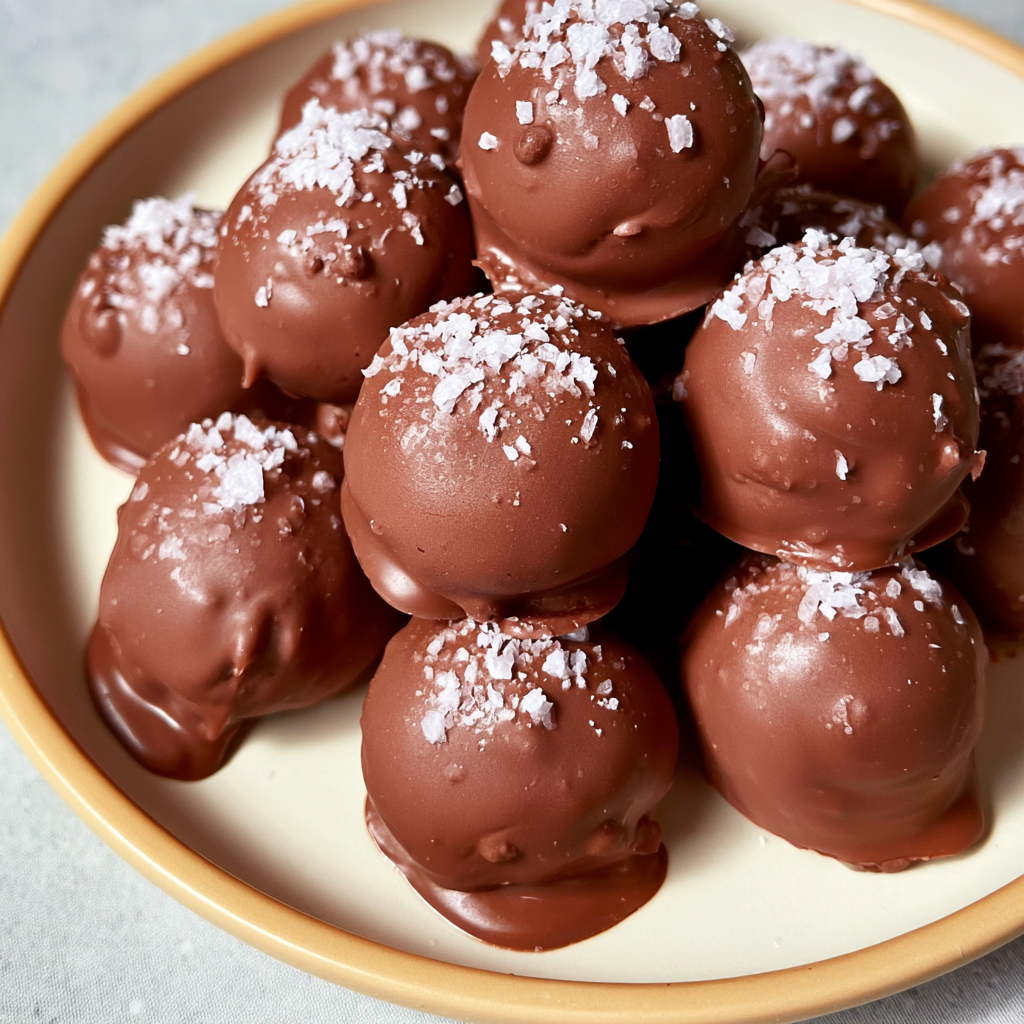
If you want a homemade chocolate treat without baking, these truffles are a great option to keep in your freezer. Blending the cottage cheese completely smooth gives the centers a surprisingly creamy texture, while cocoa powder provides a deep chocolate flavor without making the mixture overly sweet.
The most important part of the process is giving the chocolate mixture enough time to chill. Once it firms up, it becomes much easier to scoop and shape. A second short freeze keeps the centers cold while you dip them, helping the melted chocolate coating set quickly into a thin, crisp shell.
Cottage Cheese Truffles Ingredients
You only need a short list of ingredients for these chocolate truffles, but each one plays an important role in creating the right consistency.
- Full-fat cottage cheese: Forms the creamy base of the truffle centers. Blending it thoroughly removes the curds and creates a smooth consistency.
- Cocoa powder: Gives the filling its rich chocolate flavor. Sifting it first prevents dry cocoa lumps from remaining in the finished mixture.
- Pure maple syrup: Sweetens the centers while blending easily into the cottage cheese and cocoa.
- Semi-sweet chocolate chips: Melt into the outer shell that surrounds each chilled truffle.
- Coconut oil: Loosens the melted chocolate slightly so it coats the truffles more smoothly and evenly.
- Flaky sea salt: Adds a light salty contrast to the chocolate and gives the finished truffles a little extra texture.
Step-by-Step Cottage Cheese Truffles
STEP 1: Add the cottage cheese to a small food processor or powerful blender. Process until it looks completely smooth and creamy. Stop once or twice to scrape down the sides so no visible cottage cheese curds remain.
STEP 2: Add the maple syrup and sifted cocoa powder. Blend again until you have an evenly colored, thick chocolate mixture. Scrape the sides as necessary, then blend once more to make sure the cocoa has been fully incorporated.
STEP 3: Transfer the chocolate mixture to a covered container and refrigerate it for at least 4 hours. Chilling overnight also works well. The filling needs to become firm enough that you can scoop it without it immediately losing its shape.
STEP 4: Line a plate or small tray with parchment paper. Scoop about 2 teaspoons of the cold filling for each truffle and gently roll or shape it into a ball. If the mixture begins getting too soft while you work, return it to the refrigerator briefly before continuing.
STEP 5: Arrange the shaped truffles on the parchment-lined plate and freeze them for 30 minutes to 1 hour. This additional chilling step is especially helpful because very cold centers are much easier to coat in warm melted chocolate.
STEP 6: Place the semi-sweet chocolate chips and coconut oil in a small saucepan. Warm over low heat while stirring constantly until the chocolate is smooth and completely melted. Transfer it to a small, relatively deep bowl so dipping is easier.
STEP 7: Dip each chilled truffle into the melted chocolate, turning it until the center is completely covered. Lift it out, allow excess chocolate to drip away, and return it to the parchment. Sprinkle with a little flaky sea salt before the chocolate hardens.
STEP 8: Freeze the coated truffles for another 30 minutes to 1 hour, or until the chocolate shells are completely firm. Once set, let them stand briefly before serving if you prefer a softer, creamier center.

Perfect Pairings
These little chocolate bites are rich enough to serve on their own, but a few simple pairings can turn them into an especially nice dessert plate.
A cup of freshly brewed coffee works particularly well because its slightly bitter flavor balances the maple-sweetened chocolate center. Espresso is another good choice when serving the truffles after dinner.
For something lighter, pair them with fresh strawberries, raspberries, or another tart berry. The fresh fruit provides a bright contrast to the dense cocoa filling and crisp chocolate coating.
You can also arrange the truffles alongside other small desserts when preparing a dessert tray for a party or gathering. Since they can remain chilled until shortly before serving, they are convenient for preparing in advance.
Why do my truffles feel too soft to roll?
The filling usually needs more chilling time. Cottage cheese naturally contains moisture, so the mixture may still be quite soft immediately after blending. Refrigerate it for at least 4 hours before shaping. If your kitchen is warm, work in small batches and keep the remaining mixture refrigerated.
Do I need to blend the cottage cheese first?
Yes. Blending the cottage cheese by itself before adding the cocoa and maple syrup helps create the smoothest possible center. If everything is added immediately, small curds may be harder to completely break down once the mixture becomes thick with cocoa powder.
Can I make these chocolate truffles ahead?
Absolutely. In fact, this dessert works particularly well as a make-ahead option because several chilling periods are already part of the preparation. Prepare and coat the truffles in advance, keep them refrigerated or frozen, and take out only the amount you plan to serve.

Why should the truffles be frozen before dipping?
The short freeze firms the centers so they do not soften or fall apart when they touch the warm melted chocolate. It also encourages the chocolate coating to begin setting quickly, which makes dipping less messy and produces a cleaner shell.
Can I skip the flaky sea salt?
Yes. The sea salt is optional and does not affect the structure of the truffles. It mainly provides contrast against the sweet chocolate. If you enjoy a classic chocolate flavor without a salty finish, simply leave it off.
How to Store & Reheat
These truffles require no reheating and are at their best served chilled or after a short rest at room temperature.
Store fully set truffles in an airtight container in the refrigerator. Placing parchment paper between layers helps protect the chocolate shells from sticking together or becoming scratched. For the best texture and freshness, enjoy refrigerated truffles within about 4 to 5 days.
For longer storage, freeze them in a tightly sealed freezer-safe container. Once the coating has completely hardened, arrange the truffles in layers separated by parchment paper. They can be kept frozen for approximately 1 month.
When you want to serve frozen truffles, transfer them to the refrigerator first or leave them at room temperature for several minutes. The chocolate shell will remain crisp while the center gradually becomes softer and creamier. Avoid heating them, since warmth can melt the coating and change the texture of the cottage cheese filling.
Helpful Tips
- Blend until completely smooth. Give the cottage cheese enough processing time before adding the other ingredients. A silky base makes a noticeable difference in the final texture.
- Keep the centers very cold. If the truffles soften while you are coating them, return them to the freezer for a few minutes. Firm centers are much easier to dip neatly.
- Use low heat for the chocolate. Melt the chocolate chips and coconut oil gently, stirring often. Excessive heat can make chocolate thick or difficult to work with instead of giving you a smooth coating.
Cottage Cheese Truffles
Ingredients
For the Truffle Centers
- ¾ cup cocoa powder sifted until free of lumps
- 3 tablespoons pure maple syrup
- 1 cup plain cottage cheese preferably full-fat for a creamier texture
For the Chocolate Coating
- 1 teaspoon coconut oil
- Flaky sea salt added according to taste
- ¾ cup semi-sweet chocolate chips
Instructions
- Prepare the cottage cheese mixture. Place the cottage cheese in a mini food processor and pulse until completely smooth and creamy.
- Add the maple syrup and sifted cocoa powder. Continue processing until the ingredients form a uniform chocolate mixture, pausing when necessary to scrape down the sides of the processor. Taste and adjust the sweetness if needed.
- Refrigerate until firm. Spoon the blended mixture into a container and level the top. Cover securely and refrigerate for at least 4 hours, or leave it overnight, until sufficiently firm for shaping.
- Shape the truffles. Line a plate with parchment paper. Using a small scoop, portion approximately 2 teaspoons of the chilled mixture at a time and shape each portion into a ball.
- Arrange the formed truffles on the prepared plate. Continue until all of the mixture has been portioned, then place the plate in the freezer for 30 minutes to 1 hour.
- Prepare the melted chocolate. Combine the semi-sweet chocolate chips and coconut oil in a small saucepan. Heat over low heat, stirring continuously, until the chocolate is fully melted and smooth.
- Pour the melted chocolate into a small bowl to make coating the truffles easier.
- Coat each truffle. Working promptly, dip the chilled truffle balls individually into the melted chocolate until completely covered.
- Return each coated truffle to the parchment-lined plate and repeat until every piece has been coated.
- Finish and set. While the chocolate coating remains wet, lightly sprinkle the tops with flaky sea salt.
- Transfer the finished truffles to the freezer for another 30 minutes to 1 hour, or until the chocolate shell has completely hardened.