
Christmas Cookies with Cool Whip are soft, colorful holiday cookies made with vanilla cake mix, fluffy whipped topping, and a generous powdered sugar coating. They come together with minimal prep, bake in about 15 minutes, and develop a festive red-and-green crinkle finish that looks especially cheerful on Christmas cookie trays.
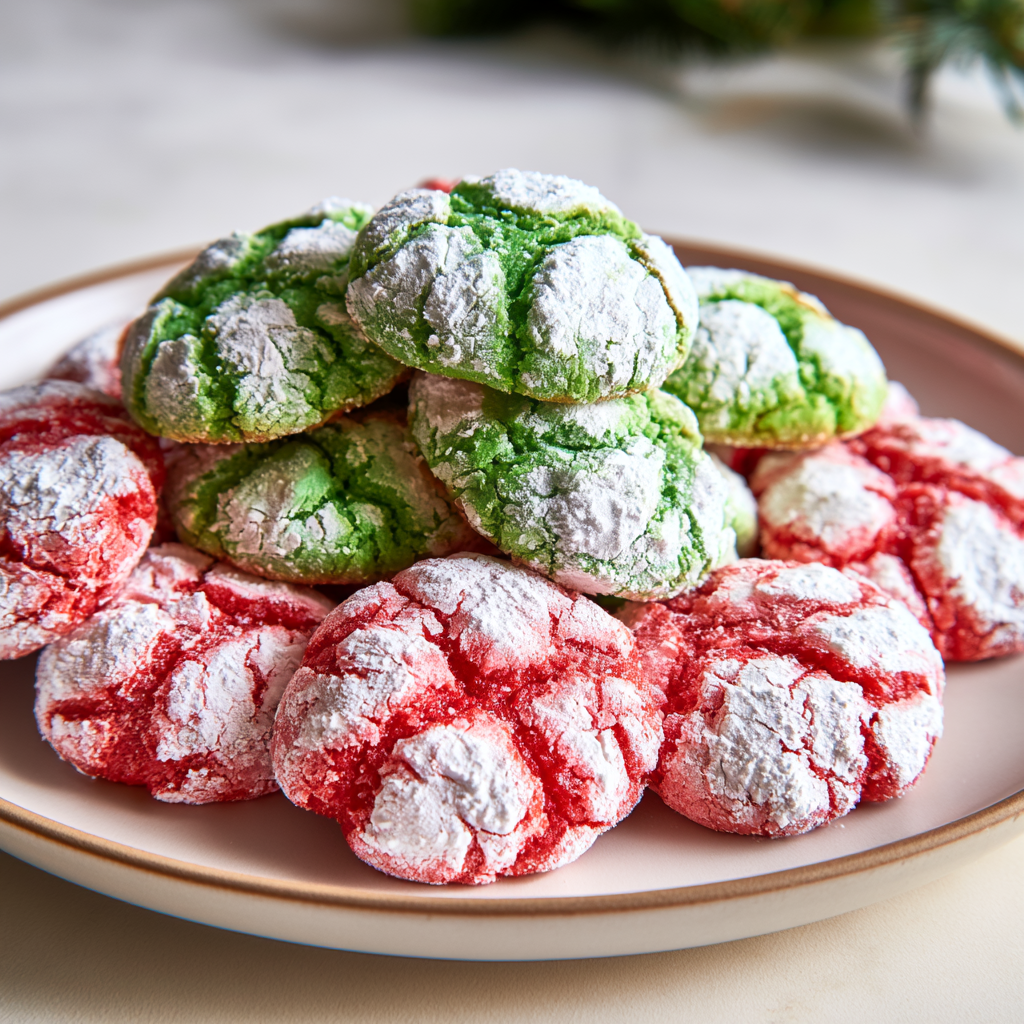
When you need a simple cookie for a busy holiday baking day, these are a great choice. The dough requires only a handful of ingredients, and there is no need to cream butter, chill the mixture for hours, or roll out shapes with cookie cutters.
The combination of vanilla cake mix and whipped topping creates an unusually light, tender center. Meanwhile, the confectioners’ sugar on the outside separates as the dough spreads in the oven, leaving behind those distinctive snowy cracks.
Because the dough is naturally sticky, handling it can seem a little unusual at first. Once you coat each scoop generously with powdered sugar, though, portioning becomes much easier. Keep the centers soft and watch the edges for doneness, and you’ll end up with tender Christmas crinkle cookies every time.
Christmas Cookies with Cool Whip Ingredients
Vanilla cake mix: Provides the flour, sugar, leavening, and vanilla-flavored foundation for these quick cookies.
Whipped topping: Use it fully thawed so it blends smoothly into the cake mix and gives the cookies their soft, tender consistency.
Egg: Binds the dough together and helps the cookies set properly as they bake.
Vanilla extract: Strengthens the vanilla flavor without adding another complicated step.
Red gel food coloring: Tints half of the dough a vivid Christmas red. Gel coloring is particularly useful because only a small amount is needed.
Green gel food coloring: Creates the second festive batch and gives the finished cookie platter its classic red-and-green appearance.
Confectioners’ sugar: A thick coating creates the snowy exterior and dramatic crinkle pattern as the cookies spread.

Cooking Steps
STEP 1: Heat your oven to 350°F. Line a baking sheet with parchment paper or a silicone baking mat. The cookies spread while baking, so having a prepared nonstick surface makes transferring them much easier.
STEP 2: Add the vanilla cake mix, egg, thawed whipped topping, and vanilla extract to a large mixing bowl. Beat or stir until everything is completely combined. Do not be concerned if the mixture is much stickier than conventional cookie dough because that texture is expected.
STEP 3: Divide the cookie mixture approximately in half between two bowls. Add a small amount of red gel food coloring to one bowl and green gel coloring to the other. Stir each separately until the color is evenly distributed.
STEP 4: Check the colors before adding more gel. A couple of drops may be enough depending on the strength of your coloring. Add additional coloring gradually rather than all at once so you can reach a bright Christmas shade without unnecessarily thinning the mixture.
STEP 5: Place the confectioners’ sugar in a shallow bowl. Use a small cookie scoop or approximately one tablespoon of dough for each cookie. Drop each sticky portion directly into the sugar and coat it generously on every side. A substantial layer gives you a more noticeable crinkle effect.
STEP 6: Transfer the coated portions to the prepared baking sheet, spacing them at least 2 inches apart. They will flatten and spread considerably in the oven, so resist the temptation to crowd the pan. Bake for 12 to 15 minutes, watching the edges rather than waiting for the centers to become firm.
STEP 7: Remove the cookies once the edges look set but the middle still appears tender. Leave them on the hot baking sheet for about 5 minutes. This short resting period lets the centers finish setting without becoming dry. Transfer them carefully to a wire rack and cool completely.
Why is my Cool Whip cookie dough so sticky?
Sticky dough is completely normal for this style of cookie. Whipped topping creates a much softer mixture than traditional butter-based cookie dough. Instead of adding extra flour, which could change the finished texture, scoop the mixture directly into plenty of confectioners’ sugar. The coating makes it much easier to handle.
Helpful Tips
- Coat generously with sugar. A light dusting can disappear during baking. Completely covering the dough gives the finished cookies their more distinctive white crinkle pattern.
- Add food coloring gradually. Gel coloring is concentrated, so begin with a small amount and build the shade until you have the red and green intensity you want.
- Judge doneness by the edges. The middle should still seem soft when the cookies leave the oven. Waiting until the entire cookie feels firm can result in a drier texture after cooling.
Serving Ideas for Christmas Cookies with Cool Whip
These colorful cookies look especially good arranged together on a holiday dessert platter. Alternate the red and green cookies across the tray so both colors stand out, or place them among other pale or chocolate-colored cookies for contrast.
For a simple Christmas dessert spread, serve them with hot chocolate, coffee, or cold milk. Their sweet vanilla flavor is mild enough to pair well with stronger holiday drinks without competing with them.
They also work nicely as part of a mixed cookie box. Because their snowy powdered-sugar coating gives them plenty of visual interest, you do not need icing or additional decorations before serving.
Can I make the dough ahead of time?
This dough is quickest and easiest to work with soon after mixing. If you need to prepare it a little earlier, cover the bowls well and refrigerate them briefly. Keep in mind that the texture can become firmer when chilled, so allow it to soften slightly if necessary before scooping and coating.
Can I use liquid food coloring instead of gel?
You can, but gel food coloring is preferable for these cookies. It produces a stronger red or green shade with much less liquid. If using conventional liquid coloring, add it cautiously because a large amount can loosen an already soft, sticky dough.

How do I keep the powdered sugar visible?
Start with a generous coating rather than a thin dusting. Roll or toss every portion until you can no longer see much colored dough through the sugar. Some sugar will naturally dissolve as the cookies spread, while the remaining patches create the characteristic crinkled appearance.
Keeping Leftovers Fresh
Once completely cooled, place the cookies in an airtight container. They are generally at their nicest during the first few days, when the centers remain tender and the exterior still has a clear powdered-sugar finish.
For longer storage, you can refrigerate them in a tightly sealed container for roughly 5 to 7 days. Allow refrigerated cookies to return to room temperature before serving for a softer texture. Be aware that moisture inside the container may gradually make the confectioners’ sugar look less powdery.
For freezer storage, arrange completely cooled cookies in a freezer-safe container with parchment between layers and freeze for up to about 2 months. Thaw them at room temperature while still protected from excess moisture. If the snowy coating has faded after thawing, a very light fresh dusting of confectioners’ sugar can restore their festive appearance.
Reheating is usually unnecessary because these cookies are intended to be soft at room temperature. If you prefer one slightly warm, heat it only briefly so the tender center does not dry out.
How do I know when the cookies are finished baking?
Look at the outer edges rather than the center. After about 12 to 15 minutes at 350°F, the edges should appear set while the middle remains visibly soft. The cookies continue to firm as they sit on the baking sheet during the first 5 minutes of cooling.
Christmas Cookies with Cool Whip
Ingredients
- 1 large egg
- 1 teaspoon pure vanilla extract
- 1 cup confectioners’ sugar reserved for coating
- 8 ounces thawed whipped topping such as Cool Whip
- Green gel food coloring as needed
- 1 box vanilla-flavored cake mix such as Duncan Hines
- Red gel food coloring as needed for a vivid shade
Instructions
- Prepare the oven and pan. Preheat the oven to 350°F. Cover a baking sheet with parchment paper or a silicone baking mat to help prevent sticking.
- Combine the cookie dough. Place the vanilla cake mix, egg, thawed whipped topping, and vanilla extract in a large mixing bowl. Beat the ingredients together until evenly incorporated. The finished mixture should have a thick, sticky consistency.
- Divide and tint the mixture. Separate the dough evenly between two bowls. Stir a couple of drops of red gel coloring into one portion and a couple of drops of green gel coloring into the other.
- Develop the colors. Mix each portion thoroughly until the coloring is evenly distributed. Add additional gel coloring when necessary to produce bright, vibrant red and green tones.
- Prepare the sugar coating. Pour the confectioners’ sugar into a small bowl. Portion the sticky dough with a small cookie scoop or a 1-tablespoon measuring spoon.
- Coat and arrange the cookies. Working with one scoop at a time, roll each portion thoroughly in the powdered sugar until completely covered. Arrange the coated dough portions on the prepared baking sheet, leaving at least 2 inches between them because the cookies will spread considerably while baking.
- Bake until set. Place the baking sheet in the preheated oven and bake for 12–15 minutes, or until the edges have set. The centers should remain soft when the cookies are removed from the oven.
- Cool the cookies. Allow the cookies to rest on the baking sheet for 5 minutes. Carefully move them to a wire cooling rack and leave them there until completely cooled.