
These christmas cookies with cookie press are buttery, tender, and perfect for holiday baking when you want festive shapes without rolling or cutting dough. A quick chill helps every delicate design bake with clean edges and a lightly golden finish.
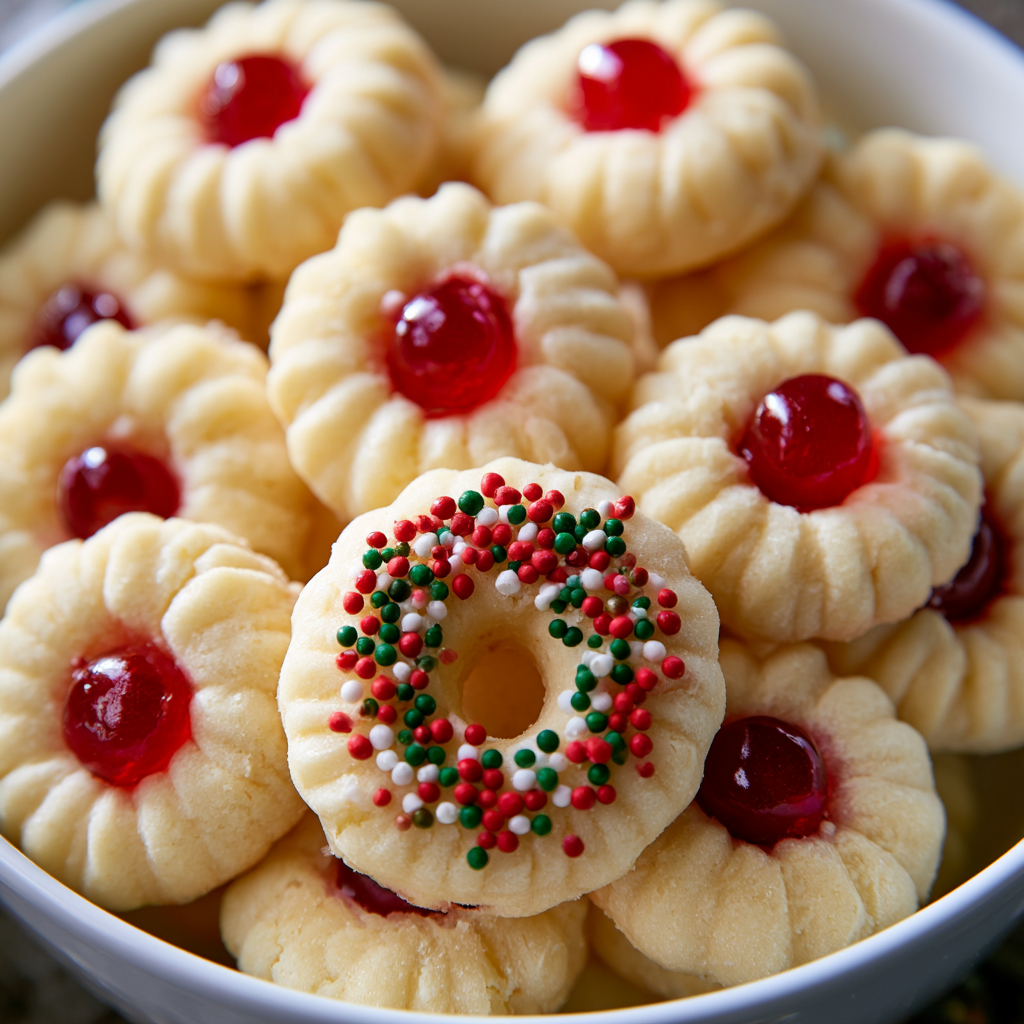
Cookie press cookies are a great choice when you need a generous holiday cookie tray without spending all afternoon cutting individual shapes. Once the dough is mixed, you simply load the press, choose your favorite disk, and press the cookies directly onto the baking sheet.
The combination of softened butter, powdered sugar, egg, and vanilla creates a delicate cookie that feels rich without being heavy. The most important details are keeping the dough soft enough to press, using an unlined baking sheet so it sticks properly, and chilling the shaped cookies before they go into the oven.
You can leave the cookies simple or dress them up for Christmas with colorful sprinkles, cherries, or a little chocolate. That flexibility makes them especially useful when you want several different-looking cookies from one basic batch of buttery dough.
Ingredients
You only need a short list of baking staples for these classic pressed cookies, plus any festive decorations you would like to add.
- Butter: Use 1 cup of thoroughly softened butter so the dough creams smoothly and passes through the cookie press without excessive pressure.
- Powdered sugar: The 1/2 cup plus 2 tablespoons sweetens the cookies while helping create their fine, tender texture.
- Egg: One large egg binds the ingredients and gives the dough enough structure to hold its decorative shapes.
- Vanilla: One teaspoon adds a simple, warm flavor that works especially well in buttery Christmas cookies.
- All-purpose flour: You will need approximately 2 1/4 to 2 1/2 cups. Add only enough to produce a soft dough that can still move easily through the press.
- Salt: A small pinch balances the sweetness and rounds out the buttery flavor.
- Decorative sprinkles: Optional, but ideal for adding holiday color before the cookies are baked.
- Cherries: Small pieces or halves can be added to selected shapes for a traditional festive finish.
- Chocolate: Use as an optional finishing touch once the cookies are baked.

Step-by-Step Cookie Press Cookies
STEP 1: Start by beating the very soft butter in a large mixing bowl until it looks smooth and creamy. Add the powdered sugar and continue beating for about 2 minutes so the mixture becomes evenly blended and light. Properly softened butter is especially important because stiff dough can be difficult to push through a cookie press.
STEP 2: Add the large egg and vanilla to the creamed butter mixture. Beat on medium speed just until everything is incorporated. Stir in the pinch of salt, then gradually add the flour. Begin with 2 1/4 cups and add more only if needed. Stop mixing as soon as a soft, cohesive dough forms.
STEP 3: Select the cookie press disk you want to use and fill the barrel with dough. Pack the dough in firmly enough to eliminate large air pockets. This helps the press dispense a consistent amount of dough and produces cleaner, more recognizable shapes.
STEP 4: Press the cookies directly onto an ungreased, unlined baking sheet. The dough needs to lightly grip the metal surface as you lift the press, which is why parchment paper is not recommended here. Space the shapes slightly apart, although they should not spread dramatically when properly chilled.
STEP 5: Add decorative sprinkles or small cherry pieces before baking if you want them baked into the cookies. Preheat the oven to 350°F (175°C), then place the entire tray of shaped cookies in the refrigerator while the oven finishes heating. This short chilling period firms the butter and helps protect the pressed details.
STEP 6: Bake the chilled cookies for about 10 minutes. Start checking them near the end because smaller shapes can bake faster than larger ones. They are ready when they are set and just beginning to turn lightly golden around the edges rather than deeply browned.
STEP 7: Let the cookies rest briefly on the baking sheet before carefully transferring them to a cooling rack. Once cooled, decorate with chocolate if desired. Allow any chocolate to set completely before stacking or storing the cookies.
Serving Ideas for Cookie Press Cookies
These delicate butter cookies are especially suited to Christmas cookie platters because you can create several shapes and finishes from one batch. Mix sprinkled cookies with cherry-topped shapes and chocolate-finished cookies to make the tray look varied without preparing several different doughs.
They also pair nicely with coffee, tea, hot chocolate, or a glass of cold milk. For holiday gifting, wait until all decorations are completely set before arranging the cookies in tins or treat boxes.
Why won’t my dough stick to the baking sheet?
The most common reason is the baking surface. Cookie press dough needs to adhere briefly to the pan so it releases cleanly from the press. Use a clean, unlined metal baking sheet rather than parchment paper or a silicone baking mat. An overly greasy pan can also make pressing difficult.
Helpful Tips
- Watch the flour amount. Start with 2 1/4 cups and add more gradually only if necessary. Too much flour can make the dough stiff and difficult to push through the press.
- Chill after shaping, not before pressing. Soft dough moves through the cookie press more easily, while chilling the finished shapes helps them keep their definition in the oven.
- Bake similar sizes together. Different press disks can create shapes of different thicknesses, so grouping similar cookies on one tray helps them bake evenly.
Should cookie press dough be chilled before pressing?
Usually, no. This dough should remain soft enough to travel easily through the cookie press. Chilling it first can make pressing unnecessarily difficult. Instead, shape the room-temperature dough onto the baking sheet and refrigerate the entire tray briefly before baking.
How do I keep pressed cookies from spreading?
Begin with accurately measured ingredients and avoid making the dough overly soft. Once the cookies have been pressed onto the baking sheet, refrigerate them while the oven preheats. That short chill firms the butter, helping the decorative ridges and edges remain more defined during baking.
Can I decorate them before baking?
Yes. Sprinkles can be added immediately after the dough is pressed, and small pieces of cherry can be gently placed in the centers of appropriate shapes. Chocolate is generally better added after baking so you can drizzle or dip the cooled cookies without affecting their shape.

How do I know when cookie press cookies are done?
Look for cookies that are set and only lightly golden, particularly around the outer edges. They bake in approximately 10 minutes at 350°F, but shape and thickness can affect timing. Avoid waiting for deep browning, since these delicate butter cookies are intended to stay relatively pale.
Keeping Leftovers Fresh
Allow the cookies to cool completely before storing them. Place them in an airtight container at room temperature, separating delicate decorated layers with parchment or wax paper if necessary. They should remain enjoyable for several days when protected from moisture and air.
For longer storage, you can freeze the fully cooled cookies in a freezer-safe container for about 2 to 3 months. Chocolate-decorated cookies should be frozen only after the chocolate has completely set. Thaw them at room temperature while still protected inside the container to help prevent condensation from making the cookies damp.
These cookies generally do not require reheating. If they have been frozen, simply allow them to return naturally to room temperature before serving so their tender, buttery texture is preserved.
Christmas Cookies with Cookie Press
Ingredients
For the cookies:
- 1 cup butter softened thoroughly at room temperature
- 1 teaspoon vanilla
- 2 1/4 to 2 1/2 cups all-purpose flour
- Pinch of salt
- 1 large egg
- 1/2 cup plus 2 tablespoons powdered sugar
Optional toppings:
- Cherries as desired
- Decorative sprinkles such as Wilton
- Chocolate as desired
Instructions
- Place the very soft butter in a large mixing bowl and beat until smooth and creamy.
- Add the powdered sugar and continue beating for approximately 2 minutes, or until the butter and sugar are thoroughly blended.
- Mix in the egg and vanilla, beating at medium speed until evenly incorporated.
- Add the salt, then gradually work in 2 1/4 to 2 1/2 cups of all-purpose flour. Beat only until the flour has combined with the remaining ingredients.
- Transfer the prepared dough into a cookie press, packing it firmly so the dough dispenses evenly and produces well-defined shapes.
- Press the cookies directly onto an unlined baking sheet. Do not place parchment paper beneath the dough.
- If desired, decorate the shaped cookies with sprinkles or place a cherry on top.
- Preheat the oven to 350°F (175°C).
- While the oven comes to temperature, place the baking sheet of pressed cookies in the refrigerator. Chilling helps the cookies retain their decorative shapes while baking.
- Bake for approximately 10 minutes, or until the cookies become lightly golden.
- Watch the cookies carefully toward the end of baking, since the exact cooking time may vary according to the oven and the size of the pressed shapes.
- Remove the baking sheet from the oven and allow the cookies to cool slightly before carefully lifting them from the pan.
- If desired, finish the warm cookies with a small amount of chocolate or half a cherry.
- Allow the cookies to finish cooling, then serve and enjoy as a festive holiday treat.