
These christmas cookies with butterscotch are buttery, soft-centered, and packed with sweet butterscotch chips in every bite. They bake in just 8–10 minutes, making them a convenient holiday cookie with crisp-looking golden edges, a tender middle, and dependable results for cookie trays, parties, or seasonal baking.
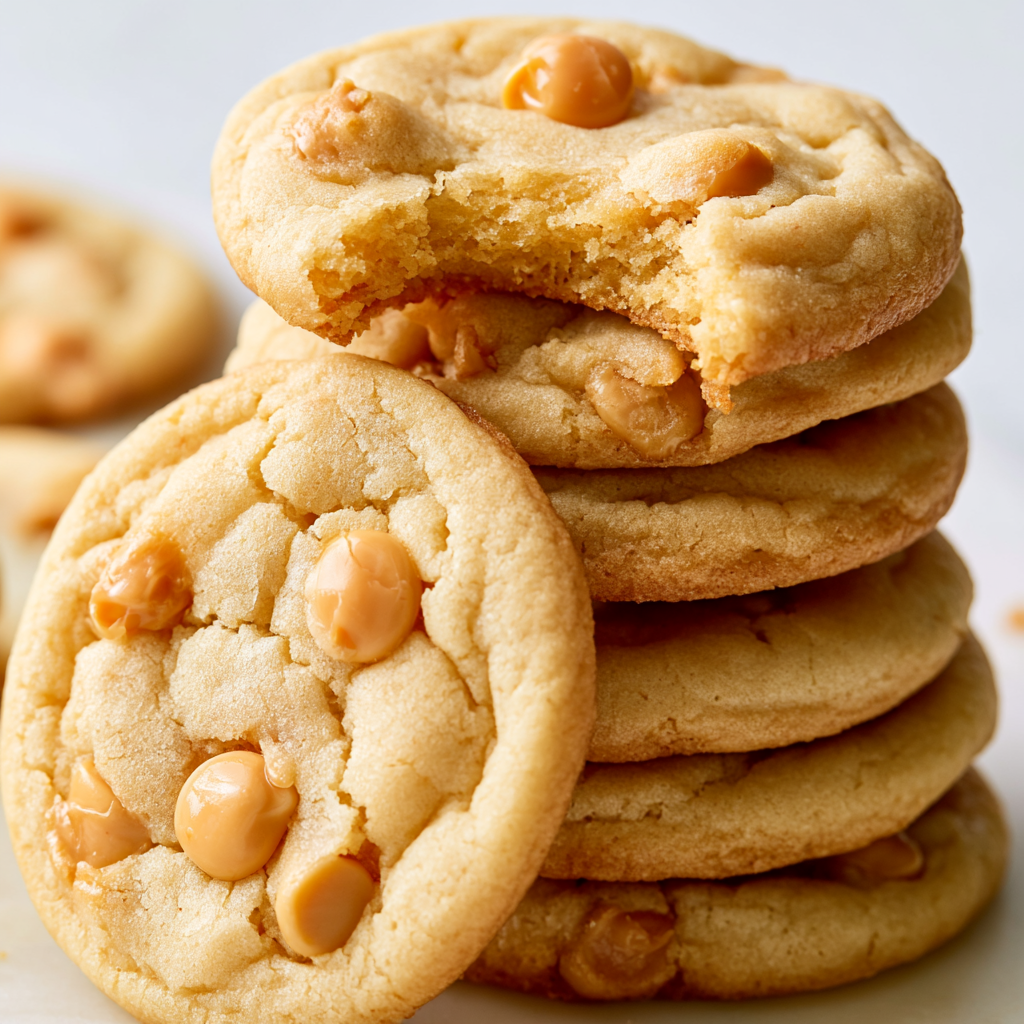
When you want a Christmas cookie that feels festive without requiring decorating, chilling, rolling, or cutting, this is a great one to keep in your holiday lineup. The dough comes together with familiar baking staples, and the generous amount of butterscotch chips gives the cookies plenty of flavor without extra toppings.
The combination of brown sugar, granulated sugar, butter, and vanilla creates a rich cookie base that complements the caramel-like sweetness of the chips. Baking only until the edges begin to brown is especially important because the centers continue setting as the cookies rest on the warm pan.
They are also wonderfully practical for busy holiday baking. You can prepare several batches quickly, cool them completely, and store them until you are ready to assemble dessert platters or Christmas cookie boxes.
Butterscotch Christmas Cookie Ingredients
All-purpose flour provides the main structure for the cookie dough while keeping the finished cookies tender when it is measured accurately and not overmixed.
Butter creates the rich flavor and soft texture that form the base of these cookies. Make sure it is softened rather than melted so it creams properly with the sugars.
Butterscotch baking chips are the dominant flavor addition. Two cups make these cookies especially generous, with sweet butterscotch pieces spread throughout every batch.
Brown sugar adds deeper caramel notes as well as moisture, helping contribute to the softer centers. Pack it firmly into the measuring cup for the correct amount.
Granulated sugar balances the brown sugar and helps the exterior develop those lightly browned edges.
Eggs bind the dough and contribute moisture. Room-temperature eggs combine more smoothly with the creamed butter mixture.
Vanilla extract rounds out the buttery, caramel-like flavors and gives the dough a warmer bakery-style aroma.
Baking soda supplies the leavening needed for the cookies to spread and develop the right texture in the oven.
Salt keeps all that sweetness balanced and makes the butter, vanilla, and butterscotch flavors taste more distinct.

Step-by-Step Butterscotch Christmas Cookies
STEP 1: Heat your oven to 350°F (175°C). Have a nonstick baking sheet ready so you can portion the dough as soon as it is mixed. Allowing the oven to preheat fully helps the cookies spread and bake consistently from one batch to the next.
STEP 2: Place the softened butter in a large mixing bowl. Add both sugars and the vanilla, then cream everything together until the mixture looks thick, smooth, and evenly combined. Scrape around the sides and bottom of the bowl so no pockets of plain butter remain.
STEP 3: Add the room-temperature eggs one at a time. Mix gently after the first egg until it disappears into the butter mixture, then repeat with the second. Avoid unnecessarily beating the mixture once the eggs have been incorporated.
STEP 4: In another bowl, stir together the flour, baking soda, and salt. Mixing these ingredients separately helps distribute the baking soda evenly so you do not end up with cookies that rise or spread differently across the same tray.
STEP 5: Gradually add the flour mixture to the butter mixture. Fold or stir with a spatula just until you no longer see dry streaks of flour. Stop at that point rather than continuing to work the dough, since overmixing can make the cookies firmer than intended.
STEP 6: Fold in the butterscotch chips until they are distributed throughout the dough. Scoop portions measuring roughly 1 tablespoon each and arrange them about 2 inches apart on the prepared baking sheet. Leaving enough room is important because the cookies will spread as they bake.
STEP 7: Bake for 8–10 minutes. Look at the edges rather than waiting for the centers to appear completely firm. The cookies are ready when the outer edges have started turning lightly brown but the middle still looks soft. Let them rest on the baking sheet for about 5 minutes before carefully transferring them to a wire rack to finish cooling.
Recipe Tips
- Do not overbake the centers. Pull the cookies from the oven while the middle still looks soft. The residual heat from the baking sheet finishes setting them during the 5-minute rest.
- Measure brown sugar firmly. Packing the sugar into the cup gives the dough the intended balance of moisture and sweetness.
- Mix the flour gently. Once the dry ingredients are added, use only enough mixing to form a uniform dough. This helps preserve a softer cookie texture.
Can I make the cookie dough ahead of time?
Yes. You can prepare the dough in advance and keep it well covered in the refrigerator until you are ready to bake. Because chilled dough may be firmer than freshly mixed dough, allow it to soften just enough that it can be scooped cleanly before portioning onto the baking sheet.
How do I know when butterscotch cookies are finished baking?
Watch for lightly browned edges and centers that still appear somewhat soft. They should not look completely dry when they leave the oven. The 5-minute cooling period on the baking sheet is part of the baking process because the hot pan continues firming the centers without drying them out.
Why did my cookies turn out too firm?
The most common reasons are baking them too long or mixing the dough excessively after adding the flour. Start checking the cookies at the 8-minute mark, especially if your oven tends to run hot. Remove them once the edges are lightly colored rather than waiting for the whole cookie to brown.

Can I freeze butterscotch Christmas cookies?
Absolutely. Once the cookies have cooled completely, arrange them in a freezer-safe container with parchment between layers if necessary. They can be frozen for about 2–3 months. Thaw them at room temperature while covered so they gradually return to their softer texture.
Perfect Pairings
These cookies work especially well as part of a larger Christmas dessert spread. Pair them with spiced holiday cookies for contrast, since cinnamon and ginger flavors balance the sweeter butterscotch notes.
You can also serve them alongside plain sugar cookies when preparing a mixed cookie tray. The different flavors and textures make the platter feel more varied without requiring complicated desserts.
For a simple dessert, serve the cookies with vanilla ice cream. The mild vanilla flavor complements the buttery dough and sweet butterscotch chips without overwhelming them.
Keeping Leftovers Fresh
Allow the cookies to cool completely before placing them in an airtight container. Storing them while they are still warm can trap excess moisture and change their texture. At room temperature, they are best enjoyed within about 4–5 days.
If you need longer storage, freeze the fully cooled cookies in a tightly sealed freezer container or freezer bag for approximately 2–3 months. Separate layers with parchment when stacking several cookies so they are easier to remove individually.
Thaw frozen cookies at room temperature before serving. If you prefer them slightly warm, heat an individual cookie very briefly until the center softens and the butterscotch chips become a little more tender. Avoid prolonged reheating, which can dry out the soft centers.
For holiday preparation, you can bake these several days before your gathering and keep them airtight once cooled. Their simple shape, buttery base, and plentiful butterscotch chips make them especially convenient when you need a reliable cookie that travels well, fits neatly into cookie boxes, and still feels festive enough for Christmas dessert trays.
Christmas Cookies with Butterscotch
Ingredients
- 2 cups butterscotch baking chips preferably Ghirardelli for a richer flavor
- ½ teaspoon fine salt
- 1 cup butter softened
- 2 large eggs brought to room temperature
- 1 tablespoon pure vanilla extract such as McCormick
- 2¼ cups all-purpose flour
- ½ cup firmly packed brown sugar
- 1 teaspoon baking soda
- ½ cup granulated sugar
Instructions
- Preheat the oven to 350°F (175°C).
- Place the softened butter in a medium or large mixing bowl. Add the granulated sugar, packed brown sugar, and vanilla extract. Cream the ingredients together until the mixture becomes thick and thoroughly blended, scraping the sides of the bowl when necessary.
- Add the eggs individually to the creamed mixture. Stir gently after each egg until it is just incorporated before adding the next.
- In a separate bowl, thoroughly combine the all-purpose flour, baking soda, and salt so the leavening and seasoning are distributed evenly.
- Gradually incorporate the dry mixture into the wet ingredients. Use a spatula to mix by hand only until a cohesive dough forms, taking care not to overmix.
- Fold the butterscotch chips gently into the finished cookie dough with the spatula until they are evenly dispersed.
- Using a cookie scoop, measure approximately 1 tablespoon of dough per cookie. Arrange the portions on a nonstick baking sheet, leaving about 2 inches of space between each one to accommodate spreading.
- Bake for 8–10 minutes, stopping when the edges have begun to brown while the centers remain soft.
- Leave the baked cookies on the baking sheet for approximately 5 minutes so they can firm slightly. Transfer them afterward to a wire cooling rack and allow them to cool completely.