
Caramelized Onion Tartlets are buttery, savory little bites filled with deeply golden onions, creamy eggs and cream, fresh thyme, garlic, and melted Gruyère. They take a little patience, but the crisp pastry and rich onion filling make them an excellent make-ahead appetizer for holidays, parties, or relaxed gatherings.
These tartlets are especially handy when you want an appetizer that feels polished without needing complicated decorating or last-minute assembly. Most of the flavor comes from letting the onions cook slowly until their natural sweetness develops.
The homemade pastry gives each tartlet a flaky, buttery shell, while the filling stays tender and creamy in the center. Gruyère adds a pleasantly nutty flavor that works naturally with the caramelized onions and thyme.
You can also serve these warm from the oven or let them settle to room temperature, which makes them practical when you are preparing several dishes for guests.
Caramelized Onion Tartlets Ingredients
All-purpose flour: Forms the main structure of the homemade pastry and provides enough strength to hold the creamy filling.
Cornstarch: Used in both the pastry and filling. In the dough, it helps create a tender texture, while the slurry helps the filling set as the tartlets bake.
Unsalted butter: Keep the pastry butter well chilled for a flaky crust. Additional butter is used to slowly caramelize the onions.
Ice-cold water: Brings the pastry dough together while helping the butter remain cold.
Yellow onions: The heart of the filling. Thin, even slices encourage consistent caramelization and a soft final texture.
Fresh thyme: Adds a subtle herbal note that balances the sweetness of the onions.
Garlic: Gives the filling a savory background without overwhelming the caramelized onions.
Eggs: Provide structure and help the creamy filling set inside each pastry shell.
Heavy cream: Makes the filling smooth and rich while softening the texture of the baked eggs.
Gruyère cheese: Adds a savory, nutty flavor and melts throughout the onion mixture.
Salt and black pepper: Season both the onions and the finished filling.

Step-by-Step Caramelized Onion Tartlets
STEP 1: Begin with the pastry. Whisk the flour, cornstarch, and salt together in a large bowl. Add the small cubes of chilled butter and cut them into the dry ingredients with a pastry cutter or fork. Stop when the mixture resembles coarse crumbs with small pieces of butter still visible.
STEP 2: Add the ice water gradually rather than pouring it in all at once. Stir gently after each small addition and stop as soon as the dough holds together when pressed. Shape it into a disk, wrap it, and refrigerate for 30 minutes to 1 hour. Let it sit at room temperature for about 15 minutes before rolling.
STEP 3: While the dough chills, melt the butter for the filling in a heavy skillet over medium heat. Add the thinly sliced onions and cook slowly for 35 to 45 minutes. Stir frequently and adjust the heat whenever necessary. You are looking for soft onions with a deep golden color rather than quickly browned edges.
STEP 4: Once caramelized, season the onions with salt, black pepper, crushed garlic, and chopped thyme. Cook for another minute, then remove the skillet from the heat. Let the mixture cool before adding it to the egg filling so the residual heat does not begin cooking the eggs.
STEP 5: Whisk the eggs and heavy cream together in a bowl. Separately, stir the cornstarch into the cold water until completely smooth. Whisk that slurry into the egg mixture, then stir in the cooled onions and shredded Gruyère until everything is evenly distributed.
STEP 6: Heat your oven to 375°F. On a lightly floured surface, roll the chilled pastry into a circle roughly 14 inches across. Cut the dough into 3-inch rounds, rerolling the scraps gently when needed. Press each circle into a well of a mini muffin pan to create a small pastry shell.
STEP 7: Spoon about 1 tablespoon of filling into each shell, taking care not to overfill them. Bake for approximately 25 to 30 minutes, until the pastry edges are golden and the centers look completely set. Let the tartlets cool briefly in the pan before carefully lifting them out.
Perfect Pairings
A simple leafy salad with a bright, acidic dressing pairs nicely with the rich pastry and cheese. The fresh greens keep the overall meal from feeling too heavy.
For a party spread, serve the tartlets alongside fresh vegetables and a light dip. Their buttery, savory flavor also makes them a good contrast to crisp raw vegetables.
They can also accompany a warm bowl of vegetable or tomato-based soup when you want to turn the tartlets into part of a casual lunch rather than serving them strictly as an appetizer.
Why do caramelized onions take so long?
Proper caramelization happens gradually as the onions soften, release moisture, and slowly develop a deep golden color. Using excessively high heat can brown or scorch the outside before the onions become soft and sweet. Allow roughly 35 to 45 minutes and adjust the heat as necessary.
Can I prepare the pastry dough ahead?
Yes. The wrapped pastry dough can remain refrigerated for up to 3 days. Keeping it chilled is actually helpful because the butter stays firm, contributing to a flakier crust. Let the dough sit at room temperature for about 15 minutes before rolling if it becomes very firm.
Can I make these tartlets ahead of time?
You can bake the tartlets ahead and serve them at room temperature, making them convenient for entertaining. For the nicest pastry texture, avoid leaving them uncovered for a long period. They can also be gently reheated before serving when you prefer them warm.
How do I keep onions from burning?
Keep the skillet around medium heat and stir regularly, particularly as the onions become darker. When you notice dry spots or onions sticking before they are fully caramelized, lower the heat. A small splash of water can loosen browned bits and slow scorching without interfering with the final flavor.
How do I know when the tartlets are done?
Look for pastry edges that have turned golden and centers that appear set rather than wet or liquid. The filling should remain tender, but it should not jiggle excessively when the pan is moved. Depending on your oven and pan, this usually takes about 25 to 30 minutes at 375°F.
Helpful Tips
- Keep the pastry butter and water as cold as possible. Small pieces of chilled butter in the dough help create the flaky texture you want once the tartlets hit the hot oven.
- Give the onions enough time. Trying to speed up caramelization with high heat increases the chance of burnt onions instead of the soft, deeply golden result that gives these tartlets their signature flavor.
- Cool the onion mixture before combining it with the eggs and cream. Hot onions can begin setting the eggs before the filling reaches the pastry shells.

Keeping Leftovers Fresh
Once the tartlets have cooled completely, transfer leftovers to an airtight container and refrigerate them. They are best enjoyed within about 3 to 4 days.
For longer storage, the baked tartlets can be frozen after cooling. Arrange them in a freezer-safe container with parchment between layers when necessary and freeze for up to about 2 months. Thaw them in the refrigerator before reheating.
For the best texture, reheat refrigerated tartlets in a moderate oven until the filling is warmed through and the pastry becomes crisp again. An air fryer can also work well for small batches. Microwave reheating is possible, but it tends to soften the buttery pastry.
Serve the tartlets warm when you want the Gruyère at its most aromatic and the pastry freshly crisp, or let them come closer to room temperature for an appetizer that can sit comfortably on a party table. Either way, the combination of slow-cooked onions, thyme, flaky pastry, and nutty cheese makes these small savory tartlets feel substantial enough for special occasions while remaining practical for everyday entertaining.
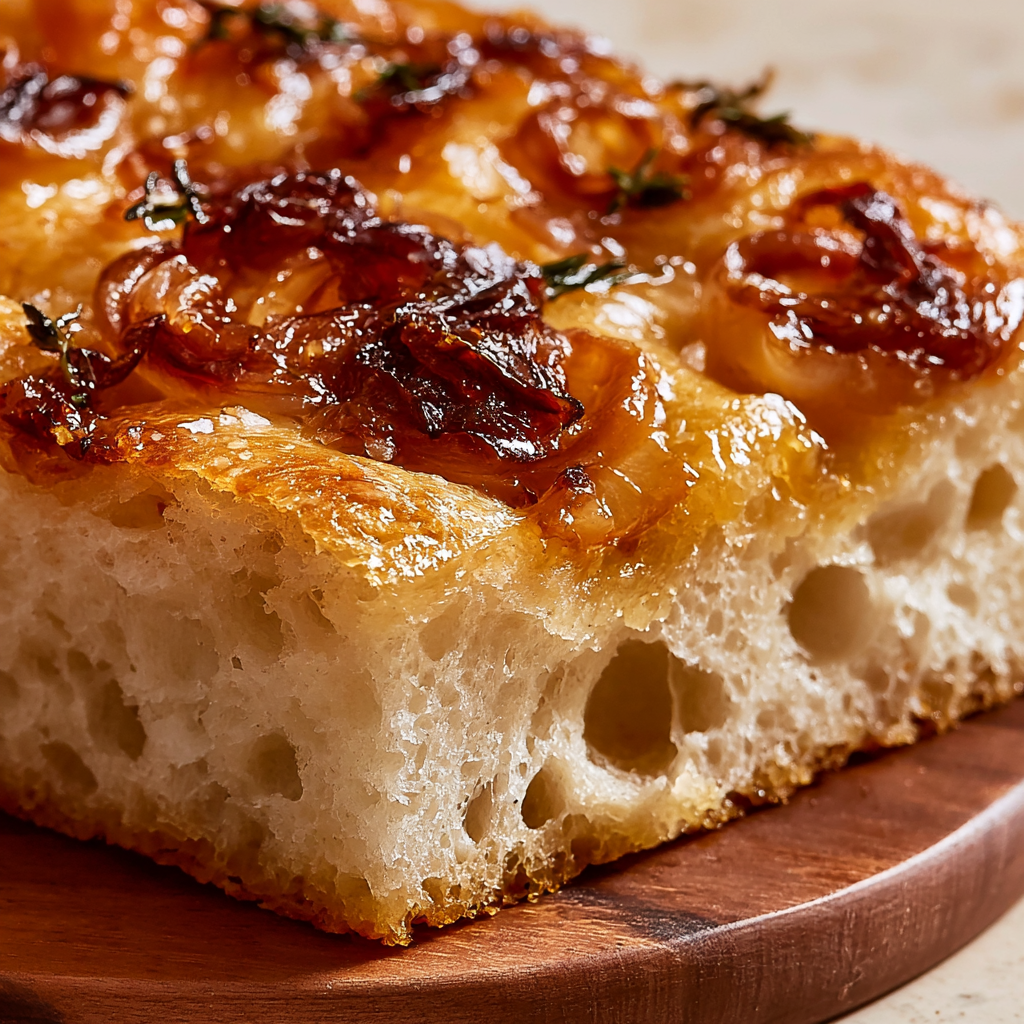
Caramelized Onion Focaccia
Ingredients
For the Caramelized Onions
- 4 cups yellow onions chopped, from approximately 2 large onions
- 2 tablespoons finely chopped fresh thyme
- 1 tablespoon salted butter
- ¼ cup water
- 2 tablespoons flavorful good-quality olive oil
For the Focaccia Dough
- 1¼ cups warm water between 105°F and 115°F
- ¼ cup Parmesan cheese finely shredded
- 2 teaspoons instant yeast
- 2 tablespoons olive oil
- ¾ teaspoon salt
- 1 tablespoon granulated sugar
- 2½ cups all-purpose flour
- Additional olive oil as needed for greasing
For the Garlic Oil and Topping
- 3 fresh garlic cloves crushed
- 1 to 2 tablespoons fresh thyme leaves
- ¼ cup olive oil
- Flaky sea salt optional
- Additional fresh thyme optional
Instructions
- Melt the salted butter with 2 tablespoons of olive oil in a large skillet over medium heat. Add the chopped onions, pour in ¼ cup water, and cover the skillet. Cook for approximately 5 minutes, or until the onions begin to soften.
- Remove the lid and lower the heat to medium-low. Continue cooking the onions for about 1 hour, stirring frequently to prevent scorching, until they become deeply browned, soft, and richly caramelized. Transfer them to a bowl and fold in 2 tablespoons of chopped fresh thyme.
- Place the all-purpose flour, warm water, shredded Parmesan, 2 tablespoons of olive oil, sugar, instant yeast, and salt in a large mixing bowl. Stir thoroughly with a wooden spoon until no dry flour remains and a cohesive, sticky dough forms.
- Lightly coat a clean large bowl and your hands with olive oil. Transfer the dough to the prepared bowl, cover it securely with plastic wrap, and leave it in a warm location for approximately 1 hour, or until it has doubled in volume.
- While the dough rises, warm ¼ cup olive oil in a skillet and add the crushed garlic cloves. Cook gently for about 5 minutes, just until the garlic becomes fragrant and begins to brown. Remove and discard the cloves before they darken further, then allow the infused oil to cool.
- Preheat the oven to 425°F (220°C). Pour half of the cooled garlic oil into an unlined 9 × 9-inch metal baking pan, spreading it across the base.
- Once the dough has doubled, lightly oil your hands. Lift the upper edge of the dough, stretch it upward, and fold it back over the center. Repeat this stretching and folding action with the remaining three sides.
- Place the folded dough seam-side down in the prepared pan. Cover the pan with plastic wrap and let the dough rise in a warm area for approximately 1 hour, until doubled, visibly airy, and nearly expanded to the edges of the pan.
- Dimple, season, and bake. After the second rise, pour the remaining garlic-infused oil evenly over the bubbly dough. Press your fingertips vertically and firmly into the surface to form pronounced dimples. Scatter 1 to 2 tablespoons of fresh thyme over the top.
- Bake for 12 to 18 minutes, until the focaccia is evenly golden brown and its internal temperature reaches at least 190°F (88°C).
- Immediately after removing the bread from the oven, distribute the prepared caramelized onions across the surface. Place the pan on a wire rack and allow the focaccia to cool.
- Once cooled sufficiently for slicing, garnish with flaky sea salt and additional fresh thyme, if desired. Cut into portions and serve.