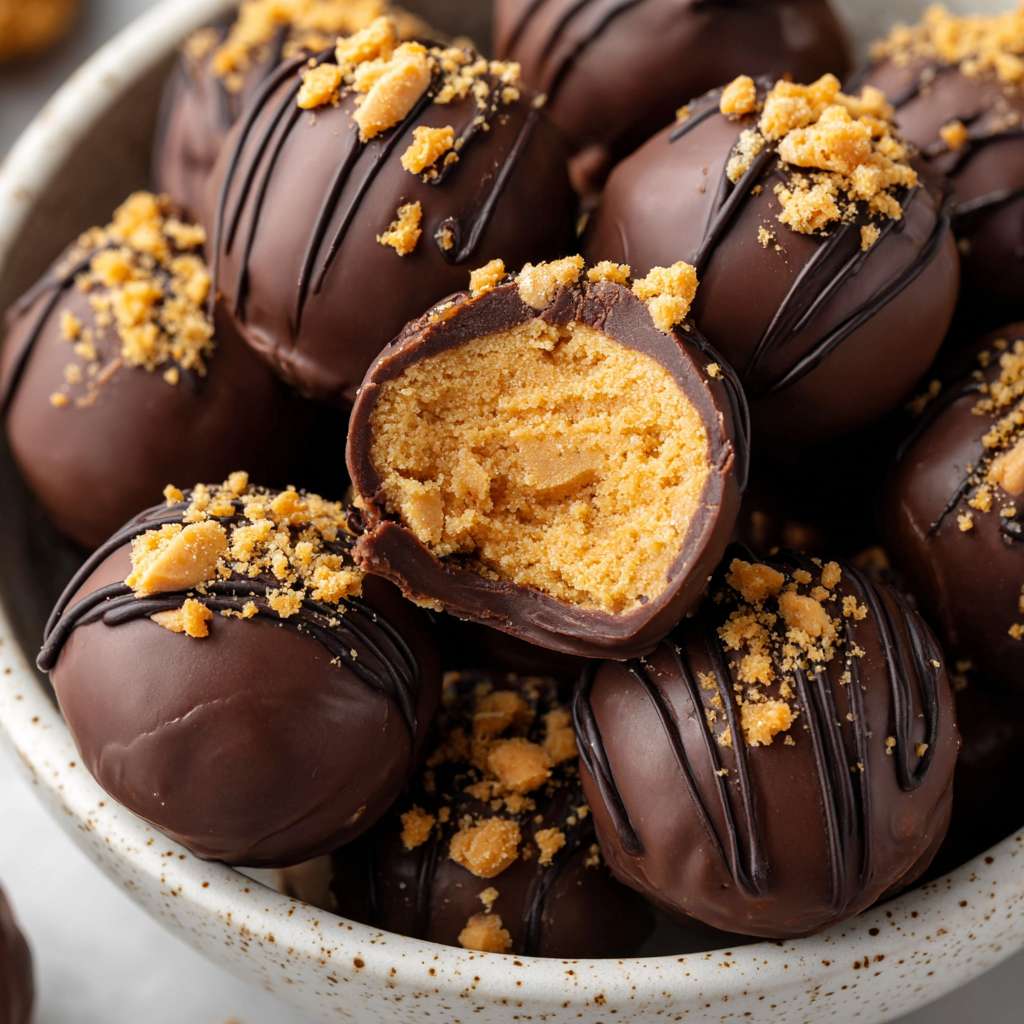
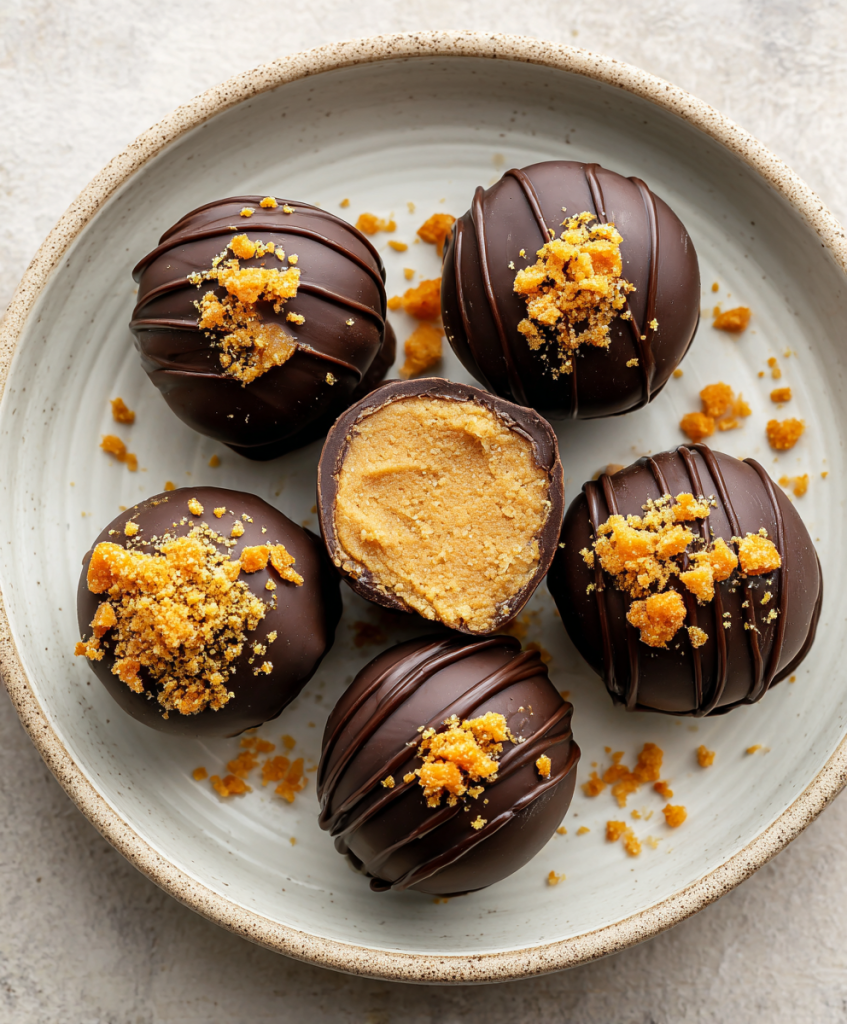
Peanut Butter Candy Balls—crunchy, creamy bites coated in chocolate with graham cracker crunch—perfect for holidays, parties, and gifting.
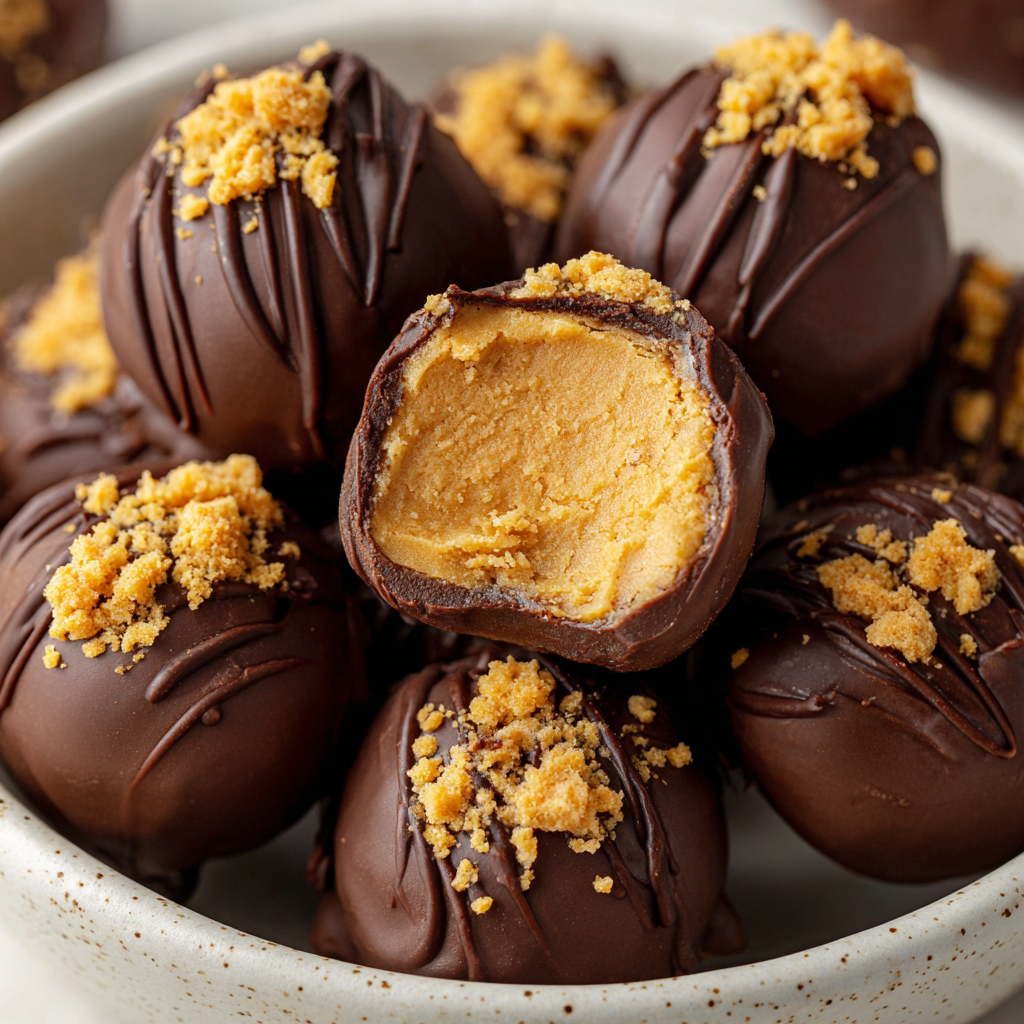
There’s something wildly satisfying about a no-bake treat that tastes like a truffle but comes together with pantry staples. These bite-size beauties mix creamy peanut butter with graham crumbs and crisp candy pieces, then take a quick dip in melted chocolate for a glossy shell.
You’ll shape, chill, and dunk—no candy thermometer required. The texture lands between a buckeye and a cookie dough truffle: tender inside, snappy outside, with toasty notes from the crumbs and tiny pops of candy crunch. Make a double batch; they vanish fast.
What You Need to Make These Peanut Butter Candy Balls
- Creamy peanut butter (shelf-stable) — The base flavor and binder; avoid natural styles, which separate and make dipping harder.
- Unsalted butter (softened) — Adds richness and helps the centers set pleasantly firm in the fridge.
- Vanilla extract — Rounds out peanut butter’s salty-sweet depth.
- Powdered sugar — Sweetens while keeping the mixture smooth and scoopable.
- Graham cracker crumbs — A subtle toastiness and gentle structure so the balls hold shape.
- Crisp peanut-toffee candy, crushed — Flecks of crunchy sweetness throughout; chop finely for clean slices.
- Chocolate for coating — Chocolate bark or melting wafers set shiny without tempering; chocolate chips work too with gentle handling.
- Toppings (optional) — Extra crushed candy, festive sprinkles, or a pinch of flaky salt for contrast and sparkle.
Cooking Steps
STEP 1: Line a large baking sheet with parchment. In a medium bowl, beat creamy peanut butter and softened butter on medium speed until smooth and unified, scraping the bowl once so no streaks remain.
STEP 2: Mix in vanilla. With the mixer on low, add powdered sugar in two or three additions until the mixture turns thick, matte, and scoopable.
STEP 3: Stir in graham cracker crumbs and finely crushed candy until evenly dispersed. The mixture should feel firm enough to roll without sticking to your palms; if soft, add a spoonful more crumbs.
STEP 4: Scoop 1 to 1½ tablespoons per piece, roll into smooth balls, and place on the parchment-lined sheet with a little space between each.
STEP 5: Freeze until solid to the touch, about 30 minutes. This chill step keeps the centers from sliding off their chocolate coats and helps maintain a round shape.
STEP 6: Melt coating chocolate in a microwave-safe bowl at 50% power in 30-second intervals, stirring between bursts until mostly melted; remove and stir until completely glossy. Avoid overheating, which can thicken or scorch the chocolate.
STEP 7: Working in batches, dip each chilled ball using a fork or skewer, letting excess chocolate drip back into the bowl. Set on fresh parchment and, if desired, sprinkle immediately with crushed candy, sprinkles, or flaky salt so toppings adhere.
STEP 8: Let the chocolate set at cool room temperature or refrigerate briefly to speed it up. Once firm, transfer to an airtight container and keep chilled until serving.
Can I use natural peanut butter?
Natural peanut butter separates and runs oily, loosening the mixture and causing cracks during dipping. For consistent results, use regular shelf-stable creamy peanut butter. If using natural, add extra graham crumbs, mix and chill longer until the balls feel firm.
What candy bars can I substitute?
Any crisp, flaky peanut-toffee candy works nicely. Try chopped peanut crisp bars, chocolate-covered toffee, or crunchy wafer bars for texture. Avoid gooey caramel centers, which leak into the mixture. Finely chop add-ins so the balls hold together and slice cleanly.
Do I need to temper the chocolate?
Tempering isn’t required if you use confectionery coating or chocolate bark; it sets shiny and firm. For real chocolate, tempering prevents streaks and bloom. Alternatively, dip, then refrigerate briefly, understanding the finish may scuff but still tastes wonderful and crisp.
How do I prevent flat bottoms or cracks?
Chill thoroughly before dipping, and work in small batches so balls stay firm. Use two forks to roll gently without squeezing. Let excess chocolate drip before setting on parchment. If flat spots appear, re-dip bases or decorate with extra crumbs.
Can I freeze Peanut Butter Candy Balls?
Yes. Freeze on a parchment-lined tray until solid, then pack airtight up to two months. Thaw in the refrigerator to minimize condensation. For best shine, unwrap after thawing so surface moisture can evaporate before serving or boxing for gifts nicely.
Helpful Tips
- Flavor bloom: Rub a pinch of graham crumbs into the crushed candy before stirring in; it distributes flavor and reduces sharp shards for smoother rolling.
- Neat dips: Keep hands off once dipped—nudge with a fork, tap gently to shed excess, and slide onto parchment with a toothpick to avoid tails.
- Picture-perfect finish: If lines from the fork remain, swirl a tiny offset spatula over the tops while the chocolate is still fluid for a professional sheen.
Serving Ideas for Peanut Butter Candy Balls
Keep things bite-size forward by pairing these candies with contrast and freshness. A citrus fruit platter (orange segments or clementines) brightens their richness. A small salted pretzel bowl adds craveable crunch. Or set out vanilla ice cream and crown scoops with two candies.
Storage & Reheating
These are happiest chilled. Refrigerate in an airtight container for up to 1 week, layering parchment between tiers so tops stay pristine. For longer keeping, freeze on a sheet until solid, then bag airtight up to 2 months. To serve from frozen, thaw in the refrigerator to minimize condensation, then let stand 5–10 minutes at room temperature for the chocolate to soften slightly. There’s no reheating here—just a quick chill if your kitchen is warm. If surface bloom appears after storage, it’s cosmetic only; a light, fresh drizzle or a dusting of extra crumbs restores shine and charm.

Peanut Butter Candy Balls
Ingredients
- ½ cup finely chopped Butterfinger candy pieces
- 1 teaspoon pure vanilla extract
- 4 tablespoons of unsalted butter softened to room temperature
- 1 cup of silky standard commercial peanut butter (avoid natural varieties)
- 1 cup of sifted confectioners’ sugar
- ¾ cup of crushed graham cracker crumbs
- 8 ounces of melting chocolate bark or semi-sweet chocolate chips
- Optional toppings: extra Butterfinger crumbles coarse sea salt, or festive sprinkles
Instructions
- Combine the peanut butter and softened butter in a medium mixing bowl. Using an electric hand mixer set to medium speed, beat the mixture until uniformly smooth and incorporated.
- Pour in the vanilla extract and mix briefly until well blended.
- Gradually incorporate the powdered sugar in portions, beating on low speed after each addition. Pause occasionally to scrape down the sides of the bowl to ensure even mixing.
- Fold in the crushed graham cracker crumbs and the chopped Butterfinger bits until fully integrated into the dough.
- Line a baking sheet with parchment paper. Scoop out portions of the mixture—approximately 1 to 1½ tablespoons each—and roll them between your palms to form compact, uniform balls. Arrange them evenly on the prepared tray.
- Transfer the tray to the freezer and chill the balls for approximately 30 minutes, or until they are firm to the touch.
Melting the Chocolate
- Place the chocolate bark or chips in a microwave-safe bowl. Heat in the microwave in 30-second intervals at 50% power, stirring between each interval. Stop heating once small pieces remain and stir gently until completely melted and smooth.
- Dip each chilled peanut butter ball into the melted chocolate, ensuring even coverage. You may choose to fully coat each ball or leave a small section exposed for a two-tone effect.
- Immediately sprinkle with additional Butterfinger crumbs, decorative sprinkles, or a pinch of flaky salt before the coating sets.
- Allow the chocolate shell to firm up completely before serving or storing.