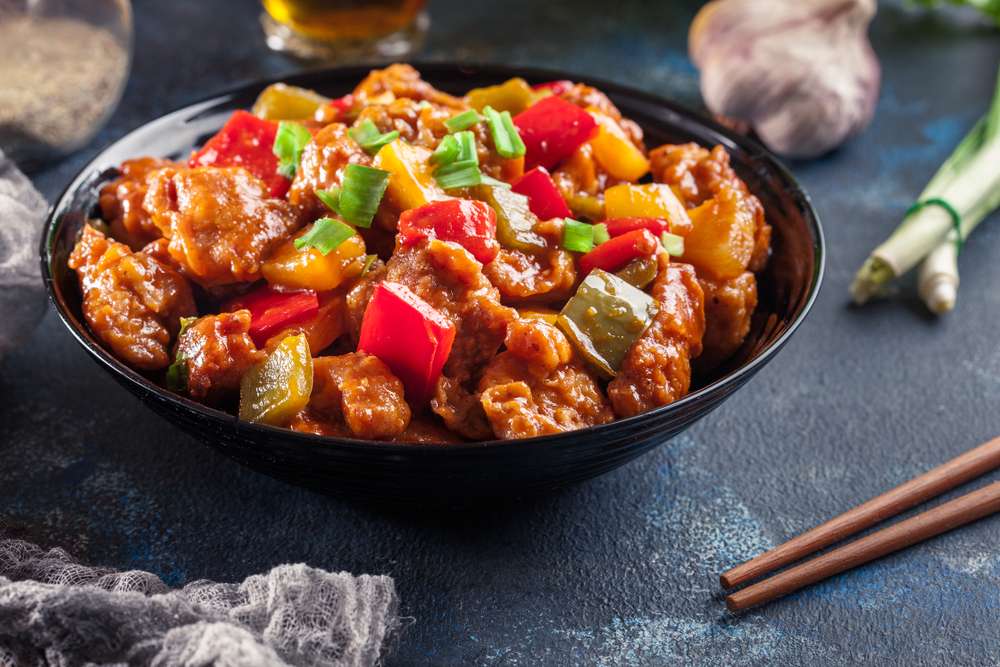
Crispy baked sweet and sour chicken with glossy pineapple-pepper sauce—lighter takeout vibes with full restaurant flavor.
This pan-to-oven method gives you golden edges without deep frying, then finishes everything in a sticky-tangy sauce that clings to every bite. The secret is balance: less sugar than most versions, plus a trio of pantry boosters—Worcestershire, soy, and oyster sauce—for that unmistakable “real” sweet-and-sour taste. Pineapple pieces and bell peppers keep it bright; quick baking keeps the chicken juicy.
You’ll flash-sear the cornstarch-coated chicken for crunch, slide it into the oven to finish, and build the sauce while it bakes. When the chicken comes out, it dives straight into a skillet of bubbling, syrupy glaze. Serve it immediately over hot rice so the exterior stays crisp and the sauce stays glossy. It’s a weeknight win that eats like Friday takeout.
What You Need to Make This Sweet & Sour Chicken
- Chicken breast, cubed — Tender, lean base that drinks in the tangy glaze without drying out.
- Egg — Light binder so the cornstarch clings and crisps.
- Cornstarch — Ultra-crisp coating and later, a quick thickener for that lacquered finish.
- Neutral oil — Brief sear for color and texture before baking.
- Onion — Softens and sweetens, building a savory backbone for the sauce.
- Red & green bell peppers — Classic crunch and color; they stay vibrant with a short sauté.
- Garlic — Aromatic punch that rounds out the sauce.
- Pineapple pieces + a splash of juice — Fruity pops in the pan and gentle acidity for balance.
- Sugar — Just enough sweetness to counter the vinegar—think tangy, not candy.
- Apple cider vinegar — Bright, clean acidity that defines the style.
- Ketchup — Tomato depth and color without heaviness.
- Worcestershire sauce — Savory, slightly funky complexity (a little goes far).
- Soy sauce — Umami and salt for a rounded, restaurant-style finish.
- Oyster sauce — Gloss and depth; the quiet game-changer in the mix.
- Salt & black pepper — Season in layers so the flavors pop.
- Scallions (optional) — Fresh, green finish.
- Steamed rice or cauliflower rice — Ideal bed to catch extra sauce.
Step-by-Step Baked Sweet & Sour Chicken
<p>1) Prep & coat: Pat chicken dry. Season with a little salt, then toss with beaten egg just to coat. Let excess drip off. Drop pieces into a bag or bowl of cornstarch and shake until every surface looks snowy.</p> <p>2) Sear fast: Heat a thin film of oil in a large skillet over high heat. Brown the chicken in one or two batches for about 2 minutes, turning to get light golden spots. The centers should still be raw—oven time will finish them.</p> <p>3) Bake to finish: Transfer chicken to a sprayed sheet pan, mist the tops with a little oil, and bake at 390–400°F (200°C) for 15–20 minutes until cooked through and crisped at the edges.</p> <p>4) Start the aromatics: Wipe the skillet. Add a drizzle of oil over medium-high heat, sauté garlic 20 seconds, then onions 2 minutes until glossy. Toss in bell peppers for 1 minute so they stay bright and snappy.</p> <p>5) Build the sauce: Stir in sugar, apple cider vinegar, pineapple juice, ketchup, Worcestershire, soy, and oyster sauce. Bring to a lively bubble, whisk in a quick cornstarch slurry (cornstarch + cold water) and simmer, stirring, until thick and syrupy—about 3 minutes.</p> <p>6) Finish with fruit: Stir in pineapple pieces just to warm through so they stay juicy and intact.</p> <p>7) Coat & serve: Add the hot, baked chicken to the bubbling sauce and toss until every piece shines. Plate over steamed rice, scatter scallions if you like, and get it to the table while the glaze is glossy.</p>
Can I air-fry the chicken instead of baking?
Yes. After the quick stovetop sear (or even without searing), air-fry at 390°F (200°C) for 8–10 minutes, shaking once, until cooked through and crisp. Toss in the hot sauce right before serving.
How do I keep the coating crisp after saucing?
Reduce the sauce to a thick syrup first, then toss chicken in the skillet off the heat and serve immediately. Avoid covering the pan; trapped steam softens the crust fast.

Can I make this gluten-free?
Use tamari or certified GF soy sauce, a GF oyster sauce (or extra tamari), and check your Worcestershire brand. Cornstarch is naturally gluten-free; the rest of the ingredients are typically safe.
Pro Tips for Sweet-and-Sour Success
- Dry, then coat. Moisture kills crisp; blot chicken well and let excess egg drip before cornstarch.
- Sauce sheen matters. Simmer until it ribbons off a spoon; too thin will sog the crust, too thick turns gloopy.
- Hot to table. Time your rice so the chicken hits plates the moment it’s sauced for best crunch.
What to Serve with Sweet & Sour Chicken
- Steamed jasmine rice or fried rice to soak up extra glaze.
- Garlic-ginger sautéed greens (bok choy, broccoli, or green beans) for freshness and snap.
- Cucumber salad with rice vinegar to cool the palate and add crunch.
Storage & Reheating
Leftovers keep up to 3 days in the refrigerator. The coating will soften, but you can revive it: reheat chicken on a rack over a sheet pan at 425°F (220°C) for 8–10 minutes, then re-warm sauce separately and toss to coat. For make-ahead, bake and chill the chicken and store the cooled sauce separately. Re-crisp the chicken in a hot oven or air fryer, reheat the sauce until glossy, then combine.
Baked Sweet and Sour Chicken
Ingredients
For the Chicken
- 500 grams approximately 1 pound boneless chicken breast, diced into small chunks
- 1 large egg or two smaller eggs, whisked until smooth
- 1 cup of corn flour cornstarch, placed into a large resealable plastic bag
- Between 3 and 5 tablespoons of neutral oil such as canola or vegetable oil
- Cooking spray for coating
- ½ teaspoon fine salt
For the Stir-Fry Base
- ½ tablespoon cooking oil
- 1 clove garlic minced finely
- 1 small onion chopped into large square pieces
- ½ of a red bell pepper cut into bite-sized chunks
- ½ of a green bell pepper cut into bite-sized chunks
- One 250g 8 oz tin of pineapple chunks in natural juice, drained (reserve juice separately)
For the Sweet and Sour Sauce
- ⅓ cup of apple cider vinegar
- ½ cup granulated sugar white or light brown, either works
- 3 tablespoons tomato ketchup or tomato sauce if in Australia
- 2 to 3 tablespoons of the reserved pineapple juice
- 1 teaspoon soy sauce
- 1 teaspoon Worcestershire sauce
- 1 teaspoon oyster sauce
- ¼ teaspoon salt
To Thicken the Sauce
- 1 tablespoon cornflour cornstarch blended with 4 tablespoons cold water
Instructions
- Preheat your oven to 200°C (390°F).
- Place the chicken pieces in a bowl, sprinkle with salt, and pour in the beaten egg. Stir to ensure each piece is coated thoroughly. Allow any excess egg to drain away.
- Transfer the egg-coated chicken, a handful at a time, into the prepared bag of cornflour. Shake the bag well to coat the chicken evenly. Try to trap air inside the bag to create a balloon effect for better coating. Once coated, discard any remaining cornflour.
- Heat oil in a large frying pan over high heat. Working in batches if necessary, briefly sear the chicken pieces for about 2 minutes, turning to develop a light golden crust. The interior should remain raw at this stage.
- Move the chicken to a baking sheet in a single layer. Lightly spray with cooking oil and place in the oven. Bake for 15–20 minutes, or until the coating becomes crisp and golden.
- While the chicken bakes, discard any leftover oil from the pan and wipe clean with paper towels. Set the pan over medium-high heat and add ½ tablespoon of oil. Sauté the garlic for 20 seconds.
- Add the chopped onion and cook for approximately 2 minutes until slightly softened. Introduce the bell pepper pieces and cook for another minute.
- Pour in the sauce mixture ingredients: vinegar, sugar, ketchup, pineapple juice, soy sauce, Worcestershire sauce, oyster sauce, and salt. Stir well until the sugar dissolves and the sauce begins to simmer.
- Add the prepared cornflour slurry to the sauce, stirring continuously as it thickens into a syrup-like consistency—this should take around 3 minutes.
- Stir in the pineapple chunks just until warmed through. Remove the pan from heat.
- Once the chicken is crisp and ready, add it directly into the pan with the sauce. Toss gently to ensure every piece is coated evenly.
- Serve hot alongside steamed rice, or opt for cauliflower rice as a lighter alternative. Garnish with sliced scallions if desired.
Notes
- The soy sauce, oyster sauce, and Worcestershire sauce work together to create a sauce profile closely resembling what is served in many Chinese eateries. While omitting one can be acceptable (increase the other two slightly to compensate), leaving out all three will result in a noticeably bland flavor.
- When draining excess egg from the chicken, you can simply use your hand to block the pieces from falling out while tipping the bowl.
- Nutritional estimates account for about 1 tablespoon of oil being discarded during cooking and assume the recipe is divided into 4 portions.