
Amish White Bread is a soft, lightly sweet homemade loaf with a tender crumb, golden crust, and simple pantry ingredients. Two rises give it dependable structure, while a buttery finish keeps the top soft and flavorful.
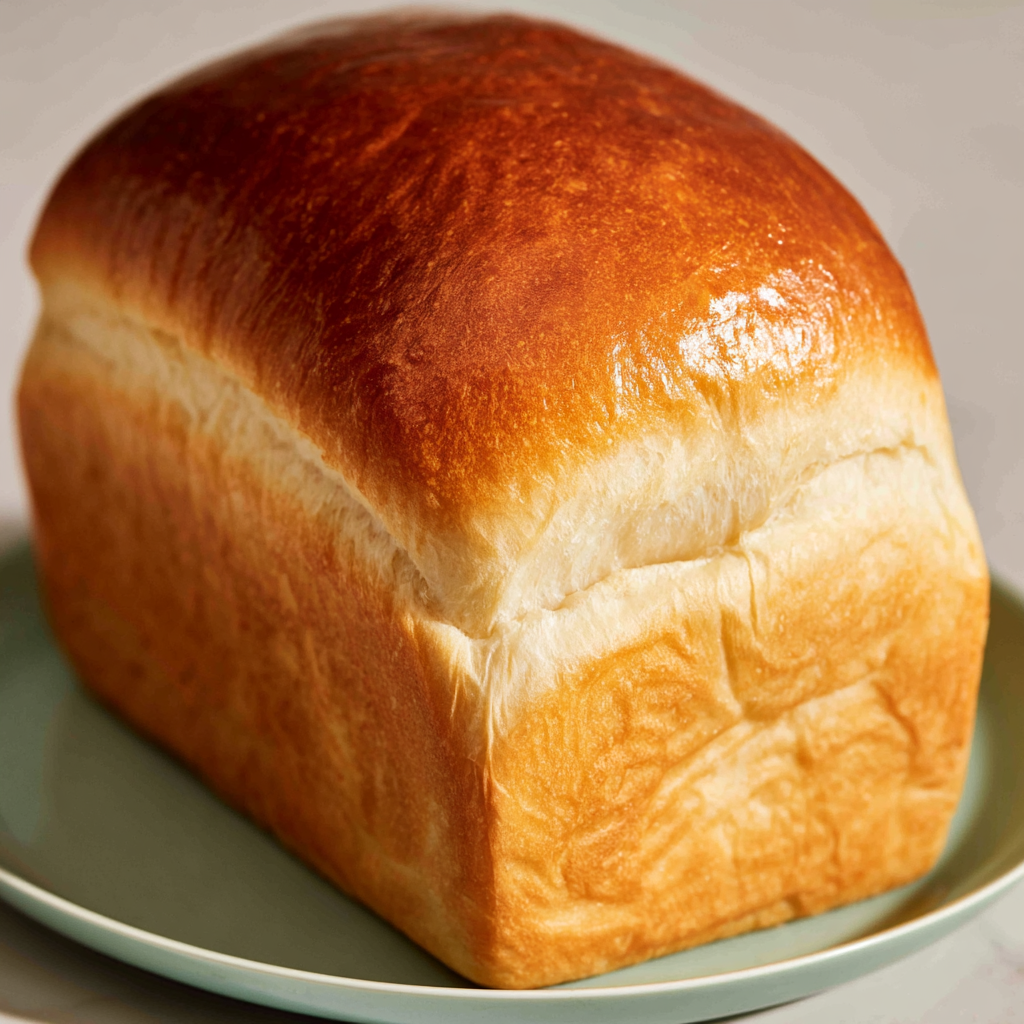
This is the kind of bread that works beautifully for everyday meals. The touch of sugar gives the loaf its characteristic mild sweetness without turning it into dessert bread, and the combination of canola oil and a brushed butter finish keeps every slice pleasantly tender.
The process is also approachable if you are still getting comfortable with yeast dough. Giving the yeast time to activate, kneading until the dough becomes elastic, and allowing both rises to finish properly make a noticeable difference in the final texture.
Once baked and cooled, the loaf slices neatly enough for sandwiches but stays soft enough for toast, breakfast, or simply serving alongside dinner with a little butter.
Amish White Bread Ingredients
All-purpose flour: Provides the gluten structure needed for a loaf that rises well while maintaining a soft, tender interior.
Warm water: Hydrates the flour and creates the warm environment needed to activate the yeast. Aim for about 110 to 120°F.
Instant yeast: Gives the dough its rise and creates the light structure inside the finished loaf.
Granulated sugar: Adds the gentle sweetness associated with this style of white bread while also helping support yeast activity.
Canola oil: Adds moisture and tenderness without giving the bread a strong flavor.
Salt: Balances the sweetness and strengthens the overall flavor of the dough.
Unsalted butter: Brushed over the freshly baked loaf to soften the crust and create a rich, lightly glossy finish.
Cooking Steps
STEP 1: Pour the warm water into a large mixing bowl and stir in the sugar and yeast. Leave the mixture undisturbed for about 10 minutes. You should see foam developing across the surface, which is a useful sign that the yeast is active.
STEP 2: Add the flour and salt to the bowl of a stand mixer fitted with a dough hook. Pour in the yeast mixture and canola oil. Mix on low speed just until the ingredients form a rough dough, then increase to medium speed and knead for about 10 minutes.
STEP 3: Continue kneading until the dough looks smooth, elastic, and begins pulling away cleanly from the sides of the bowl. Shape it into a ball and place it in a lightly greased bowl, turning once so the surface receives a thin coating of oil.
STEP 4: Cover the bowl and let the dough rise at room temperature for 60 to 90 minutes, or until approximately doubled in size. A gentle finger press should leave an indentation that slowly springs back partway rather than disappearing immediately.
STEP 5: Transfer the risen dough to a lightly floured surface and gently shape it into a compact loaf. Place it in a greased loaf pan, cover loosely, and let it rise again for 50 to 60 minutes. The dough should eventually extend slightly above the rim. Preheat the oven to 350°F during the latter portion of this rise.
STEP 6: Bake the loaf for 25 to 30 minutes, until the top is evenly golden brown. If the surface is browning faster than the center is baking, tent it loosely with aluminum foil for the remaining baking time.
STEP 7: Remove the loaf from the oven and immediately brush the top with the melted butter. Let it rest in the pan for about 10 minutes before carefully transferring it to a wire rack. Cool completely before slicing for the cleanest, softest crumb.

Helpful Tips
- Check your water temperature. Water around 110 to 120°F creates a reliable environment for the yeast. Water that is excessively hot can damage it, while cool water may make the dough rise considerably more slowly.
- Use the dough rather than the clock as your guide. Kitchen temperatures vary, so the first rise may take closer to 60 minutes in a warm room or 90 minutes in a cooler one.
- Resist slicing immediately. Fresh bread smells tempting straight from the oven, but cooling allows the interior structure to finish setting. Cutting too soon can compress the soft crumb.
Why isn’t my bread rising?
Start by checking the yeast and the temperature of your water. Yeast that is old or exposed to excessively hot water may not activate properly. A cool kitchen can also slow fermentation considerably, so give the dough additional time if necessary rather than assuming it has failed.
Can I knead the dough by hand?
Yes. A stand mixer makes the process convenient, but the dough can be kneaded manually on a lightly floured work surface. Expect to knead for roughly 10 to 15 minutes, working until the dough feels smooth and elastic instead of rough and sticky.
Avoid adding large amounts of extra flour while kneading because too much flour can make the finished loaf heavier and drier.
How do I know when the loaf is fully baked?
The crust should be nicely golden and the loaf should sound hollow when gently tapped after it is removed from the pan. If you prefer a more precise check, properly baked yeast bread generally has a well-set interior rather than a damp or gummy center.
If the crust becomes dark before the loaf seems finished, loosely cover it with foil and continue baking.

Can I reduce the sugar?
You can reduce the sugar somewhat, but doing so will change the characteristic flavor of the loaf. The sugar contributes both sweetness and browning, so a significantly smaller amount will produce bread that tastes more like a standard white sandwich loaf.
For the intended Amish-inspired flavor and soft texture, using the listed amount gives the most predictable result.
Perfect Pairings
A thick slice of this soft bread is particularly good toasted and spread with butter or fruit preserves for breakfast. Because its sweetness is gentle rather than overpowering, it also works well with savory foods.
For lunch, use the cooled loaf for sandwiches with sliced turkey, chicken, cheese, or other simple fillings. The tender crumb makes it especially useful when you want a softer alternative to rustic artisan bread.
At dinner, serve warm slices with comforting dishes such as soup, stew, pot roast, or a creamy casserole. A little butter is usually all it needs.
Can I freeze homemade white bread?
Yes. Allow the loaf to cool completely before freezing so trapped steam does not turn into excess moisture inside the packaging. You can freeze the loaf whole or slice it first if you want to remove individual portions as needed.
Sliced bread is especially convenient because pieces can go directly from the freezer into a toaster.
How to Store & Reheat
Keep the completely cooled loaf tightly wrapped or in an airtight bread container at room temperature for about 3 to 4 days. Avoid refrigerating it unless necessary, since refrigeration can make bread become stale more quickly.
For longer storage, wrap the cooled bread securely and freeze it for up to about 3 months. If freezing an entire loaf, thaw it at room temperature while still wrapped. This helps prevent the surface from drying out as it comes back to room temperature.
Individual frozen slices can be toasted directly from frozen. To refresh several slices at once, warm them briefly in a low oven until soft and pleasantly warm.
The butter-brushed crust should remain relatively tender rather than crisp, making this loaf especially useful for sandwiches and toast throughout the next few days. Once you have the proofing and kneading cues down, it is a straightforward homemade bread that fits easily into regular baking.
Amish White Bread
Ingredients
For the Bread Dough:
- 1/3 cup granulated sugar
- 2 tablespoons canola oil
- 3/4 teaspoon salt
- 1 packet instant yeast approximately 2 1/4 teaspoons, preferably used before its expiration date
- 1 cup warm water maintained between 110–120°F
- 3 cups all-purpose flour with King Arthur flour preferred for consistent results
For the Butter Finish:
- 2 tablespoons unsalted butter melted and allowed to cool slightly
Instructions
- Pour the warm water into a mixing bowl, then add the sugar and instant yeast. Stir to combine and leave the mixture undisturbed for 10 minutes. A layer of foam should develop across the surface, indicating that the yeast is active. For reliable results, verify that the water measures between 110–120°F; excessively cool water can slow activation, while overly hot water may damage the yeast.
- Add the all-purpose flour and salt to the bowl of a stand mixer fitted with a dough hook. Pour in the activated yeast mixture along with the canola oil. Mix at low speed until the ingredients come together into a rough, shaggy dough.
- Increase the mixer to medium speed and knead for approximately 10 minutes. Continue until the dough appears smooth and elastic and begins pulling cleanly away from the sides of the bowl. Adequate kneading develops the gluten structure responsible for the bread’s soft, tender crumb.
- Form the kneaded dough into a smooth ball. Transfer it to a lightly greased bowl and turn the dough once so that its entire surface receives a thin coating of oil. Cover the bowl with plastic wrap or a clean kitchen towel.
- Allow the dough to rise at room temperature for 60–90 minutes, or until it has approximately doubled in volume. To check the proof, gently press two fingers into the surface. The dough is appropriately risen when the impressions slowly recover about halfway.
- Carefully transfer the risen dough to a lightly floured work surface. Shape it gently into a loaf-shaped log sized to fit snugly inside a greased loaf pan.
- Place the shaped dough into the prepared pan and cover it loosely with a clean kitchen towel. Allow it to rise for another 50–60 minutes, until the dough extends slightly above the rim of the pan.
- Approximately halfway through the second rise, preheat the oven to 350°F so it is fully heated when the loaf is ready for baking.
- Transfer the risen loaf to the preheated 350°F oven. Bake for 25–30 minutes, until the surface becomes golden brown and the loaf produces a hollow sound when tapped on the bottom.
- If the crust begins darkening too rapidly, loosely cover the top with aluminum foil during the latter portion of baking.
- Remove the finished loaf from the oven and immediately brush the surface with the melted, slightly cooled unsalted butter.
- Leave the bread in its pan for 10 minutes to allow its structure to firm sufficiently for removal. Turn the loaf out onto a wire rack and allow it to cool completely before slicing.