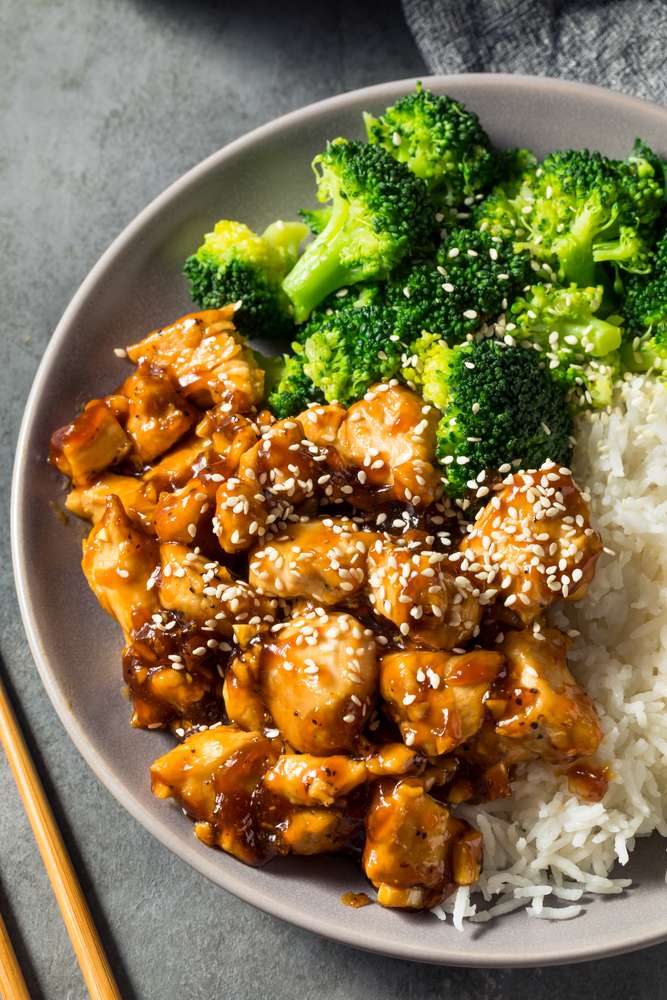
Teriyaki Chicken is the weeknight hero. Juicy bite-size pieces sear until golden, then glaze in a glossy, from-scratch sauce that nails sweet-savory balance.

In under 30 minutes, you’ll have tender chicken with a lacquered finish perfect over steamed rice, showered with scallions and sesame. It’s simple, fast, and absolutely better than takeout.
Brown sugar, soy sauce, mirin, fresh ginger, and garlic build a silky sauce that clings without being heavy. A quick cornstarch slurry keeps it light.
Lightly dusted chicken bites cook hot and quick in a splash of oil, then the sauce bubbles to a sheen. Finish with sesame seeds and sliced scallions for crunch and color.
Ingredients for Teriyaki Chicken, Simplified
- Chicken breasts – lean, quick-cooking protein that stays tender in bite-size pieces.
- Cornstarch – creates a light velvet crust on the chicken and helps the sauce thicken glossy.
- Soy sauce – the savory backbone; regular or low-sodium both work.
- Brown sugar – caramel sweetness that balances salinity and adds shine.
- Mirin – gentle sweetness and a touch of umami for a restaurant-style glaze.
- Fresh ginger – warm, zesty lift that keeps the sauce lively.
- Garlic – aromatic depth that perfumes every bite.
- Rice vinegar – a bright splash to sharpen flavors.
- Neutral oil – for hot, even searing without smokiness.
- Scallions & sesame seeds – crunchy, nutty finish.
Balancing Sweetness and Salt
The sauce tightens as it bubbles, concentrating both sugar and soy. Start with the base ratio, then fine-tune.
Add a teaspoon or two of water if it tastes too intense. Add a pinch more brown sugar if the soy reads sharp.
Using low-sodium soy lets you reduce without oversalting. Mirin adds sweetness plus body; if you reduce the sugar, keep a little mirin for sheen.
Always taste a spoonful over a grain of rice—salt and sweet read truer against starch than by themselves. Adjust in small steps.
Fast, Sticky-Sweet Teriyaki Chicken: The Game Plan
Whisk the sauce first so it’s ready. Dust chicken with cornstarch and seasonings.
Sear in two hot, lightly oiled batches until browned and just cooked through. Return all chicken to the pan, pour in the sauce, and simmer briefly until thick, glossy, and clinging.
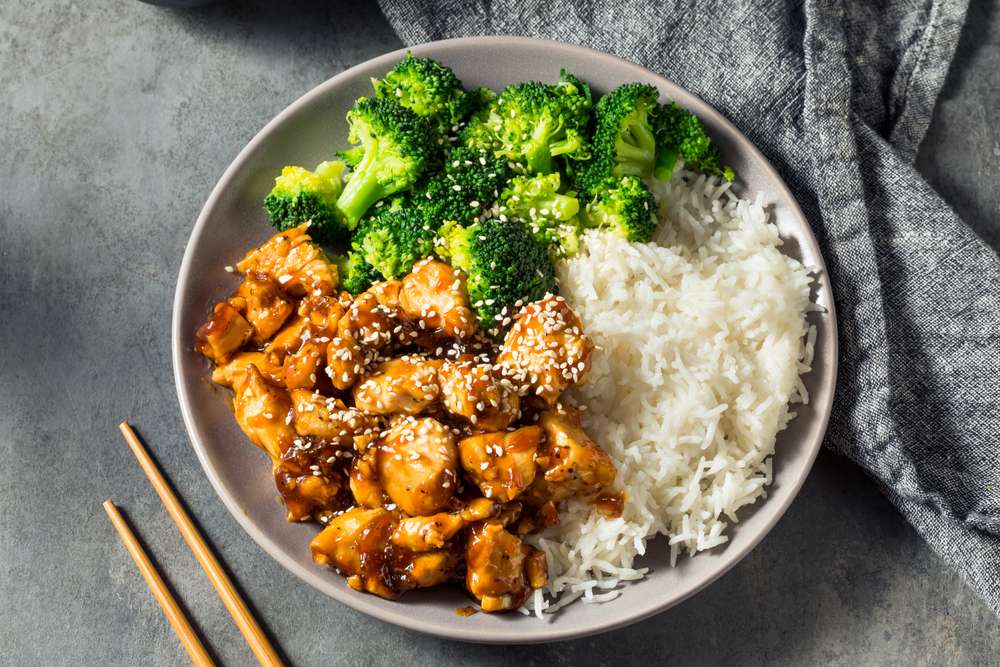
Serve over rice with sesame and scallions—see the recipe card for exact measurements and times. Keep sides simple.
Searing for Juiciness, Not Dryness
High heat and elbow room are the difference between golden edges and steamed chicken. Heat the pan until the oil shimmers.
Cook in two batches, and don’t move the pieces for the first few minutes so they brown. Flip once, then pull the chicken as soon as it hits 165°F; the simmer with sauce will finish the texture.
If fond starts to darken, splash in a tablespoon of water before adding the sauce to dissolve those tasty browned bits without scorching. Keep the pan under control.
Cook’s Notes & Easy Twists
Sauce texture is about timing: pull it when it’s shiny and lazily coats a spoon—the cling will thicken further off heat. Watch closely at the end.
Chicken thighs work beautifully if you prefer richer, juicier bites; just trim well and cook a minute longer. They’re forgiving and great for meal prep.
For a little heat, stir in a pinch of red pepper flakes or a drizzle of chili oil. Add it to taste.
Keep ginger knobs in the freezer and grate from frozen for an easy, thread-free zest that melts into the sauce. It’s mess-free and fast.
Tamari or coconut aminos can stand in for soy; adjust sweetness to taste. Balance is the goal.
Cornstarch Coating for Velvet Texture
A light dusting—just enough to barely coat—creates a delicate crust that grips the glaze. Toss the chicken until no dry pockets remain, then let it sit 5 minutes so the starch hydrates and adheres.
Overcoating leads to gumminess, while overcrowding prevents crisp edges; give each piece contact with the pan. Work in roomy batches.
The remaining cornstarch in the sauce sets that signature glossy finish. Keep both steps—dusting the chicken and thickening the sauce—for best results.
Storing, Freezing, Reheating
Cool leftovers quickly, then refrigerate in a shallow container for up to 4 days. Label for easy grab-and-go meals.
Freeze up to 3 months in an airtight bag or container, pressing out excess air to protect the glaze. Thaw overnight in the refrigerator.
Reheat gently in a skillet with a splash of water to loosen the sauce, or microwave covered until warmed through. Store rice separately so it doesn’t absorb all the sauce.
Make-Ahead Strategy for Busy Nights
Whisk the sauce up to a week ahead and keep it in a sealed jar; shake before using as the cornstarch settles. Prep once, cook twice.
Cube chicken and pat dry, but hold off on dusting with cornstarch until just before cooking so the coating stays light. This keeps the texture crisp.
You can also sear the chicken a day in advance—slightly undercook it—then finish with the sauce at dinnertime for a fresh-tasting glaze without overcooking. It’s a reliable shortcut.
Frequently Asked Questions (FAQ)
Can I use chicken thighs instead of breasts?
Yes—boneless, skinless thighs are excellent. Trim excess fat, cut into 1-inch pieces, and cook a touch longer. Thighs are forgiving and stay juicy, making them great for meal prep.
What can I substitute for mirin?
Use an equal mix of dry sherry (or apple juice) plus a small pinch of sugar. Or add a bit more brown sugar and a splash of extra rice vinegar. Aim for gentle sweetness without turning the sauce syrupy.
How do I scale the recipe for a crowd?
Double everything, but sear in multiple batches to maintain browning. Combine the cooked chicken, add all the sauce at once, and simmer until glossy. Keep warm over low heat; the sauce will hold nicely.
Can I add vegetables?
Absolutely. Stir-fry quick-cooking veggies (broccoli florets, snap peas, bell peppers) separately with a little oil and salt. Toss them in at the end so they stay crisp-tender and don’t water down the glaze.
Teriyaki Chicken
Ingredients
For the Chicken:
- 2 tablespoons plus 1 tablespoon of olive oil divided for sautéing
- A dash of freshly ground black pepper according to taste
- 3 tablespoons of fine cornstarch
- 2 boneless skinless chicken breasts, diced into approximately 1-inch chunks
- ½ teaspoon ground garlic powder
- Optional garnish: finely sliced green onions and a sprinkle of sesame seeds
For the Teriyaki Sauce:
- 3 tablespoons mirin Japanese sweet rice wine; see notes
- 2 cloves of garlic finely minced
- 1 teaspoon grated fresh ginger root
- 1 tablespoon cornstarch to thicken
- 2 tablespoons soy sauce
- 1 teaspoon rice wine vinegar or apple cider vinegar
- ½ cup water
- ¼ cup firmly packed brown sugar
Instructions
- In a small mixing bowl, combine all the ingredients for the sauce. Whisk thoroughly until the mixture is smooth and set aside.
- Place the chicken pieces into a separate bowl. Sprinkle over the garlic powder and a few grinds of black pepper, stirring well to coat the surface. Add the cornstarch and mix again to form an even coating on all the chicken.
- Heat 2 tablespoons of olive oil in a large skillet over medium-high heat. Once hot, add half the chicken pieces, ensuring the pan isn’t overcrowded. Sear for approximately 4 minutes on one side, then turn the pieces and continue cooking for another 3 to 4 minutes until fully cooked through and golden brown. Transfer the first batch to a plate.
- Add the remaining tablespoon of oil to the pan and repeat the cooking process with the second half of the chicken.
- Return the reserved cooked chicken to the skillet. Pour in the prepared sauce and stir gently. Let the sauce come to a rapid simmer for about a minute, stirring frequently, until the glaze has thickened to your liking.
- Serve hot over steamed rice, if desired. Top with chopped scallions and a sprinkling of sesame seeds for an optional finish.
Notes
For ease of preparation, consider keeping fresh ginger in the freezer and using a Microplane or fine grater to zest it directly into your sauce.