
Jalapeño pepper jelly is a sweet-and-spicy homemade preserve with bright pepper flavor, a glossy set, and enough heat to keep every bite interesting. It’s especially useful for entertaining because one jar can quickly turn cream cheese, crackers, sandwiches, and savory appetizers into something special.
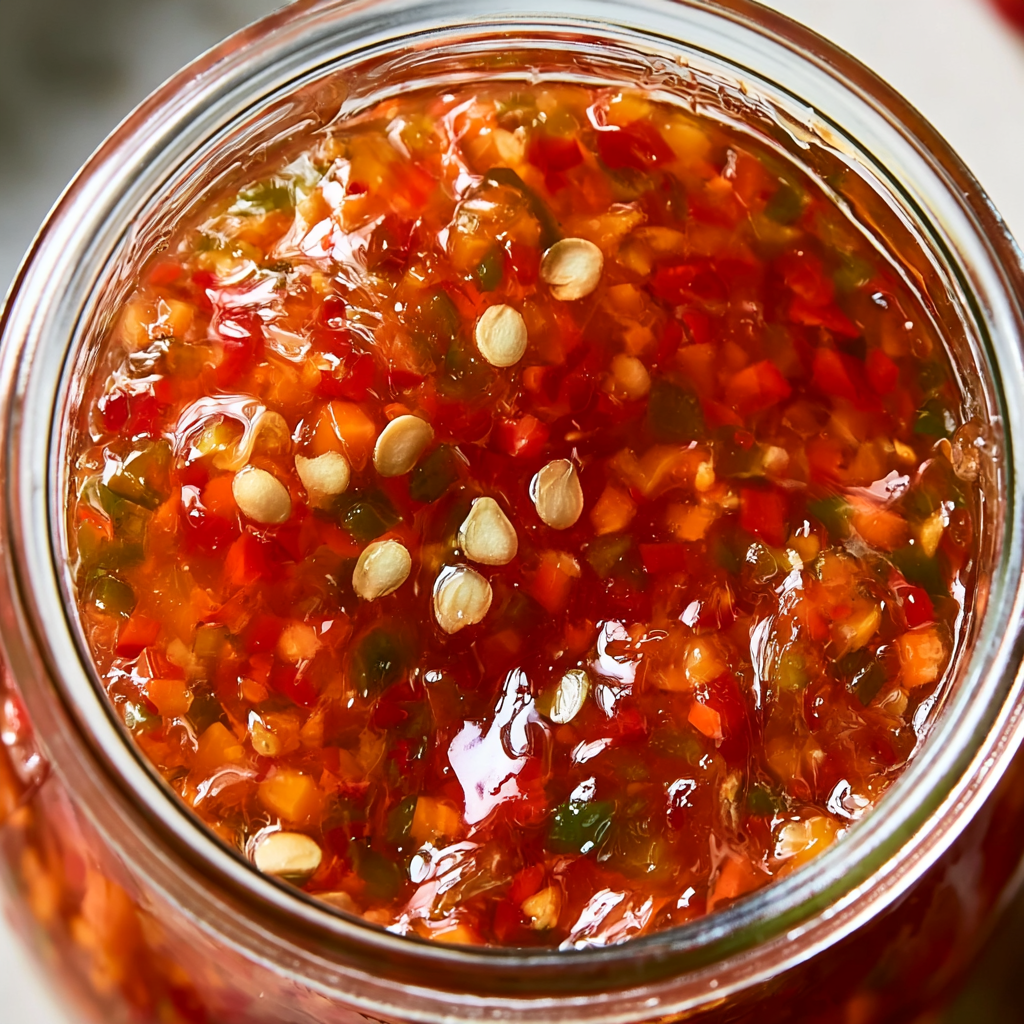
If you enjoy preserves that balance sweetness with a noticeable pepper kick, this one deserves a place in your pantry. Jalapeños provide the heat while red and green bell peppers add color, freshness, and a milder pepper flavor that keeps the jelly balanced rather than overwhelmingly spicy.
The preparation is straightforward, but timing matters. The pepper mixture needs a full boil before the liquid pectin is added, and the jars are then processed in a boiling-water bath. Giving the finished jars plenty of undisturbed cooling time also helps the jelly reach its proper consistency.
Jalapeño Pepper Jelly Ingredients
Jalapeño peppers: Ten jalapeños create the main flavor and heat. Keeping the seeds in five peppers gives the jelly a noticeable spicy edge without using every seed.
Red bell pepper: Adds sweetness, vibrant color, and a fresh pepper flavor that complements the jalapeños.
Green bell pepper: Gives the jelly more pepper character and helps create the colorful flecks throughout each jar.
Granulated sugar: Provides the sweetness that balances the vinegar and chile heat while also contributing to the jelly’s final texture.
Distilled white vinegar: Adds the sharp acidity that gives pepper jelly its characteristic tangy contrast.
Liquid fruit pectin: Helps the cooked mixture develop its soft, spreadable jelly consistency after cooling.
Salt: A small amount sharpens the pepper flavor and balances the sweetness.

Cooking Steps
STEP 1: Begin by washing your canning jars thoroughly with hot, soapy water. Keep the jars warm while you prepare the jelly so hot jelly is not poured into cold glass. Prepare the boiling-water canner with simmering water and have the lids ready according to the type of canning lids you are using.
STEP 2: Prepare the peppers by removing the seeds from five jalapeños while leaving the remaining five seeded. Add all of the jalapeños to a food processor along with the diced red and green bell peppers. Pulse until the peppers are very finely chopped, stopping before they become a smooth puree.
STEP 3: Transfer the chopped peppers to a fine-mesh strainer and let excess liquid drain away. This keeps unnecessary pepper liquid from diluting the mixture and helps you achieve a more dependable finished texture.
STEP 4: Place the drained peppers in a large stockpot. Add the granulated sugar, white vinegar, and salt, stirring until everything is evenly distributed. Bring the mixture to a strong boil over medium-high heat and continue boiling for 10 minutes. Stir periodically, paying particular attention to the bottom of the pot so the sugar does not scorch.
STEP 5: After the initial 10-minute boil, pour in the liquid pectin. Return or maintain the mixture at a full boil and cook for exactly 1 additional minute while stirring continuously. Remove the pot from the heat as soon as that minute is complete. Avoid extending this stage unnecessarily because the pectin’s cooking time affects how the jelly sets.
STEP 6: Carefully ladle the hot mixture into warm jars, leaving approximately 1/4 inch of headspace at the top. Wipe the rims clean so no sticky jelly interferes with sealing. Position the lids and secure the bands until comfortably fingertip-tight rather than forcing them down excessively.
STEP 7: Transfer the filled jars to the prepared boiling-water canner. Make sure the jars are covered with at least 1 to 2 inches of water, bring the water to a full boil, and process for 10 minutes. Adjust the processing time for elevation when necessary.
STEP 8: Carefully remove the jars and place them upright on a towel with a little space between each one. Leave them completely undisturbed for 12 to 24 hours. Once cooled, check the seals before labeling and storing the jars.
How spicy is this pepper jelly?
The heat level is noticeable but balanced by the large amount of sugar and the mild bell peppers. Leaving seeds in half of the jalapeños increases the kick. Individual peppers naturally vary in heat, though, so every batch may taste slightly different.
If you prefer a milder result, removing more jalapeño seeds can reduce some of the heat, although much of a chile’s heat is also concentrated in the pale membranes inside the pepper.
Why didn’t my pepper jelly set immediately?
Freshly processed jelly can remain fairly loose while it is still warm. Give the jars the full 12 to 24 hours of undisturbed cooling recommended in the recipe before deciding whether the consistency is too thin.
The jelly continues settling as it cools, so repeatedly moving or shaking the jars right after processing is unnecessary.
Why do the chopped peppers need to drain?
Peppers can release quite a bit of liquid once finely chopped. Draining that excess moisture helps preserve the intended ratio between the peppers, vinegar, sugar, and pectin.
You do not need to press the peppers completely dry. Simply allow loose liquid to drain naturally before transferring the chopped mixture to the stockpot.
Can I reduce the amount of sugar?
For this particular preparation, it is better not to casually reduce the sugar. The sugar is doing more than sweetening the jelly; it also works with the liquid pectin and other ingredients to create the intended consistency.
If you specifically want a lower-sugar pepper jelly, use a tested formulation designed for that type of pectin and sugar level rather than changing the proportions of this batch.
How do I know whether a jar sealed?
After the jars have cooled completely, inspect each lid before pantry storage. A properly sealed lid should remain firmly in place and should not flex up and down when pressed in the center.
Any jar that has not sealed correctly should not be treated as shelf-stable. Refrigerate it instead and use it as a refrigerated condiment.

What to Serve with Pepper Jelly
One of the simplest serving ideas is spooning the jelly over a block of cream cheese and pairing it with crisp crackers. The cool, creamy cheese softens the chile heat while still letting the sweet pepper flavor stand out.
It also works well alongside baked Brie or another mild, creamy cheese. Add crackers, toasted bread, or crostini and you have an appetizer that requires very little preparation once a jar is open.
For savory meals, try a small amount with grilled or roasted meats, or use it as a sweet-spicy sandwich spread. Because the jelly is both sugary and tangy, a little usually goes a long way.
Helpful Tips
- Wear gloves while preparing the jalapeños if your skin is sensitive to chile oils, and avoid touching your eyes or face during preparation.
- Pulse the peppers only until finely minced. Turning them into a completely smooth puree changes the texture and eliminates the colorful pepper pieces that make the finished jelly distinctive.
- Have your jars, canner, utensils, and pectin ready before you begin boiling the pepper mixture. Once the cooking starts, the timing moves quickly.
Keeping Leftovers Fresh
Properly processed and fully sealed jars should be stored in a cool, dry, dark location after they have cooled and the seals have been checked. Labeling each jar with the preparation date makes it much easier to rotate your homemade preserves.
If a jar fails to seal after processing, move it to the refrigerator rather than storing it in the pantry. Opened jars should also be refrigerated and handled with a clean spoon each time you serve the jelly.
Freezing is generally unnecessary for jars that have been successfully processed and sealed. If you choose to freeze refrigerated jelly, transfer it to a freezer-safe container with room for expansion rather than freezing it in a tightly filled canning jar.
There is no need to reheat the jelly before serving. In most cases, it can be spooned directly from the refrigerator, although allowing it to stand briefly at room temperature can make the texture easier to spread.
For elevations above 1,000 feet, remember to increase the water-bath processing time by 1 minute for each additional 1,000 feet of elevation, following the directions provided with this recipe. Once processing is complete, resist the temptation to move the jars repeatedly. Leaving them undisturbed for up to 24 hours gives the jelly time to finish setting and makes checking the final seal much easier.
Jalapeño Pepper Jelly
Ingredients
- 1 pouch 3 ounces liquid fruit pectin
- 1 green bell pepper cut into small dice
- 1/2 teaspoon salt
- 10 jalapeño peppers with the seeds removed from 5 of them
- 1 1/2 cups distilled white vinegar
- 1 red bell pepper finely diced
- 5 1/2 cups white granulated sugar
Instructions
- Wash the canning jars thoroughly in hot, soapy water, then keep them warm while the jelly is being prepared. Place the lids in a small saucepan and maintain them at a gentle simmer. Fill a boiling-water canner or large pot approximately halfway with water and bring it to a simmer.
- Place the jalapeños, including five with their seeds intact and five with the seeds removed, in a food processor with the diced red and green bell peppers. Pulse until the peppers are finely minced without turning them into a puree. Transfer the mixture to a fine-mesh strainer and allow any excess liquid to drain away.
- Add the drained peppers to a large stockpot. Stir in the granulated sugar, distilled white vinegar, and salt until evenly combined. Bring the mixture to a boil over medium-high heat. Boil for 10 minutes, stirring periodically to help prevent the sugar from scorching.
- Once the pepper mixture has boiled for 10 minutes, pour in the liquid fruit pectin. Maintain a full boil for exactly 1 additional minute while stirring continuously. Remove the stockpot from the heat immediately afterward.
- Carefully ladle the hot pepper jelly into warm, sterile jars, allowing approximately 1/4 inch of headspace. Wipe each jar rim with a damp paper towel so the sealing surface is clean. Position the lids on the jars and screw on the bands until resistance is felt, then tighten them approximately another quarter turn without overtightening.
- Carefully lower the jars onto the rack of the simmering water-bath canner. Add additional hot water when necessary so the jars are covered by at least 1 to 2 inches of water. Bring the water to a full boil and process the jars for 10 minutes.
- Remove the processed jars carefully and arrange them on a kitchen towel with approximately 1 inch of space between each jar. Leave them undisturbed for 12 to 24 hours while they cool and seal. Properly sealed jars may be stored on the shelf, while any jars that fail to seal should be refrigerated.